
Table of Contents
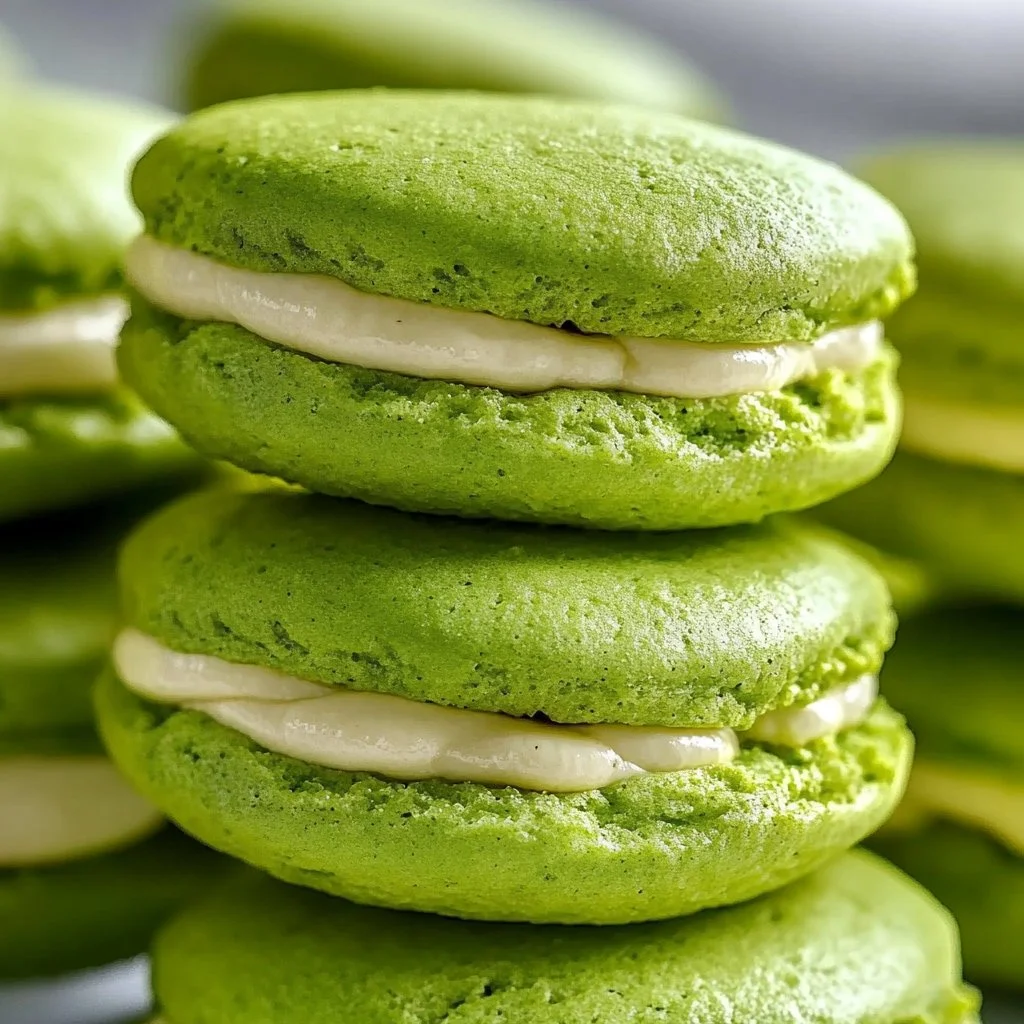
Who doesn’t love a delightful dessert that brings smiles and a touch of whimsy to any occasion? Green Whoopie Pies are not just desserts; they are little bites of joy and nostalgia. Imagine soft, cake-like cookies, vibrant in color, filled with a sweet, creamy filling. These treats are perfect for celebrations, family gatherings, or just as a treat on a cozy afternoon. Have you ever wondered how something so festive could be so easy to make? This recipe is special because it combines simple ingredients with a sprinkle of creativity, making them a fantastic baking project for anyone, whether you’re a novice or a seasoned baker.
Why should you consider whipping up a batch of Green Whoopie Pies? They’re not only visually appealing but also incredibly delicious. Their unique color brings a festive vibe to any gathering. Who can resist the allure of a delicious cookie sandwich that’s both fun to look at and taste? The beauty of this recipe lies in its flexibility and the joy it brings. You can customize the flavor and color to any occasion.
Baking Green Whoopie Pies is an easy task that involves minimal fuss, suitable for baking with kids, or even as a solo venture. Think of the wonderful aroma wafting through your kitchen, the joy of making something from scratch, and the excitement of sharing them with loved ones. Whether it’s a birthday party, St. Patrick’s Day, or simply a way to brighten someone’s day, this recipe is a splendid choice.
Key Benefits of Green Whoopie Pies
Green Whoopie Pies offer plenty of reasons to love them. They are a treat that satisfies both taste and imagination. Here are a few benefits:
- Flavorful Delight: The combination of cocoa powder and sweet filling hits all the right notes.
- Easy to Make: With straightforward steps, even beginners can enjoy baking.
- Visually Fun: Their vibrant green color makes them stand out at any gathering.
- Versatile Treat: You can customize the flavors and colors for different occasions.
- Family Appeal: Everyone from kids to adults loves whoopie pies!
- Perfect for Sharing: These delightful cookies are made to be enjoyed with friends and family.
What Makes It Stand Out
What sets Green Whoopie Pies apart from other desserts is their originality. They’re a fun twist on the traditional whoopie pie, making them a conversation starter at any event. The vivid green color instantly draws attention and sets a festive mood.
Customization is another highlight of this recipe. You can adjust the color or even the flavor of the filling. This flexibility allows you to celebrate Halloween with orange-colored pies or Christmas with red. The unique dessert appeals to all ages, making it perfect for birthday parties, holiday gatherings, or just a fun family bake day.
Ingredients for Green Whoopie Pies
To make your delightful Green Whoopie Pies, you will need the following ingredients:
- 2 cups all-purpose flour: The base for your cookies, providing structure.
- 1/2 cup unsweetened cocoa powder: For a rich chocolate flavor.
- 1 teaspoon baking soda: To help the cookies rise.
- 1/2 teaspoon salt: Enhances the flavors.
- 1/2 cup unsalted butter, softened: Gives the cookies a rich, tender texture.
- 1 cup granulated sugar: Adds sweetness and moisture.
- 1 cup packed brown sugar: For a deeper flavor and softness.
- 2 large eggs: Binds the ingredients together.
- 1 teaspoon vanilla extract: Adds a warm, inviting flavor.
- 1 cup buttermilk: Provides moisture and a slight tang.
- Green food coloring: To achieve the vibrant color.
- 1 cup powdered sugar: For the sweet filling.
- 1/2 cup unsalted butter, softened (for filling): Adds richness to the filling.
- 1 teaspoon vanilla extract (for filling): For enhanced flavor.
- Milk (as needed for filling): Adjusts the filling’s consistency.
Substitutes and Alternatives
If you have dietary restrictions or simply want to swap some ingredients, there are numerous options. For the all-purpose flour, consider using gluten-free flour for a gluten-free version. Just ensure it has xanthan gum included or add it separately to help with structure.
For those avoiding dairy, you can replace the buttermilk with almond milk or oat milk with a splash of vinegar for the tanginess. The filling can also be made with dairy-free butter and powdered sugar for a delightful dairy-free alternative. If you prefer to avoid eggs, a flax egg (1 tablespoon ground flaxseed mixed with 2.5 tablespoons water) can work beautifully in this recipe.
How to Make Green Whoopie Pies – Step-by-Step Directions
Step 1 – Prepare Ingredients
Gather all your ingredients together, ensuring everything is at room temperature where required. Preheating your oven to 350°F (175°C) will ensure your cookies bake evenly and thoroughly. Line your baking sheets with parchment paper to prevent sticking.
Step 2 – Cook the Base
In a large bowl, whisk together the flour, cocoa powder, baking soda, and salt. This step is crucial as it allows for even distribution of the dry ingredients, ensuring consistent texture in your cookies.
Step 3 – Cream Butter and Sugars
In another bowl, cream together the softened butter, granulated sugar, and brown sugar using a mixer until the mixture is light and fluffy. This process introduces air into the mixture, creating a perfect texture.
Step 4 – Incorporate Eggs and Vanilla
Add the eggs one at a time, mixing well after each addition. Stir in the vanilla extract to enhance the flavors of your base. You want a smooth, creamy mixture.
Step 5 – Combine Wet and Dry Mixtures
Gradually add the dry ingredients into the wet mixture, alternating with the buttermilk. Mix until just combined to avoid over-mixing, which can lead to tough cookies.
Step 6 – Add Green Food Coloring
Now comes the fun part! Add green food coloring to the batter. Stir until you achieve your desired shade, ensuring the color is evenly distributed throughout the mixture.
Step 7 – Portion the Batter
Using a tablespoon, drop rounded amounts of batter onto the prepared baking sheets, spacing them about 2 inches apart to allow for spreading during baking.
Step 8 – Bake the Cookies
Bake your cookies in the preheated oven for 10-12 minutes, or until the edges feel firm. They should look slightly puffed in the center. Allow them to cool on the baking sheets for a few minutes before transferring them to wire racks to cool completely.
Step 9 – Prepare the Filling
While your cookies are cooling, prepare the filling. In a clean bowl, beat together the softened butter, powdered sugar, vanilla extract, and milk until creamy. Adjust the milk based on the consistency you want for the filling.
Step 10 – Assemble the Whoopie Pies
To assemble, spread the filling generously on the flat side of one cookie, then sandwich it with another cookie. Press gently to combine, and repeat until all cookies are filled.
Serving Suggestions for Green Whoopie Pies
Best Occasions to Serve This Dish
Green Whoopie Pies are splendid for any occasion. They perfect for birthday parties, especially for children, because of their playful color. These treats can also brighten up holiday celebrations, serving as a festive dessert for St. Patrick’s Day or Halloween.
Family gatherings where you want to make a lasting impression will also benefit from these vibrant treats. Their cheerful appearance adds to the joy of any family celebration.
What to Serve With It
- Milk or Chocolate Milk: Classic pairings that never go out of style.
- Coffee or Tea: A delightful accompaniment for adults enjoying a sweet treat.
- Ice Cream: Sandwich them with a scoop of vanilla or mint chocolate chip for a fun twist.
- Fruit Salad: Balance the sweetness of the pies with fresh fruit for a refreshing contrast.
How to Store Green Whoopie Pies Properly
Best Storage Practices
To keep your Green Whoopie Pies fresh, store them in an airtight container. They can be kept at room temperature for about 3 days. However, if you want to extend their shelf life, refrigeration is a good option.
For longer storage, these treats can be frozen. Wrap each whoopie pie individually in plastic wrap and place them in a freezer-safe bag or container. They can last up to three months in the freezer.
Reheating and Freezing Tips
When ready to enjoy frozen Green Whoopie Pies, remove them from the freezer and let them defrost in the refrigerator overnight. If you’re in a hurry, you can leave them at room temperature for a couple of hours.
If you prefer a warm pie, simply microwave them for about 10 seconds to bring back that delightful soft texture.
Tips & Tricks for Green Whoopie Pies
Mistakes to Avoid
- Overmixing the Batter: This can lead to tough cookies rather than soft ones.
- Underbaking: Make sure the edges are firm; otherwise, your cookies may be raw in the center.
- Skipping Room Temperature Ingredients: Using cold ingredients can affect the texture.
- Not Measuring Ingredients Accurately: Improper measurements can lead to a failed batch.
- Neglecting to Prepare Baking Sheets: Always line them to prevent sticking.
Extra Tips for Better Results
- Experiment with Flavors: Add peppermint extract or almond extract to the filling for unique tastes.
- Level Up the Filling: Mix in mini chocolate chips or sprinkles for added texture.
- Perfect the Presentation: Dust with additional powdered sugar before serving for a polished look.
Recipe Variations of Green Whoopie Pies
Creative Twists
- Orange Whoopie Pies: Simply swap the green food coloring for orange and use an orange-flavored filling for a Halloween theme!
- Chocolate Chip Whoopie Pies: Add chocolate chips to the batter for a double chocolate experience that chocolate lovers will adore.
- Lemon Zest Addition: Incorporate lemon zest into the filling for a citrusy twist that brightens every bite.
- Nutty Version: Fold in chopped nuts like walnuts or pecans into the batter for added crunch.
Dietary Adjustments
For a vegan version, use plant-based butter and substitute eggs with flax eggs. You can also replace buttermilk with soy milk mixed with vinegar. Gluten-free flour can replace all-purpose flour easily. Adjust sugar levels if necessary, using alternatives like agave syrup or coconut sugar.
Conclusion about Green Whoopie Pies
In summary, Green Whoopie Pies are not just a dessert; they are a delightful experience. Their flavor, texture, and vibrant appearance make them perfect for any occasion, be it a party or a cozy night in. This recipe is simple enough for anyone to try yet impressive enough to win over every guest.
If you are looking for a fun baking project that yields amazing results, then Green Whoopie Pies are the way to go. With the ability to customize and adapt them for different tastes and dietary needs, they truly are a recipe you can enjoy time and again. So why not gather your ingredients and start baking today? Your taste buds will thank you!
FAQs about Green Whoopie Pies
Can I prepare it ahead of time?
Absolutely! You can bake the cookies and store them in an airtight container for up to three days before adding the filling.
Can I freeze it?
Yes, you can freeze the assembled pies or just the cookies themselves. Wrap them individually and they will last for up to three months.
How long does it last?
At room temperature, they last about 3 days. In the refrigerator, they can last up to a week.
What are the best substitutions?
Gluten-free flour can work, and you can substitute dairy ingredients with plant-based alternatives to accommodate specific dietary needs.
Is this recipe family-friendly?
Definitely! Kids love the bright color and fun texture, making it a great baking activity together.
Can I change the color?
Yes! You can use any color food coloring to match the occasion. Think red for Christmas or orange for Halloween.
Is it hard to make?
No, it’s quite simple! Follow the steps, and you’ll have delicious whoopie pies in no time.
Can I add fillings?
Of course! You can customize the filling with chocolate chips, different extracts, or even fruit jams.
What if I don’t have buttermilk?
You can easily make your own buttermilk by mixing a cup of milk with a tablespoon of vinegar or lemon juice.
Can I serve it warm?
Yes! They can be enjoyed warm, especially the cookies, for a gooey, delightful treat.

Green Whoopie Pies
Equipment
- Electric Mixer
- piping bag or resealable plastic bag
- Baking Sheets
- Parchment Paper
Ingredients
- 1 roll (16.5 oz) refrigerated sugar cookie dough let stand 10 min to soften
- 2 eggs eggs
- ½ cup plus 1 tablespoon all-purpose flour
- ½ teaspoon green gel food coloring
- 1 cup cream cheese ready-to-spread frosting (from a 16-oz container)
Instructions
- Heat oven to 350 °F (176 °C). Line 2 large cookie sheets with parchment paper. Let cookie dough sit 10 minutes to soften.
- In a large bowl, break up the cookie dough. Add eggs, flour, and green food coloring. Beat with electric mixer on medium speed about 30 seconds until well blended (do not eat raw dough after adding flour/eggs).
- Transfer mixture into a piping bag fitted with a round tip (or into a resealable plastic bag and cut off one corner). Pipe batter into circles about 1¼ inch diameter, spacing about 1 inch apart on cookie sheets.
- Bake for 8–10 minutes, or until cookies are set and spring back when touched. Remove from oven and cool on sheets for 2 minutes, then transfer to cooling racks until completely cool (about 30 minutes).
- To assemble, pipe frosting between two cooled cookies to form whoopie pies.