
Table of Contents
Introduction about Apple Crisp Recipe
Have you ever bitten into a warm, gooey Apple Crisp, the sweet and tart flavors dancing on your palate while its buttery, crumbly topping melts in your mouth? If not, you’re in for a treat! Apple Crisp Recipe is not just another dessert; it’s a cozy hug served in a dish that brings nostalgia and comfort. Do you ever crave something sweet but don’t want to spend hours in the kitchen? This Apple Crisp recipe is the answer you’ve been looking for!
With just a handful of simple ingredients and easy-to-follow steps, you can whip up this delightful dessert in no time. The charm of Apple Crisp Recipe is that it appeals to everyone—from kids to grandmas, making it a perfect family-friendly choice. Plus, it’s so versatile! Whether you’re celebrating the harvest season or just enjoying a casual weeknight dinner, Apple Crisp can fit any occasion beautifully.
So grab your apron, and let’s dive into the wonderful world of Apple Crisp. You’ll soon discover why it’s become a beloved classic in many households.
Key Benefits of Apple Crisp Recipe
Why You’ll Love This Recipe
Apple Crisp Recipe isn’t just a delicious treat; it also comes with several benefits that make it a go-to dessert choice. Here are five reasons why you’ll love this recipe:
- Deliciously Irresistible: The combination of sweet apples, warm cinnamon, and a buttery crumb topping is simply delicious and comforting.
- Quick and Easy: This recipe is straightforward and can be made in less than an hour, perfect for busy schedules.
- Hands-On with Kids: It’s a great recipe to involve children in cooking, making it a fun family activity.
- Customization Friendly: You can easily adapt the recipe to fit your taste preferences or dietary needs.
- Perfect for Any Occasion: Whether it’s a holiday feast or a simple weeknight meal, Apple Crisp fits right in.
What Makes it Stand Out
Apple Crisp has a unique charm that sets it apart from other desserts. For one, it celebrates the wonderful flavor of seasonal apples. You can use a variety of apples—like Granny Smith for tartness or Honeycrisp for sweetness—allowing for a customized taste experience. It’s also incredibly adaptable; you can throw in nuts, raisins, or even a splash of caramel if you’re feeling adventurous!
Moreover, Apple Crisp is the dessert that brings people together. A warm baking dish, fresh from the oven, is an invitation to gather ‘round the table and share stories. With its simplicity and versatility, Apple Crisp stands out as a dish that feels like home, no matter where you are.
Ingredients for Apple Crisp Recipe
Complete Ingredient List with Measurements
To make a delightful Apple Crisp, gather these simple ingredients:
- 6 cups sliced apples (preferred: Granny Smith or Honeycrisp)
- 1 cup granulated sugar
- 1 teaspoon cinnamon
- 1 cup rolled oats
- 1 cup all-purpose flour
- 1/2 cup brown sugar
- 1/2 cup butter, melted
Substitutes and Alternatives
If you have dietary restrictions or preferences, consider these alternatives:
- Gluten-Free: Substitute regular flour with a 1:1 gluten-free flour blend.
- Lower Sugar: Replace granulated and brown sugars with a sugar substitute like stevia or monk fruit.
- Butter Alternatives: Use coconut oil or vegan butter for a dairy-free version.
- Add-Ins: Experiment with nuts, dried cranberries, or even a sprinkle of nutmeg for added flavor.
How to Make Apple Crisp Recipe – Step-by-Step Directions
Follow these easy steps to create your delicious Apple Crisp Recipe!
Step 1 – Prep Your Workspace and Ingredients
Start by gathering all your ingredients and equipment. You’ll need a large bowl for mixing and a greased baking dish for the crisp. Preheat your oven to 350°F (175°C) to save time later!
Step 2 – Prepare the Apples
Wash, peel, and slice your apples. Aim for 1/4-inch slices to ensure even cooking. In your large bowl, combine the sliced apples with granulated sugar and cinnamon. Toss them well to coat evenly.
Step 3 – Place the Filling in the Baking Dish
Transfer the apple mixture into your greased baking dish, spreading it out evenly. This layer will form the base of your Apple Crisp.
Step 4 – Prepare the Crumb Topping
In another bowl, combine rolled oats, all-purpose flour, brown sugar, and melted butter. Stir with a fork until the mixture resembles coarse crumbs. This crumbly topping is what makes Apple Crisp so delectable!
Step 5 – Assemble the Crisp
Evenly spread the crumb topping over the apple layer in the baking dish. Be sure to cover all the apples, so they are well-protected under the delicious crust.
Step 6 – Bake
Carefully place the baking dish in the preheated oven. Bake for about 45 minutes, or until the topping is golden brown and the apples are tender when pierced with a fork.
Step 7 – Cool and Serve
Once baked, remove the Apple Crisp from the oven and allow it to cool for a few minutes. This will help the juices set and make it easier to serve.
Step 8 – Enjoy with Toppings
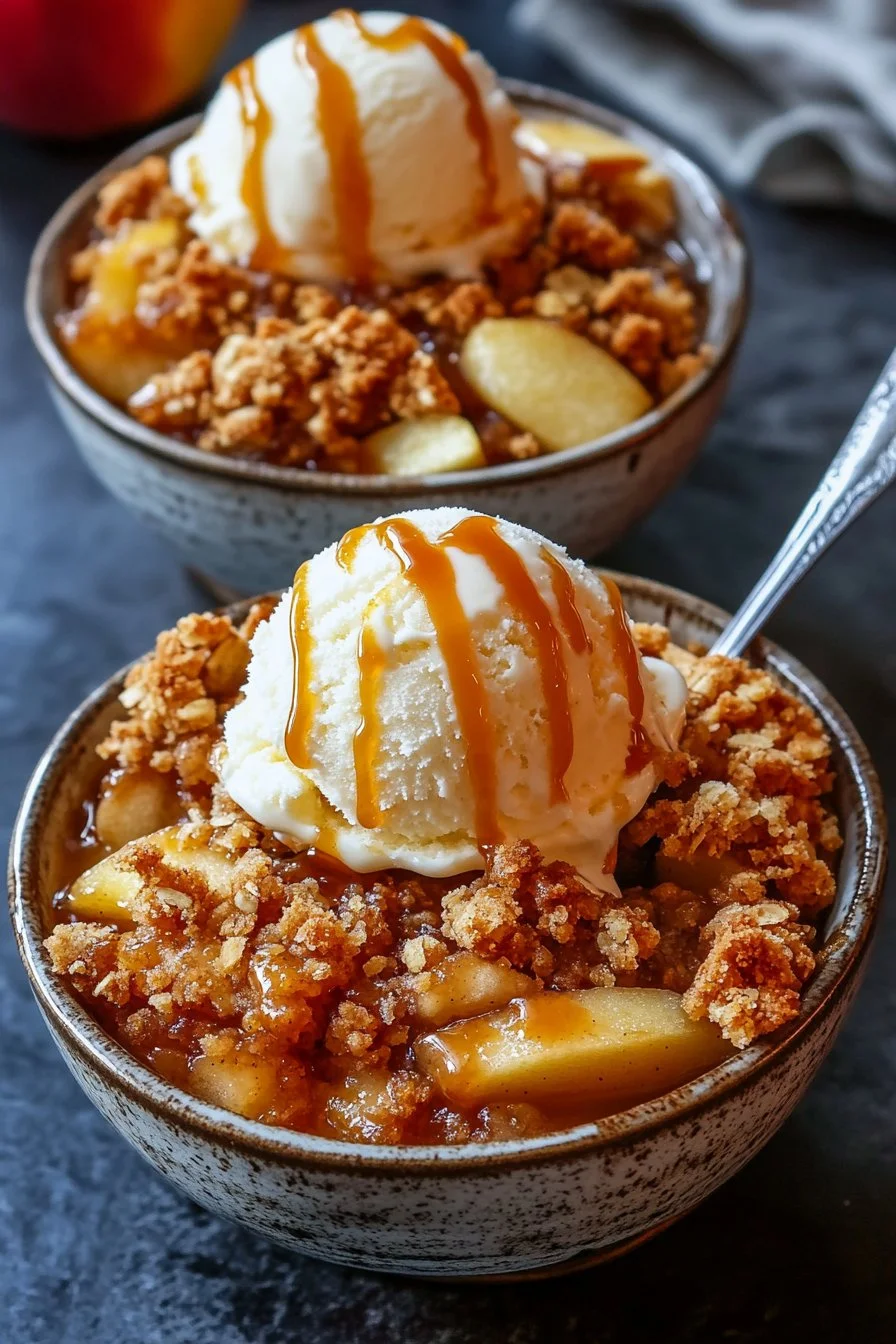
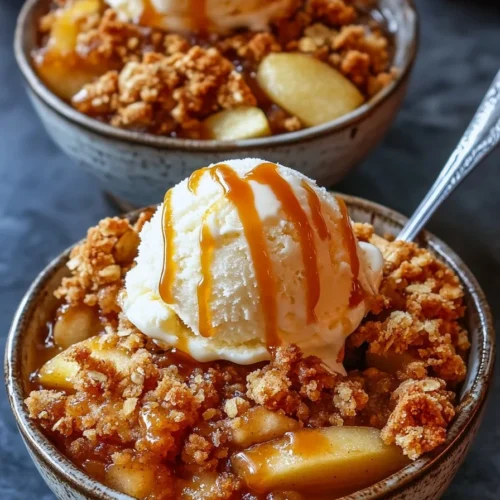
Serve your warm Apple Crisp plain, or add a scoop of vanilla ice cream or a dollop of whipped cream on top for a classic touch.
Serving Suggestions for Apple Crisp Recipe
Best Occasions to Serve This Dish
Apple Crisp is fabulously versatile! Here are some occasions where it shines:
- Everyday Dessert: Ideal for a cozy family dinner.
- Holiday Feasts: A warm, homestyle dessert for Thanksgiving or Christmas celebrations.
- Potluck Dishes: Easy to share and transport, making it perfect for gatherings.
- Comfort Food: A go-to dessert for chilly nights when you want something warm and heartening.
What to Serve with It
Enhance your Apple Crisp experience with these delightful pairings:
Beverages:
- Warm cider
- Hot tea
- Coffee
Toppings:
- Vanilla ice cream
- Whipped cream
- Caramel drizzle
Sides:
- A simple green salad
- Cheese platter with sharp cheddar
Storing Apple Crisp Recipe Properl
Best Storage Practices
To keep your Apple Crisp fresh:
- In the Fridge: Cover and store in the refrigerator for up to 3-4 days. This helps maintain its texture.
- In the Freezer: It can be frozen for up to 3 months. Wrap it tightly in plastic wrap and foil to prevent freezer burn.
Reheating and Freezing Tips
- Reheating: Preheat your oven to 350°F (175°C). Reheat covered for 10-15 minutes, or until warmed through. Avoid reheating in the microwave, as it can make the topping soggy.
- Thawing: If frozen, transfer to the fridge the night before you plan to bake it.
Tips & Tricks for Apple Crisp Recipe
Mistakes to Avoid
Here are some common pitfalls and how to avoid them:
- Overcooking the Apples: Keep an eye on your baking time! You want tender apples that still hold their shape.
- Soggy Topping: If you add too many wet ingredients like fruit juice or extra melted butter, it can cause a soggier topping. Stick to the measurements!
Extra Tips for Better Results
- Mix Different Apples: Combine several types of apples for varied flavors and textures.
- Use a Mandoline: For even apple slices, a mandoline can be a game-changer in consistency.
- Double the Recipe: If you’re expecting a crowd, double the recipe and use a larger baking dish.
Recipe Variations of Apple Crisp Recipe
Creative Twists
Don’t hesitate to experiment with your Apple Crisp Recipe! Here are some ideas:
- Nuts: Add chopped walnuts or pecans for extra crunch.
- Seasoning: Incorporate spices like nutmeg or allspice for a warm autumn flavor.
- Fruit Combinations: Mix in berries or pears for a seasonal twist.
Dietary Adjustments
Make your Apple Crisp friendly for various dietary needs:
- Vegan: Use flaxseed meal and water as a butter substitute in the topping or use coconut oil.
- Sugar-Free: Replace sugars with natural sweeteners like erythritol.
Conclusion about Apple Crisp Recipe
In conclusion, Apple Crisp Recipe is not just a dessert; it’s an experience that brings warmth, joy, and comfort to any occasion. With its delightful blend of sweet apples and crunchy topping, it draws families together and creates lasting memories. This recipe is easy to make, customizable to your needs, and utterly delicious!
I encourage you to try this Apple Crisp recipe and share it with loved ones. Whether it’s for a quiet evening or a festive celebration, this dish truly offers something special. Don’t forget to share your feedback—I’d love to hear how it turned out for you!
FAQs about Apple Crisp Recipe
What if it doesn’t turn out right?
If your Apple Crisp isn’t quite what you hoped for, don’t worry! It’s still edible deliciousness. Adjusting baking time can help, and maybe next time, try different apples or check your ingredient measurements.
Can I prepare it ahead of time?
Absolutely! You can prep the apple filling and topping separately and assemble them right before baking. This way, you can enjoy a fresh-baked crisp even after a busy day.
What are the best ingredient substitutions?
For a gluten-free version, use a gluten-free flour blend. For a vegan option, choose plant-based butter or a blend of coconut oil and applesauce in place of regular butter.
How long can it be stored?
You can store Apple Crisp Recipe in the fridge for about 3-4 days. If you want to keep it longer, freeze it for up to 3 months.
Can I use store-bought dough or crust?
While it’s best to use the homemade topping in this recipe, you could definitely experiment with a store-bought pie crust if you’re looking for a more traditional feel.
Is this recipe kid-friendly or family-appropriate?
Yes! Apple Crisp is a fantastic family-friendly dessert that has simple flavors and textures, making it ideal for kids of all ages.
Can I make this recipe allergen-free?
Certainly! You can easily modify this recipe for various allergies. Use gluten-free flour, nut-free ingredients, and dairy-free butter to create a delicious allergen-friendly version of Apple Crisp.
Classic Apple Crisp
Equipment
- Mixing Bowls
- 9×13 Baking Dish
- Whisk
- Oven
Ingredients
Apple Filling
- 6 cups apples peeled, cored, and sliced (Granny Smith or Honeycrisp)
- ½ cup granulated sugar
- 1 tsp ground cinnamon
- 1 tbsp lemon juice freshly squeezed
Crisp Topping
- 1 cup old-fashioned oats
- ¾ cup all-purpose flour
- ½ cup brown sugar packed
- ½ cup unsalted butter cold, cut into cubes
- ½ tsp salt
Instructions
- Preheat oven to 350°F (175°C). Grease a 9×13 baking dish lightly with butter or nonstick spray.
- In a large bowl, combine sliced apples, sugar, cinnamon, and lemon juice. Toss until evenly coated and transfer to the baking dish.
- In another bowl, mix oats, flour, brown sugar, and salt. Add cold butter and use a pastry cutter or fingers to mix until crumbly.
- Sprinkle the oat mixture evenly over the apples, covering them completely.
- Bake uncovered for 40–45 minutes, until the topping is golden brown and the apples are bubbling.
- Let cool slightly before serving. Best enjoyed warm with vanilla ice cream or whipped cream.