
This post may contain affiliate links. As an Amazon Associate, I earn from qualifying purchases at no extra cost to you.
Table of Contents
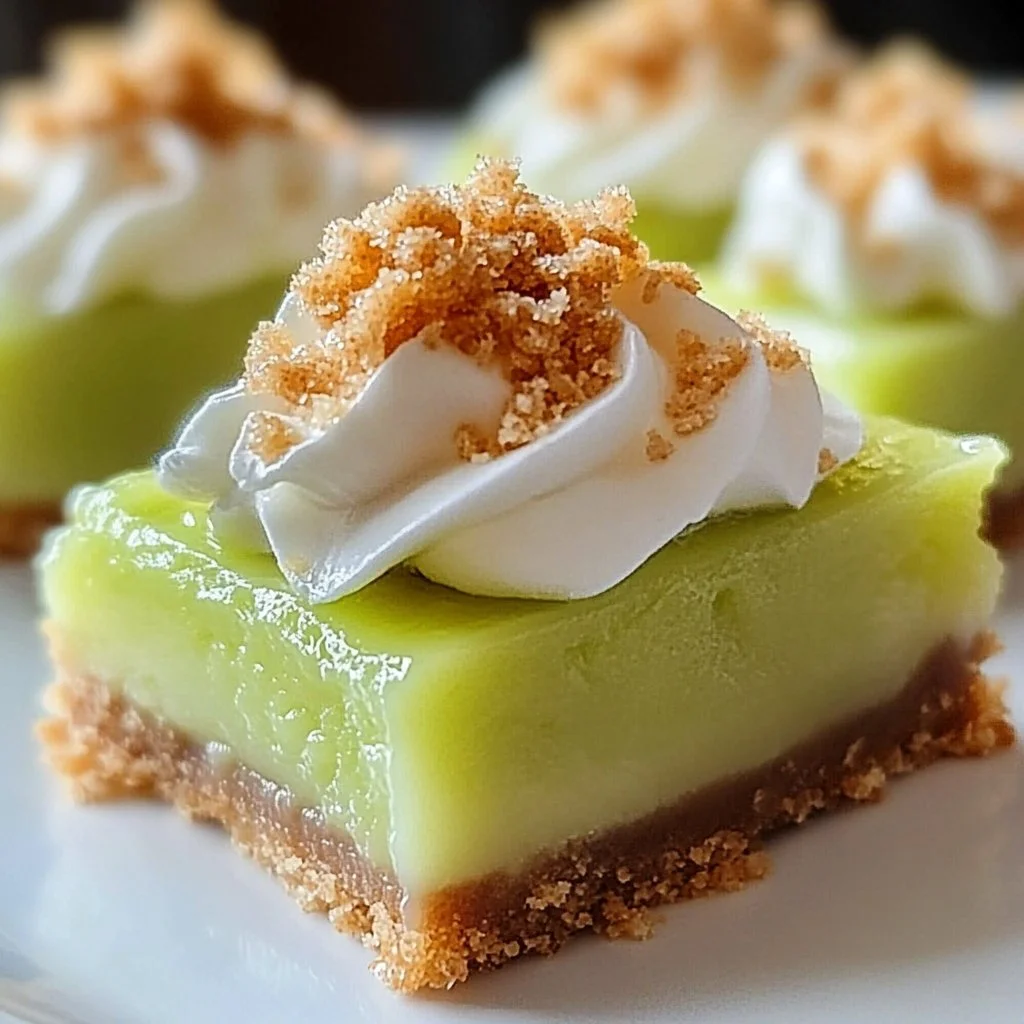
Are you ready to dive into a tropical flavor sensation that embodies the essence of summer? Key Lime Pie Bars are the perfect blend of tartness and sweetness, wrapped in a buttery graham cracker crust. These bars capture the classic taste of key lime pie in a format that’s easy to make and hard to resist. Imagine taking a bite, and being whisked away to a sun-kissed beach, where the cool breeze meets the refreshing zest of lime. Doesn’t that sound delightful?
This recipe for Key Lime Pie Bars is special because it brings all the flavors you love from traditional key lime pie but in a handheld form. It’s suitable for casual gatherings, family reunions, or even quiet evenings at home. Plus, it’s incredibly easy to whip up, making it a great option even for novice bakers. The sweet and tangy lime filling is balanced beautifully by the smooth, creamy texture, combined with the crunchy crust. Who wouldn’t want to indulge in such a delightful treat?
The best part? You can customize these Key Lime Pie Bars to make them uniquely yours. Whether you want to add extra zest, swap in different toppings, or even adapt the recipe to cater to dietary needs, the possibilities are endless. Just think about how wonderful it would be to bring a dessert that appeals not just to your taste buds but to everyone’s at your next gathering. With so many benefits packed into each bite, why wouldn’t you want to discover how easy it is to create this scrumptious dessert?
🍴 Top Kitchen Essentials You'll Love


Key Benefits of Key Lime Pie Bars
Why You’ll Love This Recipe
- Flavorful Delight: The perfect balance of tart lime and sweet cream offers a refreshing experience.
- Simplicity: With just a handful of ingredients, these bars can be made with minimal effort.
- Versatile: Ideal for any occasion, from BBQs to formal dinners, making them a staple in any kitchen.
- Family-Friendly: Kids and adults alike will enjoy the vibrant flavors and fun texture.
- Make Ahead: These bars can be prepared in advance, allowing for easy dessert planning.
What Makes It Stand Out
What differentiates Key Lime Pie Bars from the traditional pie is their versatility and ease of serving. With a sturdy base, they are easy to cut and serve, making them perfect for potlucks, picnics, or even just a family treat. Plus, they bring a unique twist to classic key lime pie, offering a new experience that captivates almost everyone who tries them.
Additionally, the ability to customize these bars further enhances their appeal. You can adjust sweetness levels, infuse them with different flavors, or even decorate the top with fresh fruit. This adaptability makes them a great candidate for any gathering. Whether you’re celebrating a birthday or just want to enjoy a slice of sunshine, Key Lime Pie Bars fit the bill perfectly.
Ingredients for Key Lime Pie Bars
Complete Ingredient List with Measurements
- 1 cup graham cracker crumbs
- 1/4 cup sugar
- 1/2 cup unsalted butter, melted
- 1 can (14 oz) sweetened condensed milk
- 1/2 cup key lime juice (fresh or bottled)
- 3 large egg yolks
- Zest of 1 lime
- Whipped cream (for serving)
Each ingredient plays a crucial role in building the flavor profile of these Key Lime Pie Bars. The buttery crust supports the rich filling, while the lime juice and zest give that iconic tangy taste we crave.
Substitutes and Alternatives
If you’re looking for alternatives due to dietary needs or preferences, there are several options. For example, you can use gluten-free graham crackers instead of traditional ones if you’re catering to a gluten intolerance. Coconut oil can replace unsalted butter for a dairy-free option while maintaining that rich flavor you’d expect. Moreover, if key limes aren’t available, standard limes can do the trick, though they may alter the taste slightly.
How to Make Key Lime Pie Bars – Step-by-Step Directions
Step 1 – Prepare Ingredients
Before you start, gather all your ingredients. Ensure your butter is melted and your limes are juiced and zested for efficiency. Preheating the oven to 350°F (175°C) will prepare your space for baking.
Step 2 – Cook the Base
In a mixing bowl, combine graham cracker crumbs, sugar, and melted butter. Stir until the mixture is evenly moistened. Press this mixture firmly into the bottom of a greased 8×8 inch baking dish. This step helps form a solid crust for your bars.
Step 3 – Create the Filling
In a separate bowl, whisk together the sweetened condensed milk, key lime juice, egg yolks, and lime zest. Mix until smooth and thoroughly combined. This will create the rich and tangy filling that characterizes these Key Lime Pie Bars.
Step 4 – Assemble the Dish
Pour the key lime filling over the prepared crust. Spread it evenly to ensure every bite is delicious. The filling should be smooth and creamy, covering every bit of the crust.
Step 5 – Bake
Place the baking dish in the preheated oven. Bake for 15-20 minutes, or until the center is set but still slightly jiggly. This means your bars will be soft and luscious after cooling.
Step 6 – Cool Down
Once baked, remove the dish from the oven. Allow it to cool at room temperature for about 30 minutes. This cooling step is crucial for the flavors to settle.
Step 7 – Refrigerate
After cooling, place the pan in the refrigerator for at least two hours. Chilling allows the bars to firm up properly, making them easier to cut and serve.
Step 8 – Cut into Bars
Once chilled, use a sharp knife to cut the dessert into squares or rectangles. A clean cut will enhance the presentation, making it more appealing for serving.
Step 9 – Serve
Before serving, top your Key Lime Pie Bars with whipped cream. This adds a delightful creaminess that complements the tartness of the lime.
Step 10 – Enjoy
Serve these bars at your next gathering or keep them for a tasty treat at home. Each bite will be a burst of flavor.
Serving Suggestions for Key Lime Pie Bars
Best Occasions to Serve This Dish
Key Lime Pie Bars are incredibly versatile and can be served on various occasions. They’re perfect for summer parties where refreshing desserts are a hit. Picture a sunny BBQ with friends, or a beach-themed gathering; these bars fit right in.
Another great occasion is family celebrations. Birthdays, anniversaries, or any special milestones are improved with a light dessert option like these bars. They contrast beautifully with richer desserts, providing guests a refreshing alternative.
Lastly, they can serve as a delightful treat for quiet evenings at home. After a long day, indulging in a piece of Key Lime Pie Bars with a cup of tea or coffee makes for a cozy moment.
What to Serve With It
- Fresh berries like strawberries or blueberries for a fruity complement.
- Slices of lime for a zesty garnish.
- Coconut whipped cream to elevate the tropical feel.
- Vanilla ice cream for a deliciously creamy side.
- Tropical drinks like iced tea or lemonade to create a full summer experience.
How to Store Key Lime Pie Bars Properly
Best Storage Practices
To keep your Key Lime Pie Bars fresh, store them in the refrigerator. Use an airtight container to protect them from absorbing odors. Bringing them in contact with foil or plastic wrap can also help maintain their quality.
For longer storage, you can freeze the bars. Just wrap them tightly in plastic wrap, then place them in a freezer-safe container. They will keep well for up to three months in the freezer.
Reheating and Freezing Tips
If you choose to freeze your Key Lime Pie Bars, thaw them in the refrigerator overnight or at room temperature for a couple of hours before serving. Avoid microwaving them, as this can change the texture of the filling.
To refresh the flavors after thawing, consider adding fresh whipped cream or a sprinkle of lime zest before serving. This will bring that fresh taste back to the forefront.
Tips & Tricks for Key Lime Pie Bars
Mistakes to Avoid
- Forgetting to preheat the oven can lead to uneven baking, ruining the texture.
- Overmixing the filling can create a tough texture, so mix just until combined.
- Not letting the bars cool completely before cutting can result in a messy presentation.
- Skipping the chilling step can make the bars too soft, preventing clean cuts.
- Using bottled lime juice instead of fresh can affect the flavor and acidity balance.
Extra Tips for Better Results
- Consider adding extra lime zest to the filling for a more intense flavor.
- Experiment with flavored extracts like coconut or vanilla for a unique twist.
- A sprinkle of sea salt on top can enhance the sweetness and flavor complexity.
- Serve the bars with additional toppings, like toasted coconut flakes for texture.
- Use a sharp knife dipped in warm water for cutting clean edges on the bars.
Recipe Variations of Key Lime Pie Bars
Creative Twists
- Coconut Key Lime Bars: Substitute half of the graham cracker crumbs with shredded coconut for a tropical twist.
- Chocolate Key Lime Bars: Drizzle melted chocolate over the chilled bars before serving for a rich contrast.
- Berry-Lime Bars: Add a layer of raspberry or blueberry puree to the bottom of the crust for extra flavor and color.
- Mango Key Lime Bars: Mix in some mango puree with the lime filling for an exotic tropical flavor.
Dietary Adjustments
For vegan or dairy-free adaptations, substitute the sweetened condensed milk with coconut cream and use flax eggs or a commercial egg replacer. Ensure your graham crackers are suitable for your dietary needs, as many contain dairy or eggs.
To make it gluten-free, use gluten-free graham crackers and check that all other ingredients comply with gluten-free standards. This ensures everyone can enjoy these delicious Key Lime Pie Bars without worry.
Conclusion about Key Lime Pie Bars
In summary, Key Lime Pie Bars are a delightful dessert that’s not only easy to make but also bursting with flavor. Their perfect balance of sweet and tangy, combined with a buttery crust, makes them an irresistible treat. When you take the time to prepare these bars, you’re not just making a dessert; you’re creating a memorable experience.
Imagine sharing these delicious bars with family and friends, each bite a taste of sunshine. Whether for a special occasion or just a sweet moment at home, Key Lime Pie Bars bring joy and flavor that everyone can appreciate. So why not try this simple yet extraordinary recipe? Your taste buds will thank you, and your loved ones will enjoy every last crumb.
FAQs about Key Lime Pie Bars
Can I prepare it ahead of time?
Absolutely! You can make these Key Lime Pie Bars a day in advance and store them in the refrigerator.
Can I freeze it?
Yes, these bars freeze well. Just wrap them tightly and store them in the freezer for up to three months.
How long does it last?
In the refrigerator, they can last up to a week if stored properly in an airtight container.
What are the best substitutions?
You can use gluten-free graham crackers, coconut oil, or even different citrus juices if necessary.
Is this recipe family-friendly?
Definitely! Kids and adults alike will love the sweet and tangy flavors.
Can I use regular limes instead of key limes?
Yes, regular limes are a great substitute, though the flavor may be slightly different.
How can I make it more tart?
Simply increase the amount of lime juice or zest in the filling to amplify the tartness.
Can I add more texture?
Consider topping with toasted coconut flakes or crushed nuts for added crunch.
What’s the best way to cut the bars?
Using a sharp knife dipped in hot water will help you cut clean lines.
Can I use store-bought whipped cream?
Yes, store-bought whipped cream is a convenient option to top off your bars.

Key Lime Pie Bars
Equipment
- 9-inch square baking pan
- Parchment Paper
- Mixing Bowls
- Electric mixer or whisk
- Cooling rack
Ingredients
Crust
- 12 full-sheet graham crackers to make ~1½ cups crumbs
- ¼ cup granulated sugar
- 6 Tbsp butter melted
Filling
- 4 oz cream cheese full-fat, softened
- 4 egg yolks from 4 large eggs
- 14 oz sweetened condensed milk
- ½ cup key lime juice fresh or bottled
- 2 tsp lime zest


Instructions
- Preheat oven to 350 °F (177 °C). Line a 9-inch square baking pan with parchment, letting it overhang the edges.
- Make the crust: grind graham crackers into fine crumbs, mix with sugar, then stir in melted butter until combined.
- Press the crust mixture firmly into the bottom of the prepared pan. Bake for about 10 minutes, until slightly golden. Remove and let cool a little.
- Make the filling: beat the softened cream cheese until smooth. Add egg yolks one at a time, mixing well between additions.
- Stir in sweetened condensed milk, key lime juice, and lime zest until mixture is smooth and fully combined.
- Pour the filling over the warm crust, spreading gently and evenly.
- Bake for about 18–20 minutes, or until the edges are set but the center still jiggles slightly.
- Remove from oven and let cool at room temperature for ~30 minutes. Then transfer to refrigerator and chill for at least 2–3 hours (or until fully set).
- Use the parchment overhang to lift the bars from the pan. Cut into squares and serve. Optionally garnish with whipped cream and extra lime zest.