
This post may contain affiliate links. As an Amazon Associate, I earn from qualifying purchases at no extra cost to you.
Table of Contents
🍴 Top Kitchen Essentials You'll Love


Introduction to Valentine’s Day Cake Pops
There’s something incredibly special about Valentine’s Day. It’s a time for love, friendship, and, of course, indulging in sweet treats. If you’re looking to make this day extra special, nothing says “I love you” quite like homemade Valentine’s Day Cake Pops. Imagine a delightful cake ball coated in smooth chocolate, served on a lollipop stick. They’re not just visually appealing but also packed with flavor, making them the perfect treats for couples, friends, and family alike.
Every bite of these Valentine’s Day Cake Pops brings together the joy of cake and the fun of handheld desserts. The nice thing about this recipe is that it’s surprisingly easy. You don’t need to be a skilled baker to whip up a batch of these adorable treats. Just a simple box of cake mix and a bit of frosting are the main ingredients. Plus, you can customize them with colors, sprinkles, and other toppers to suit your taste and the theme of your celebration.
What stands out about Valentine’s Day Cake Pops is their versatility. They can be made in any flavor you like, allowing you to experiment with different combinations and toppings. They make terrific gifts, party favors, or treats at any gathering. Looking to add a touch of fun and creativity to your Valentine’s Day? This recipe is essentially your ticket to delight!
Key Benefits of Valentine’s Day Cake Pops
Why You’ll Love This Recipe
- Flavorful: Choose your favorite cake mix and frosting for a personalized taste.
- Simple: Requires minimal ingredients and steps, perfect for beginner bakers.
- Customizable: Add unique decorations like sprinkles or edible glitter.
- Fun to Make: Involve friends or family in rolling the balls and decorating.
- Perfect for Any Occasion: Ideal for Valentine’s Day, birthdays, or any festive gathering.
- Portable Treat: Easy to take with you and share with others.
What Makes It Stand Out
Valentine’s Day Cake Pops are not just your average dessert; they are a conversation piece. Their fun, portable nature makes them a hit at parties, lifting everyone’s spirits. Additionally, they can be tailored to fit any taste, diet, or aesthetic by changing up the flavors and decorations. Plus, they provide an excellent opportunity for creativity, allowing each person to put their own spin on these delightful dessert bites.
Another factor that sets this recipe apart is its ease of execution. Even if you aren’t a baking enthusiast, you can still impress your loved ones with these treats. The mix and roll method is straightforward, ensuring even novice cooks can produce excellent results.
Ingredients for Valentine’s Day Cake Pops
Complete Ingredient List with Measurements
- 1 box cake mix (any flavor)
- 1 cup frosting (matching or contrasting flavor)
- Chocolate coating or candy melts
- Lollipop sticks
- Sprinkles (optional)
Substitutes and Alternatives
If you have dietary restrictions or allergies, don’t worry! You can easily customize this recipe. For a gluten-free option, choose a gluten-free cake mix. Dairy-free frosting and chocolate can also be found in stores. If you prefer to avoid refined sugars, look for sugar-free cake mixes or homemade frosting recipes. This flexibility makes Valentine’s Day Cake Pop an inclusive treat that everyone can enjoy.
How to Make Valentine’s Day Cake Pops – Step-by-Step Directions
Step 1 – Prepare Ingredients
Gather all the ingredients listed above. It’s crucial to have everything at hand so you can follow the steps without interruption. Read through the instructions to familiarize yourself with the process.
Step 2 – Cook the Base
Bake the cake according to the package instructions. Once baked, allow it to cool completely on a wire rack. This step is crucial as it ensures that the cake holds together when crumbled and mixed with frosting.
Step 3 – Crumble the Cake
After the cake has cooled, crumble it into a large bowl using your hands. Aim for fine crumbs and avoid large chunks to ensure smooth mixing with frosting. The texture should resemble sand.
Step 4 – Mix in the Frosting
Add the frosting to the crumbled cake. Mix thoroughly until every crumb is coated with frosting. You want the mixture to be moist but not soggy. It should hold together when you roll it into a ball.
Step 5 – Roll into Balls
Using your hands, scoop out portions of the mixture to roll into small balls. Place each ball on a baking sheet lined with parchment paper. Aim for a consistent size so they all look great together.
Step 6 – Insert Lollipop Sticks
Once you have your cake balls formed, take a lollipop stick and gently insert it into each one. The stick should go about halfway through. This will allow you to easily dip them in chocolate later.
Step 7 – Freeze until Firm
Pop the baking sheet with the cake pops in the freezer for about 1 hour. This step is essential, as it helps the cake pops maintain their shape when you dip them in chocolate.
Step 8 – Melt the Coating
While the cake pops are chilling, melt your chocolate coating or candy melts according to package instructions. Make sure the chocolate is smooth and free of lumps for the best coating.
Step 9 – Dip the Cake Pops
Take each cake pop out of the freezer one at a time, and dip it into the melted chocolate. Swirl it around to ensure even coating, then gently tap to let the excess chocolate drip off.
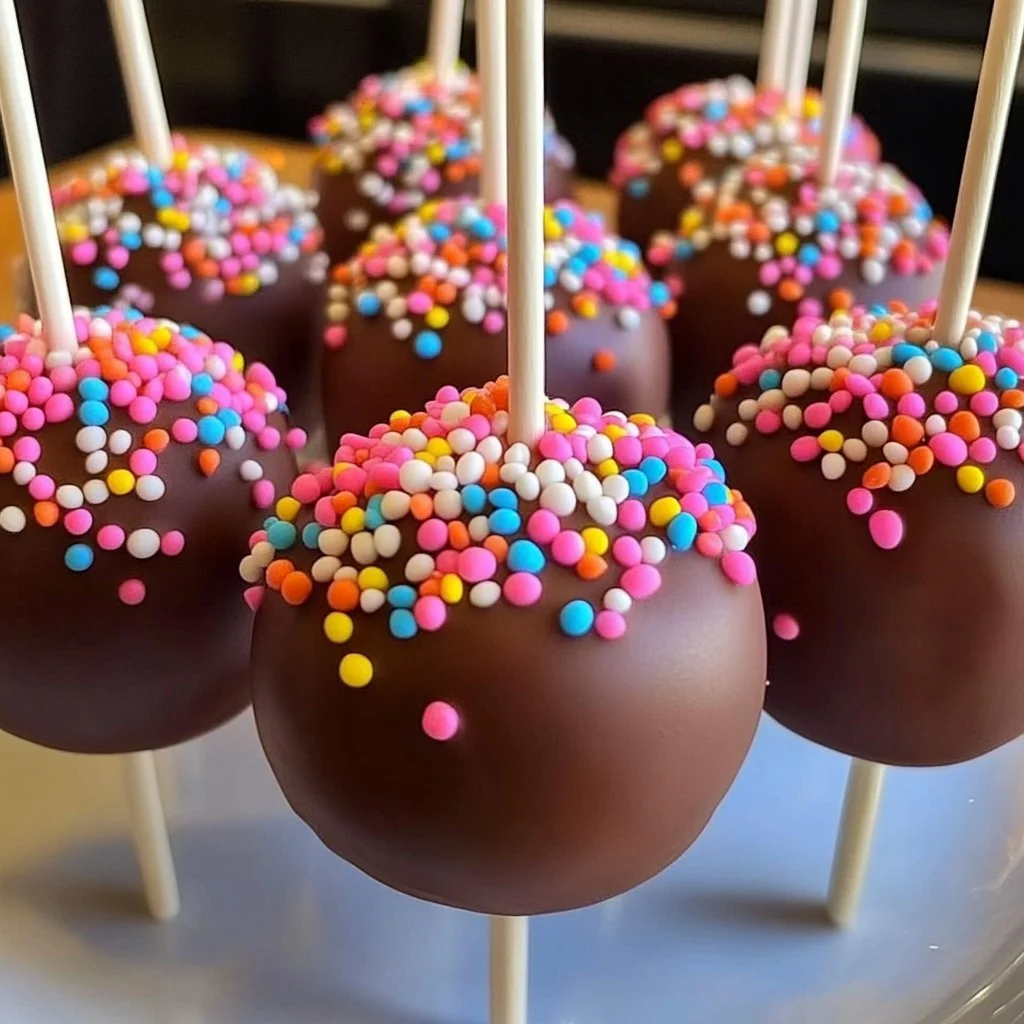
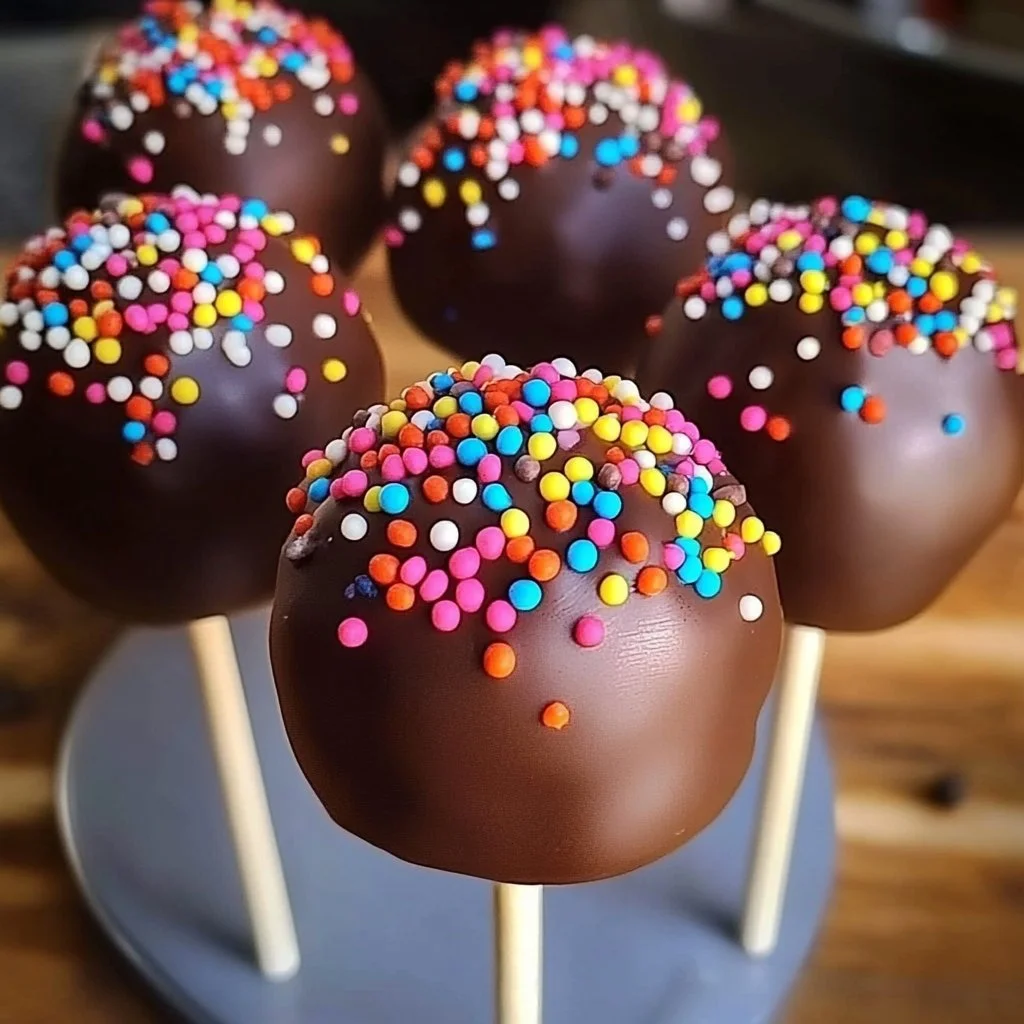
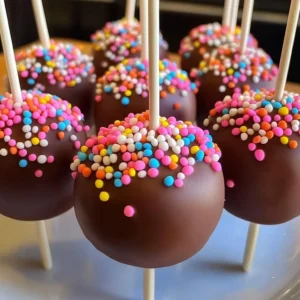
Step 10 – Decorate and Set
If desired, sprinkle your cake pops with sprinkles while the coating is still wet. This will help them stick. Allow the chocolate coating to set on parchment paper or a cake rack.
Serving Suggestions for Valentine’s Day Cake Pops
Best Occasions to Serve This Dish
Valentine’s Day Cake Pop shine during various events. They are particularly perfect for Valentine’s Day celebrations, parties, and gatherings, but also work wonderfully for birthdays, baby showers, or casual get-togethers. Their vibrant colors and designs can set the mood for any festive occasion.
What to Serve With It
These delectable treats pair well with a range of accompaniments. Consider serving them with hot beverages like coffee, tea, or even hot chocolate. You can also include other desserts such as cookies, brownies, or a fruit platter to balance the sweetness.
How to Store Valentine’s Day Cake Pops Properly
Best Storage Practices
To maintain freshness, store your Valentine’s Day Cakee Pop in an airtight container. Keep them in the refrigerator for up to a week. If you’re placing them in a container, ensure that they don’t touch each other to avoid any damage to the chocolate coating.
Reheating and Freezing Tips
If you wish to make these well in advance, you can freeze your cake pops. Just wrap them individually in plastic wrap and place them in an airtight container, lasting up to three months. To thaw, simply take them out 30 minutes before serving. Avoid microwave reheating, as it may melt the chocolate.
Tips & Tricks for Valentine’s Day Cake Pops
Mistakes to Avoid
- Underbaking the Cake: Ensure to bake the cake completely, as underbaked cake can lead to soggy pops.
- Using Too Much Frosting: While frosting binds the mixture, too much can result in overly wet cake pops that won’t hold their shape.
- Skipping Freezing Time: Don’t skip the freezing step. This is crucial for stability during the dipping process.
- Using Thick Coating: Ensure your chocolate is at the right consistency. Thick chocolate will not coat evenly.
- Skimping on Decorations: Don’t be afraid to go crazy with the toppings; they enhance both appearance and flavor.
Extra Tips for Better Results
For even more flavor, consider using flavored extracts in your frosting, like almond or vanilla. When dipping, don’t rush. Take your time to create an even coating, and allow enough time for the chocolate to set for a beautiful finish.
Recipe Variations of Valentine’s Day Cake Pops
Creative Twists
- Red Velvet Cake Pops: Use red velvet cake mix and cream cheese frosting for a romantic touch.
- Chocolate Hazelnut Flavor: Mix hazelnut spread into the frosting for a decadent chocolate hazelnut cake pop.
- Rainbow Cake Pops: Use a white cake mix and split the batter into different colors for eye-catching rainbow cake pops.
- Lemon Cake Pops: Try lemon cake mix with lemon frosting for a zesty variation that is refreshing.
Dietary Adjustments
For vegan cake pops, use plant-based cake and frosting. Gluten-free cake mixes are available for those avoiding gluten, and opting for dairy-free chocolate will accommodate lactose intolerance.
Conclusion about Valentine’s Day Cake Pops
Incorporating Valentine’s Day Cakee Pop into your festive celebrations is a delightful way to express love and creativity. They are easy to make and even easier to customize, allowing you to tailor them to suit various tastes and dietary needs. Plus, these adorable treats can serve multiple occasions beyond Valentine’s Day, ensuring they are a go-to dessert for many celebrations. With their charming presentation and delicious flavor, there’s no doubt that they will bring joy to anyone who enjoys them. Why not give this fun and simple recipe a try and create a batch of magic for your next gathering?
FAQs about Valentine’s Day Cake Pops
Can I use homemade cake mix instead of box mix?
Absolutely! Homemade cake can make your cake pops even more special.
How long can I keep leftover cake pops?
You can store them in the fridge for up to a week or freeze them for several months.
Can I make these cake pops ahead of time?
Yes, you can make them a few days in advance and store them in the fridge or freeze them for longer shelf life.
What kind of chocolate should I use for coating?
You can use chocolate chips, candy melts, or even almond bark for coating.
Do I need to refrigerate the cake pops?
Yes, it’s best to keep them in the fridge, especially if you used frosting that is dairy-based.
What if I don’t have lollipop sticks?
You can use any sturdy stick, such as bamboo skewers, cut to size.
Can I customize the flavors beyond cake and frosting?
Definitely! Add flavor extracts or mix in chocolate chips or nuts for added texture and taste.
How can I ensure the chocolate coating is smooth?
Make sure to melt the chocolate thoroughly and consider adding a small amount of vegetable oil to achieve a smoother consistency.
Is there a way to avoid melting the chocolate during storage?
Keep the cake pops in an airtight container and store them at a consistent temperature away from heat sources.
Valentine’s Day Cake Pops
Ingredients
Cake Base
- 1 box cake mix (any flavor) Choose your favorite flavor.
- 1 cup frosting (matching or contrasting flavor) Select your preferred frosting.
Coating and Decoration
- 1 package chocolate coating or candy melts Ensure it’s melted smoothly.
- 12 sticks lollipop sticks
- as needed sprinkles (optional) For decoration.


Instructions
Preparation
- Gather all the ingredients listed above.
Cooking the Cake
- Bake the cake according to the package instructions.
- Allow the cake to cool completely on a wire rack.
Preparation of Cake Pops
- Crumble the cooled cake into a large bowl until it resembles fine crumbs.
- Mix in the frosting until all crumbs are coated and the mixture holds together.
- Roll portions of the mixture into small balls and place them on a lined baking sheet.
- Insert lollipop sticks into each ball about halfway.
- Freeze the cake pops for about 1 hour until firm.
Coating
- Melt the chocolate coating or candy melts according to package instructions.
- Dip each cake pop into the melted chocolate, swirling to coat evenly.
- Allow excess chocolate to drip off.
- Sprinkle with decorations if desired, while the coating is still wet.
- Set the cake pops on parchment paper or a cake rack to let the coating harden.