

This post may contain affiliate links. As an Amazon Associate, I earn from qualifying purchases at no extra cost to you.
Table of Contents
🍴 Top Kitchen Essentials You'll Love


Introduction to Valentine’s Day Cake Pops
What could be more delightful than sharing sweet treats with your loved ones on Valentine’s Day? Valentine’s Day Cake Pops are the perfect blend of fun and deliciousness, making them an ideal gift or party treat! Imagine these bite-sized confections on a lovely platter, each one beautifully decorated and ready to make hearts melt. But what makes these cake pops so special? For starters, they are incredibly easy to make, even for beginners. With just a few simple ingredients and steps, you can whip up these adorable treats to impress anyone!
Imagine the joy on a child’s face when they receive a homemade Valentine’s Day Cake Pop or the smile your partner will wear when they bite into a chocolaty, heart-shaped surprise. Moreover, these cake pops are completely customizable; you can choose any flavor of cake mix and frosting to suit your preferences. This versatility lets you cater to different tastes, making them suitable for various occasions beyond Valentine’s Day.
Have you ever found yourself in need of a last-minute gift? Valentine’s Day Cake Pops can be made ahead of time and easily packaged for a sweet surprise. They also double as fantastic dessert options for parties, baby showers, and birthdays! The beauty of these delicious treats doesn’t just lie in their taste; it’s also in how you can personalize them to match any occasion’s theme.
Now, if you’re ready to embark on this delightful baking adventure, let’s dive into the key benefits that make this recipe a must-try!
Key Benefits of Valentine’s Day Cake Pops
- Flavorful Variety: You can choose your favorite cake mix and frosting combo, creating a unique flavor experience.
- Easy to Make: With straightforward steps, even novice bakers can craft these adorable treats.
- Creative Customization: Decorate them with themed colors, sprinkles, or edible glitter for a festive touch.
- Perfect for Gifting: They can be individually wrapped, making them an excellent gift option for friends and loved ones.
- Fun Activity: Making cake pops can be a fun and engaging activity to share with family or friends.
- Versatile Occasions: Ideal for Valentine’s Day, but also suitable for birthdays, anniversaries, or any celebratory gatherings.
What makes Valentine’s Day Cake Pops stand out even more is how they can be tailored for special dietary needs or allergies. You can easily swap ingredients to make them gluten-free, dairy-free, or vegan. This flexibility ensures everyone can indulge in these little delights.
Ingredients for Valentine’s Day Cake Pops
Complete Ingredient List with Measurements
- 1 package cake mix (any flavor)
- 1 cup frosting (matching your cake flavor)
- Chocolate melting wafers
- Sprinkles or decorations of your choice
- Lollipop sticks
Substitutes and Alternatives
If you have dietary restrictions, there are several alternatives you can use for Valentine’s Day Cake Pops. For example, gluten-free cake mixes are easily available, which can be used instead of regular cake mix. Consider using dairy-free frosting for a dairy-free version.
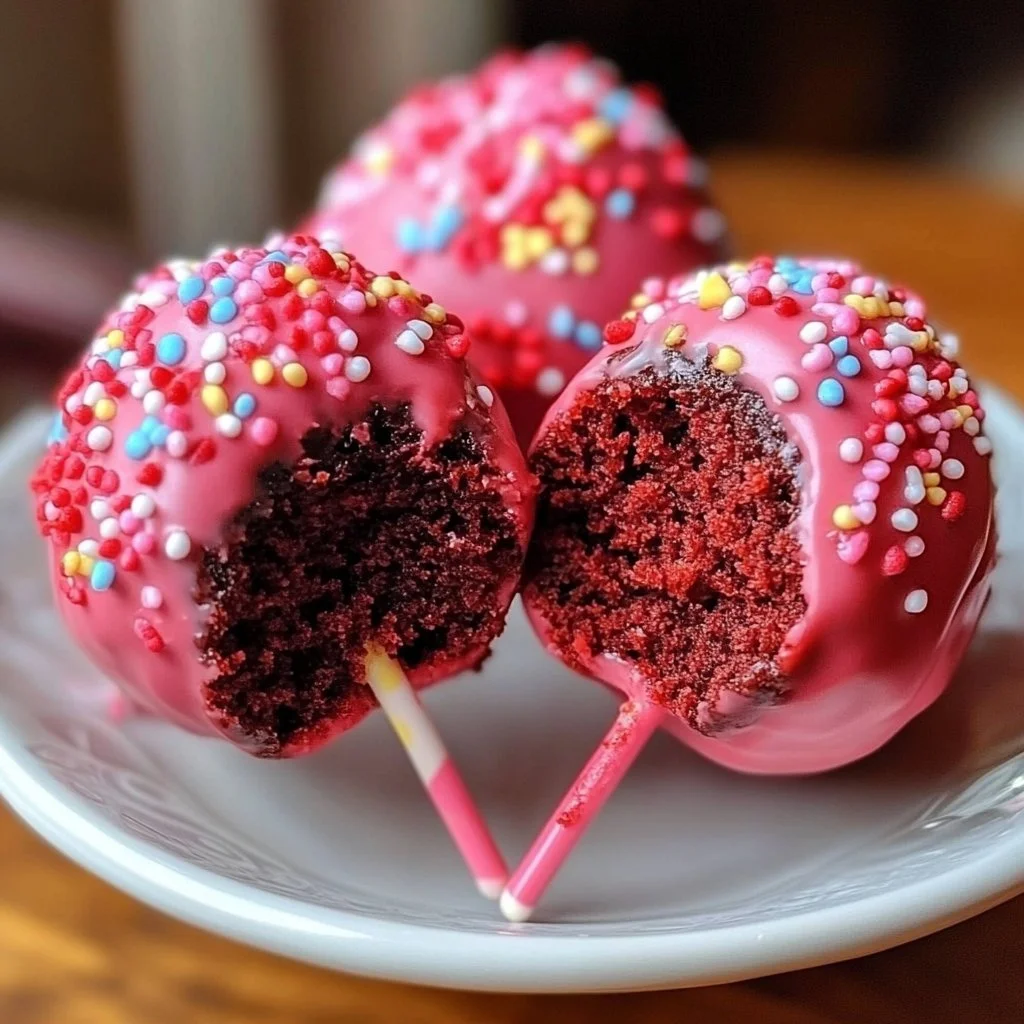
Additionally, there are vegan cake mixes and frostings available that are perfect for those following a plant-based diet. Don’t hesitate to get creative with flavors; using a red velvet cake mix or a strawberry-flavored frosting can add a festive twist that aligns perfectly with the Valentine’s Day theme.
How to Make Valentine’s Day Cake Pops – Step-by-Step Directions
Step 1 – Prepare Ingredients
Before getting started, gather all your ingredients and tools. This will help streamline the process and ensure you have everything on hand. Preheat your oven as per the cake mix package directions and prepare your baking pans.
Step 2 – Cook the Base
Bake the cake according to the package instructions, and let it cool completely. This step is crucial, as a warm cake can make it difficult to crumble effectively. Once cooled, transfer the cake to a large bowl.
Step 3 – Crumble the Cake
Using your hands, crumble the cooled cake into small pieces within the bowl. This is where the fun begins! Ensure the cake has broken down into fine crumbs to achieve the perfect consistency for rolling.
Step 4 – Mix in the Frosting
Add the frosting to the crumbled cake. Mix it by hand until everything is well combined and forms a dough-like texture. The mixture should be moist enough to hold its shape but not sticky.
Step 5 – Shape the Cake Balls
Scoop out small portions of the mixture and roll them into bite-sized balls. Place the balls on a lined baking sheet, spacing them evenly apart. This prevents them from sticking together as they chill.
Step 6 – Freeze the Cake Balls
To help the cake balls maintain their shape during dipping, freeze them for about 30 minutes. This helps them firm up, making the next steps easier.
Step 7 – Melt the Chocolate Wafers
While the cake balls are freezing, melt the chocolate melting wafers according to package instructions. Stir until smooth and evenly melted. Having a dipping consistency is key!
Step 8 – Insert Lollipop Sticks
Dip the tip of each lollipop stick into the melted chocolate. This helps secure the stick into the cake ball. Carefully insert the stick about halfway into each cake ball.
Step 9 – Coat the Cake Pops
Dip each cake pop into the melted chocolate, allowing the excess to drip off. This creates a beautiful, even coating. If you desire a thicker coating, let it set just a bit before dipping a second time.
Step 10 – Decorate and Set
Before the chocolate hardens, decorate your cake pops with sprinkles or any other decorations you’ve chosen. Once decorated, set them in a styrofoam block or cake pop stand to dry completely.
Serving Suggestions for Valentine’s Day Cake Pops
Best Occasions to Serve This Dish
Valentine’s Day Cake Pops aren’t just for Valentine’s Day! They can also shine at birthday parties, family get-togethers, or any fun celebration. Their small size makes them perfect for an assortment of desserts in a buffet-style setting.
You can also create themed pops for other holidays or occasions, such as Easter or Halloween, by altering the colors and decorations to match. These treats can easily be adapted for holiday festivities!
What to Serve With It
Pair your Valentine’s Day Cake Pops with a variety of delicious accompaniments. A warm cup of coffee, hot chocolate, or even your favorite dessert wine can enhance the cake pop experience. You can also serve these cake pops alongside fresh fruits or with a scoop of ice cream for a delightful dessert spread.
How to Store Valentine’s Day Cake Pops Properly
Best Storage Practices
To keep your Valentine’s Day Cake Pops fresh, store them in an airtight container if you have leftovers. You can keep them at room temperature for up to 3 days or refrigerate them for about a week. Ensure they are adequately wrapped or placed so they don’t stick together.
Reheating and Freezing Tips
If you want to make your cake pops ahead of time, consider freezing them. Place the uncoated cake balls in a single layer on a baking sheet, freeze until solid, and then transfer them to an airtight container or freezer bag. They can typically be frozen for up to 3 months. When you’re ready to enjoy, simply thaw them in the refrigerator before dipping in chocolate and decorating.
Tips & Tricks for Valentine’s Day Cake Pops
Mistakes to Avoid
- Not Allowing the Cake to Cool: Ensure the cake is completely cooled before crumbling; otherwise, the texture will be off.
- Overmixing the Dough: Mix the cake and frosting just until combined to avoid a dense texture.
- Not Freezing Enough: If the cake balls aren’t firm, they may fall apart during chocolate dipping.
- Skipping the Chocolate Coating Test: Always test your chocolate; too hot will melt your cake pops, too cold won’t coat well.
- Storing without Proper Care: Avoid leaving cake pops out without covering to prevent them from drying out or getting stale.
Extra Tips for Better Results
For added flavor, consider incorporating extracts like vanilla or almond into your cake mix. You can also experiment with different types of chocolate, such as milk, dark, or white chocolate, for dipping. Finally, let your creativity shine with themed decorations, like using heart-shaped sprinkles or edible glitter for a more festive look.
Recipe Variations of Valentine’s Day Cake Pops
Creative Twists
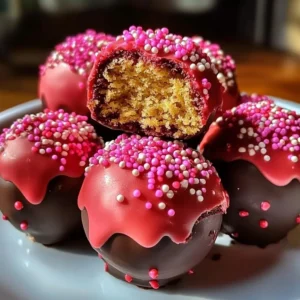
- Chocolate-Covered Strawberry: Use strawberry cake mix and vanilla frosting, decorating with melted white chocolate and strawberry pieces.
- Red Velvet Delight: Opt for red velvet cake mix, paired with cream cheese frosting, then coat with white chocolate and red sprinkles.
- Nutty Flavor: Add crushed nuts or Nutella to your cake mixture for an extra layer of flavor and texture.
Dietary Adjustments
Making dietary adjustments is simple! Swap out regular cake and frosting for gluten-free options. For vegan options, utilize plant-based cake mixes and non-dairy frosting. These alternatives ensure everyone can indulge without compromise.
Conclusion about Valentine’s Day Cake Pops
In conclusion, making Valentine’s Day Cake Pops is a delightful and creative way to celebrate love and sweetness. With simple ingredients and straightforward steps, these treats not only taste great but also offer the fun of customization. They stand out as perfect gifts for friends, family, or that special someone. Given their versatility, you can make them for various occasions throughout the year. Whether sweetening your Valentine’s Day or celebrating a birthday, these delicious cake pops can make any gathering more joyful. So why not try your hand at making these irresistible goodies today? You won’t regret it!
FAQs about Valentine’s Day Cake Pops
How long can I store cake pops?
You can store Valentine’s Day Cake Pops at room temperature for about 3 days or in the refrigerator for up to a week.
Can I freeze cake pops?
Yes, you can freeze uncoated cake balls for up to 3 months. Thaw them in the refrigerator before dipping.
Can I make cake pops ahead of time?
Absolutely! Make and freeze the cake balls ahead of time, and just dip and decorate them when you’re ready to serve.
Can I use any cake mix for cake pops?
Yes! Any flavor of cake mix works well, so feel free to use your favorites or try different combinations.
Can I use a different type of coating?
Certainly! You can use dark, milk, or white chocolate melting wafers, or even candy melts for colored coatings.
What if my chocolate is too thick?
If your chocolate is too thick for dipping, add a small amount of vegetable oil or shortening to it to achieve a smoother consistency.
Are there vegan options for cake pops?
Yes! Use vegan cake mixes and plant-based frosting for a delicious vegan version of Valentine’s Day Cake Pops.
Can I use icing instead of frosting?
Icing is typically thinner than frosting; using it can make shaping the cake pops difficult, so it’s best to stick with frosting.
Valentine’s Day Cake Pops
Ingredients
Main Ingredients
- 1 package cake mix (any flavor) Choose your favorite flavor.
- 1 cup frosting (matching your cake flavor) Store-bought or homemade.
- 1 package chocolate melting wafers Choose milk, dark, or white chocolate.
- to taste sprinkles or decorations of your choice Use themed sprinkles for decoration.
- 12 sticks lollipop sticks For assembling the cake pops.


Instructions
Preparation
- Gather all your ingredients and tools.
- Preheat your oven as per the cake mix package directions and prepare your baking pans.
Baking
- Bake the cake according to the package instructions and let it cool completely.
Crumbling and Mixing
- Crumble the cooled cake into small pieces in a large bowl.
- Add the frosting to the crumbled cake and mix until well combined.
Forming Cake Balls
- Roll the mixture into bite-sized balls and place them on a lined baking sheet.
Freezing
- Freeze the cake balls for about 30 minutes to firm them up.
Melting Chocolate
- Melt the chocolate melting wafers according to package instructions until smooth.
Assembling Cake Pops
- Dip the tip of each lollipop stick into melted chocolate and insert it halfway into each cake ball.
- Dip each cake pop into the melted chocolate, allowing excess to drip off.
- Decorate with sprinkles before the chocolate hardens.
- Set them in a styrofoam block or cake pop stand to dry completely.