

This post may contain affiliate links. As an Amazon Associate, I earn from qualifying purchases at no extra cost to you.
Table of Contents
🍴 Top Kitchen Essentials You'll Love


Introduction to Valentine’s Day Homemade Candy
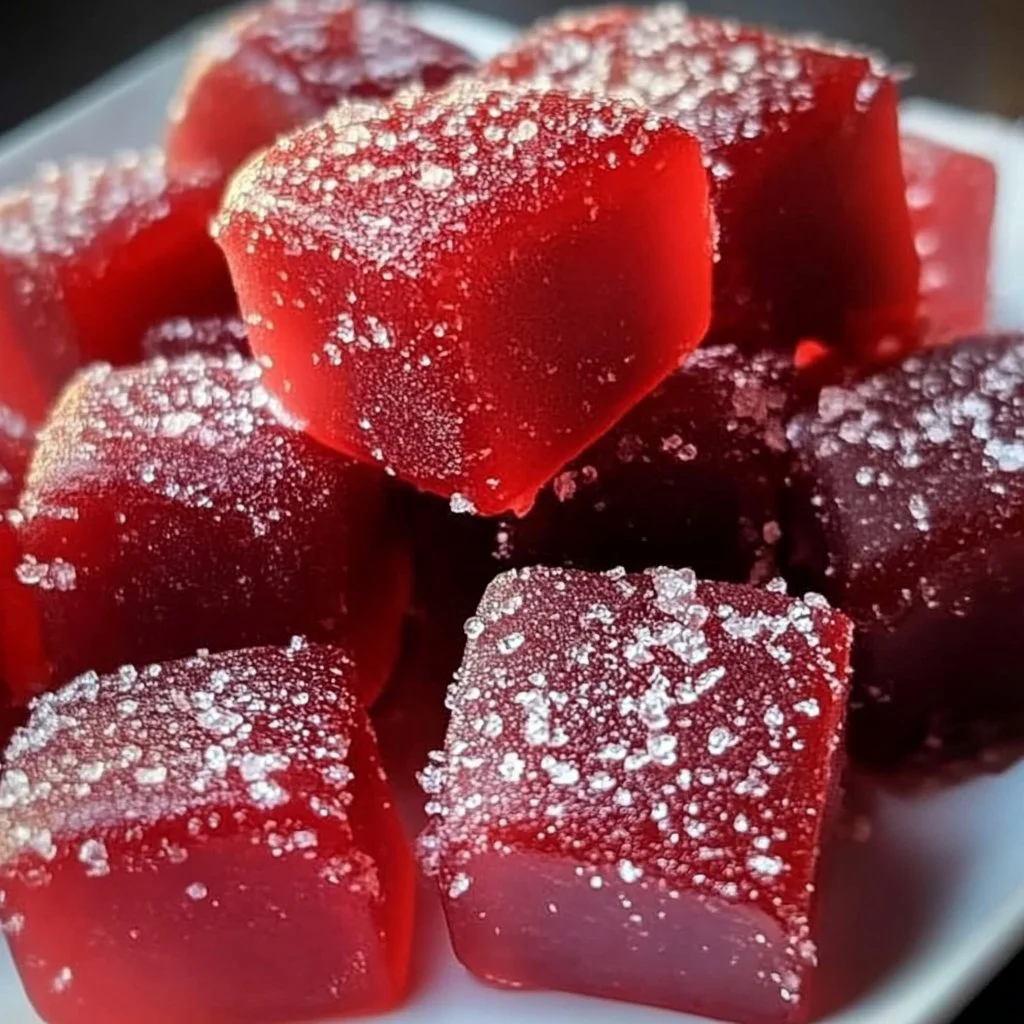
Valentine’s Day is a time when hearts flutter and love is in the air. When it comes to expressing affection, nothing beats a delicious, heartfelt gift made from scratch. That’s where this Valentine’s Day Homemade Candy recipe comes in. Have you ever dreamed of crafting sweet, delightful treats that capture the essence of love? This recipe allows you to create irresistible candies that are not only beautiful but also bursting with flavor.
Using just a handful of ingredients, you can whip up candies that are sure to impress your loved ones. Imagine the joy on their faces when they receive a box of homemade sweets! Whether you’re making them for a partner, friends, or family members, these treats are not just enjoyable to make, but they are also delightful to eat. The best part is the opportunity for personalization—add any flavors and colors that represent your unique style and connection.
This Valentine’s Day Homemade Candy is easy to prepare and offers a wonderful way to share your love through food. As you pour your heart into the process, you create more than just sweets; you craft unforgettable moments. So, gather your ingredients and let’s dive into the world of candy-making!
Key Benefits of Valentine’s Day Homemade Candy
Why You’ll Love This Recipe
- Delicious Flavors: Customize flavors with your favorite extracts.
- Simplicity: Requires only a few ingredients and steps.
- Versatile: Perfect for various occasions beyond Valentine’s Day.
- Fun to Make: Engaging activity to do with family or friends.
- Gifts from the Heart: Thoughtful presents that show you care.
- Customizable: Adapt colors and shapes to match any theme.
What Makes It Stand Out
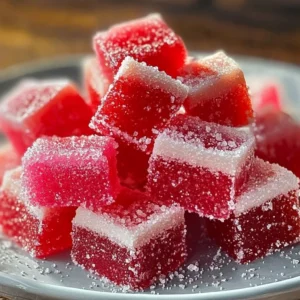
What truly sets this recipe apart is its versatility. You can combine an array of flavors, from classic vanilla to fruity cherry, tailoring the candies to your tastes. Moreover, you have the creative freedom to choose the color and design of the candies, making them perfect for any celebration, not just Valentine’s Day. These candies can easily be gifted for birthdays, anniversaries, or any special occasion where a touch of sweetness is needed.
Ingredients for Valentine’s Day Homemade Candy
Complete Ingredient List with Measurements
- 2 cups granulated sugar
- 1/2 cup corn syrup
- 1/2 cup water
- Flavor extracts (vanilla, cherry, etc., to taste)
- Food coloring (optional, for aesthetic appeal)
- Powdered sugar (for dusting)
Substitutes and Alternatives
If you’re looking for alternatives due to dietary needs, consider using honey instead of corn syrup. For a sugar-free version, explore sugar substitutes. Ensure you choose flavors and colors that comply with dietary restrictions, such as natural extracts or dyes for those avoiding artificial ingredients.
How to Make Valentine’s Day Homemade Candy – Step-by-Step Directions
Step 1 – Prepare Ingredients
Gather all the ingredients. Start by measuring out the sugar, corn syrup, and water, ensuring everything is ready before starting the cooking process. This preparation will help you work efficiently.
Step 2 – Cook the Base
In a medium-sized saucepan over medium heat, combine the granulated sugar, corn syrup, and water. Stir the mixture gently until the sugar dissolves completely. This step is crucial as it ensures a smooth candy base.
Step 3 – Bring to a Boil
Allow the mixture to come to a gentle boil without stirring. Keep an eye on the temperature as you’ll need to reach the hard crack stage, which is 300°F on a candy thermometer. This can take about ten minutes, depending on your heat.
Step 4 – Monitor Temperature
As the mixture heats, watch it carefully to prevent burning. The color will change slightly when it’s nearing the target temperature. Once it hits 300°F, quickly remove it from the heat.
Step 5 – Add Flavor and Color
When the mixture is removed from the heat, quickly stir in your desired flavor extracts and food coloring. This step adds an exciting burst of flavor and visual appeal to the candies.
Step 6 – Pour the Candy
Carefully pour the candy mixture onto a greased baking sheet. Spread it out gently for even cooling, but be cautious as it will be very hot. Allow it to cool slightly before handling.
Step 7 – Shape the Candy
Once the candy has cooled enough to handle, you can use molds to create fun shapes or cut it into pieces. This is where your creativity shines—don’t be afraid to experiment!
Step 8 – Dust with Powdered Sugar
After shaping, dust the candies with powdered sugar to prevent them from sticking together. This also adds a touch of sweetness and improves the overall appearance.
Step 9 – Cool and Store
Allow the candies to cool completely at room temperature before packaging them. For the best results, store them in an airtight container away from moisture.
Serving Suggestions for Valentine’s Day Homemade Candy
Best Occasions to Serve This Dish
While these candies are perfect for Valentine’s Day, they can elevate any occasion. Use them as party favors at birthdays, or simply enjoy them during family movie nights. Present them in decorative boxes for special celebrations to make guests feel cherished.
What to Serve With It
Pair these sweets with a warm beverage like hot chocolate or tea for a delicious treat. You could also use them as toppings for desserts, like ice cream sundaes, adding flavor and texture.
How to Store Valentine’s Day Homemade Candy Properly
Best Storage Practices
Store your Valentine’s Day Homemade Candy in an airtight container to maintain its freshness. Keep it in a cool, dry place away from direct sunlight. If you’re storing them for a longer period, maximize freshness by refrigerating them, but remember to let them return to room temperature before serving.
Reheating and Freezing Tips
While these candies are best enjoyed fresh, they can also be frozen. Just ensure they’re completely cooled before placing them in an airtight freezer-safe container. For reheating, allow them to come to room temperature naturally, avoiding direct heat which could melt them.
Tips & Tricks for Valentine’s Day Homemade Candy
Mistakes to Avoid
- Don’t Stir After Boiling: Once boiling, avoid stirring to prevent crystallization.
- Watch the Temperature: Use a reliable candy thermometer to ensure proper hardness.
- Allow Enough Cooling Time: Don’t rush the cooling process; otherwise, candies may not set properly.
- Grease the Surface Well: Failing to grease the baking sheet can cause sticking issues.
- Experiment Carefully with Flavors: Start with small amounts, as some flavorings can overpower the candy.
Extra Tips for Better Results
To enhance flavors, consider adding a pinch of salt to balance the sweetness. Experiment with layering different colors for a stunning visual effect, and remember, presentation matters! Use festive packaging for gifts to add a special touch.
Recipe Variations of Valentine’s Day Homemade Candy
Creative Twists
For a fun variation, try adding nuts or dried fruits to the melted candy mixture before it hardens. This adds a wonderful texture and flavor contrast. Alternatively, create themed candies by customizing shapes and colors (like heart shapes for Valentine’s Day or pastel colors for spring).
Dietary Adjustments
If you have dietary restrictions, try making these candies vegan by using maple syrup instead of corn syrup and ensuring that the flavor extracts are also vegan. For a gluten-free option, confirm that all ingredients comply with that dietary need.
Conclusion about Valentine’s Day Homemade Candy
In summary, making Valentine’s Day Homemade Candy is a delightful way to celebrate love and affection. The joy of creating these sweet treats adds a unique touch to your gifts and festivities. Using simple ingredients, you can craft candies bursting with flavor and personality. Whether sharing them with loved ones or keeping them as a sweet indulgence for yourself, these candies are sure to spread joy. So why not dive into this simple yet rewarding recipe and make this Valentine’s Day truly special? Treat yourself and others to a homemade experience you all will cherish.
FAQs about Valentine’s Day Homemade Candy
How long can I store Valentine’s Day Homemade Candy?
Typically, you can store the candy for up to 2 weeks at room temperature if kept in an airtight container.
Can I substitute corn syrup in this recipe?
Yes, you can use honey or a maple syrup alternative if corn syrup is unavailable.
What if I don’t have a candy thermometer?
If you don’t have a thermometer, you can perform the cold water test—drop a small amount of the boiling candy mixture into cold water. If it forms hard, brittle threads, it’s ready.
Can I make this recipe larger for a party?
Absolutely! Simply increase the ingredient quantities while maintaining the same cooking methods.
Is it possible to use different flavors and colors?
Yes! Personalize your candy by using any flavor extracts and colors you prefer.
How do I prevent my candy from sticking together?
Dusting with powdered sugar right after shaping can help prevent sticking.
Can I package these candies for gifts?
Definitely! Use decorative boxes or bags; a personal touch will make your gifts even sweeter.
Can I freeze the candy?
Yes, they can be frozen. Just ensure they’re stored in a suitable airtight container to preserve freshness.
How do I reheat the candies if they become too hard?
Allow candies to come to room temperature instead of reheating them directly, to maintain their structure.
Are there non-candy uses for this recipe?
The techniques and flavors can be adapted for making cake decorations, topping desserts, or using in snack mixes!
Valentine’s Day Homemade Candy
Ingredients
Candy Base Ingredients
- 2 cups granulated sugar
- ½ cup corn syrup Can substitute with honey for a more natural sweetener.
- ½ cup water
- to taste Flavor extracts (vanilla, cherry, etc.) Customize with your favorite flavor.
- optional Food coloring For aesthetic appeal.
- as needed tablespoons powdered sugar For dusting.


Instructions
Preparation
- Gather all the ingredients and measure out the sugar, corn syrup, and water.
Cooking the Candy
- In a medium-sized saucepan over medium heat, combine granulated sugar, corn syrup, and water. Stir gently until the sugar dissolves completely.
- Allow the mixture to come to a gentle boil without stirring and monitor the temperature until it reaches 300°F (hard crack stage).
- Remove from heat once the target temperature is reached and stir in your flavor extracts and food coloring immediately.
Shaping the Candy
- Carefully pour the candy mixture onto a greased baking sheet and spread evenly.
- Once slightly cooled, shape the candy using molds or cut it into pieces.
- Dust with powdered sugar to prevent sticking.
Storing the Candy
- Allow the candies to cool completely before storing them in an airtight container.