
This post may contain affiliate links. As an Amazon Associate, I earn from qualifying purchases at no extra cost to you.
Table of Contents
🍴 Top Kitchen Essentials You'll Love


Introduction about Apple Cider Whoopie Pies
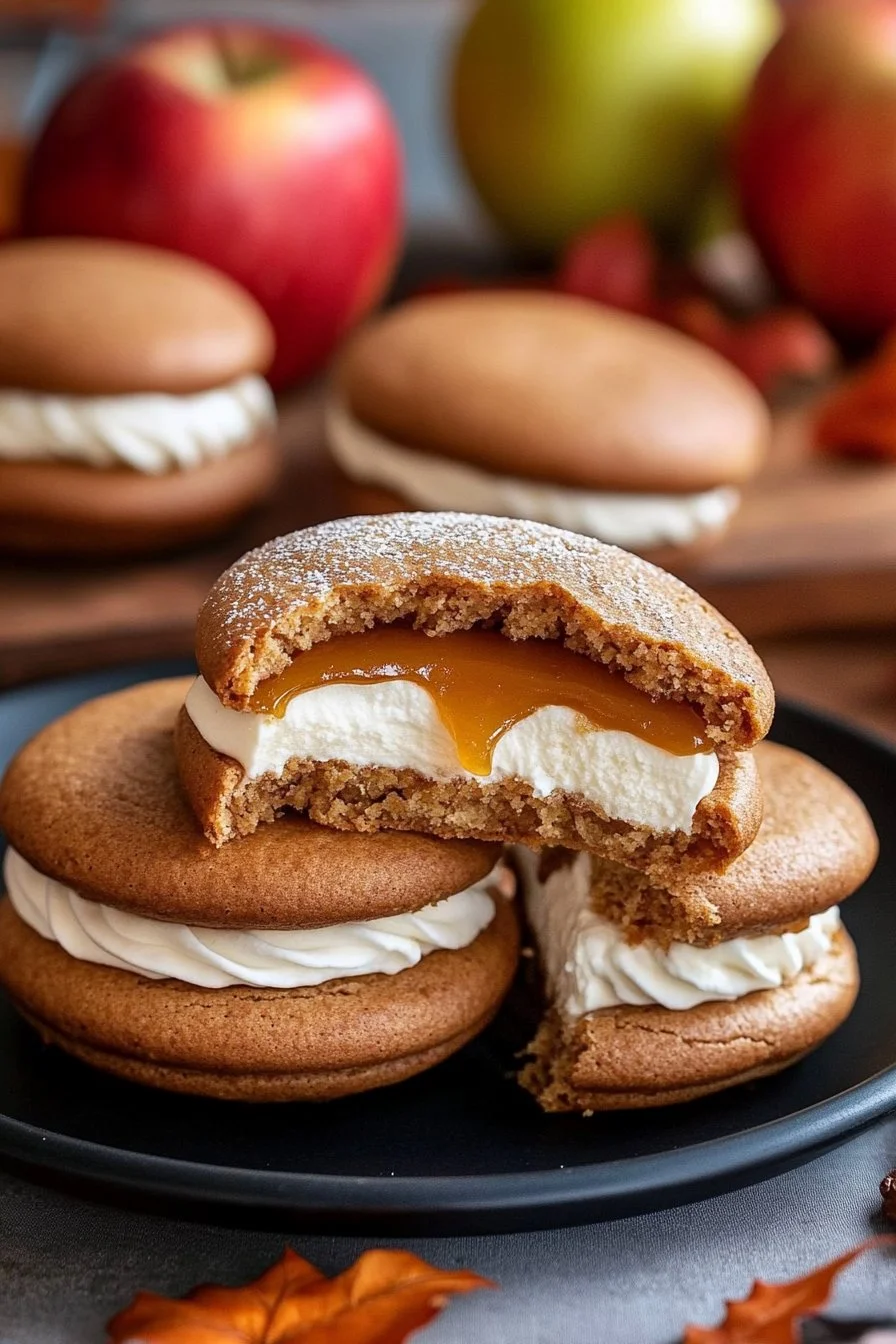
Have you ever tasted a dessert that perfectly captures the essence of autumn? If not, let me introduce you to Apple Cider Whoopie Pies. Imagine two soft and spongy cakes infused with the rich flavors of apple cider, sandwiched together with velvety buttercream and a drizzle of caramel. Sounds heavenly, right?
These whoopie pies are not just a treat for the taste buds; they’re also a feast for the eyes. With their inviting appearance and delightful flavors, they are sure to impress family and friends alike. The best part? They’re surprisingly easy to make! Whether you’re preparing for a cozy evening at home or a festive gathering, Apple Cider Whoopie Pies bring warmth and joy to any occasion.
What makes this recipe so special? It’s the perfect balance of flavors and textures, combined with a hint of spice that captures the spirit of the season. Plus, they’d make an excellent addition to your baking repertoire, whether you’re an experienced baker or just starting out. So, let’s dive into this delightful recipe and discover why these whoopie pies are sure to become a family favorite!
Key Benefits of Apple Cider Whoopie Pies
Why You’ll Love This Recipe
- Delightful Flavor: The combination of apple cider and spices creates a warm, comforting flavor that evokes memories of fall.
- Easy to Make: With step-by-step instructions, even beginners can create this delicious dessert without any fuss.
- Quick to Prepare: Both the whoopie pie cakes and buttercream come together in no time, allowing you to enjoy freshly baked treats in about an hour.
- Family-Friendly: These whoopie pies are a hit with both kids and adults, making them perfect for family gatherings or children’s parties.
- Versatile: You can customize the filling, add toppings, or even switch up the spices to fit your tastes and preferences.
- Seasonal Appeal: Perfect for autumn but delicious year-round, they can also be made for holidays like Thanksgiving or Halloween.
What Makes It Stand Out
Apple Cider Whoopie Pies are not your average dessert. Their unique combination of flavors sets them apart, as they incorporate a beloved fall favorite—apple cider. This seasonal touch makes them perfect for gatherings during the cooler months, giving each bite a delightful warmth.
Additionally, these pies offer versatility. You can mix and match the fillings and toppings to cater to various tastes. Whether you go for a classic buttercream or want to try something daring and new, the choice is yours! This flexibility, coupled with the delightful taste, makes them a standout dessert you can always rely on.
Ingredients for Apple Cider Whoopie Pies
Complete Ingredient List with Measurements
To make these Apple Cider Whoopie Pies, gather the following ingredients:
For the Whoopie Pies:
- 2 ½ cups all-purpose flour
- 1 tsp baking soda
- 1 tsp baking powder
- ½ tsp salt
- 1 tsp ground cinnamon
- ½ tsp ground nutmeg
- ¼ tsp ground cloves
- ½ cup unsalted butter, softened
- 1 cup light brown sugar, packed
- 1 large egg, room temperature
- 1 tsp vanilla extract
- 1 cup apple cider, reduced to ¼ cup
- ½ cup whole milk
For the Apple Cider Buttercream:
- ½ cup unsalted butter, softened
- 3 cups powdered sugar
- ¼ cup reduced apple cider
- 1 tsp vanilla extract
- Pinch of salt
For the Caramel Filling:
- ½ cup store-bought caramel sauce (or homemade)
- Pinch of flaky sea salt (optional)
Substitutes and Alternatives
- Butter: You can use margarine or dairy-free butter for a dairy-free version.
- Milk: Substitute almond milk or oat milk for a dairy-free option.
- Apple Cider: In a pinch, you could use apple juice, but the flavor won’t be as rich.
- Flour: For a gluten-free version, opt for a gluten-free all-purpose flour mix.
- Sugar: Coconut sugar can be a healthier alternative if you want to steer clear of refined sugars.
How to Make Apple Cider Whoopie Pies – Step-by-Step Directions
Step 1 – Prep Your Workspace and Ingredients
Start by getting your workspace ready. Gather all the ingredients, measuring cups, and mixing bowls. It’s helpful to line two baking sheets with parchment paper to make the process smoother.
Step 2 – Reduce the Apple Cider
The first step in creating these wonderful whoopie pies is to make the apple cider reduction. Pour 1 cup of apple cider into a saucepan and simmer it over medium heat. Keep an eye on it and allow it to reduce until you’re left with about ¼ cup. This process usually takes around 10-15 minutes. Once it’s reduced, set it aside to cool.
Step 3 – Preheat Your Oven
While your cider is cooling, preheat your oven to 350°F (175°C). This ensures that your whoopie pies will bake evenly and thoroughly.
Step 4 – Whisk the Dry Ingredients
In a medium bowl, whisk together 2 ½ cups of all-purpose flour, 1 tsp baking soda, 1 tsp baking powder, ½ tsp salt, and the spices: 1 tsp ground cinnamon, ½ tsp ground nutmeg, and ¼ tsp ground cloves. This mixture will give your whoopie pies their flavorful kick!
Step 5 – Cream the Butter and Sugar
In a large mixing bowl, beat ½ cup of softened unsalted butter and 1 cup of packed light brown sugar together until the mixture becomes light and fluffy. This typically takes about 2-3 minutes. Don’t rush; proper creaming will give your cakes a better texture.
Step 6 – Add the Egg and Vanilla
Once your butter and sugar are creamed, add in one large egg (make sure it’s at room temperature) and 1 tsp of vanilla extract. Beat until everything is combined, making sure no sugar lumps remain. This will contribute to the airy texture of the cakes.
Step 7 – Incorporate the Reduced Cider
Now it’s time to incorporate that delicious apple cider reduction you set aside earlier. Gradually mix this into the butter and sugar mixture until everything is well combined.
Step 8 – Mix in the Dry Ingredients and Milk
Begin to add the dry ingredient mixture in three parts, alternating with ½ cup of whole milk. Start and finish with the dry ingredients, mixing only until just combined. Overmixing could result in tough cakes, so be gentle!
Step 9 – Bake the Whoopie Pies
Using a cookie scoop or a tablespoon, drop 2-tablespoon-sized rounds of batter onto your lined baking sheets, leaving about 2 inches between each one. Bake for 10-12 minutes, or until the cakes are firm to the touch. A toothpick inserted in the center should come out clean.
Step 10 – Cool the Cakes
Once baked, transfer the whoopie pie halves to a wire rack to cool completely. This step is essential, as you don’t want your buttercream melting when you assemble your pies.
Step 11 – Prepare the Buttercream
While the cakes are cooling, it’s time to make the apple cider buttercream. In a medium bowl, beat ½ cup of softened unsalted butter until creamy. Gradually add 3 cups of powdered sugar, followed by the ¼ cup of reduced apple cider, 1 tsp of vanilla extract, and a pinch of salt. Beat on high until the buttercream is fluffy and smooth.
Step 12 – Assemble the Whoopie Pies
Pair the whoopie pie halves by size. On the flat side of one half, pipe or spoon a generous amount of apple cider buttercream. Drizzle a spoonful of caramel sauce on top. If you’re feeling a bit adventurous, sprinkle a pinch of flaky sea salt for that extra touch of flavor. Carefully press the second half on top to create a sandwich. Repeat this process until all pies are assembled!
Serving Suggestions for Apple Cider Whoopie Pies
Best Occasions to Serve This Dish
Apple Cider Whoopie Pies are ideal for a variety of occasions:
- Fall Festivities: Perfect for autumn gatherings or Thanksgiving celebrations.
- Birthday Parties: Delight friends and family with these charming desserts at your next celebration.
- Baking Parties: Great for fun baking afternoons with kids or friends.
- Potlucks: They are easy to transport and sure to be a hit.
What to Serve with It
These whoopie pies can be enjoyed alone or paired with delicious complements:
- Hot Beverages: Pair with cider, coffee, or hot cocoa.
- Ice Cream: Serve with a scoop of vanilla or caramel ice cream for an irresistible treat.
- Whipped Cream: A dollop of fresh whipped cream can elevate this dessert even further.
- Fresh Fruits: Apple slices or a simple fruit salad balanced nicely with the sweetness.
Storing Apple Cider Whoopie Pies Properly
Best Storage Practices
To keep your Apple Cider Whoopie Pies fresh, follow these tips:
- Refrigerator: Store in an airtight container in the refrigerator for up to 5 days.
- Freezer: These pies freeze beautifully! Just wrap each pie individually in plastic wrap and place them in a freezer-safe bag for up to 3 months.
Reheating and Freezing Tips
- To Thaw: Simply transfer frozen whoopie pies to the refrigerator overnight before serving.
- To Reheat: Warm in the microwave for 10-15 seconds to enjoy a freshly baked taste, but avoid overheating as this can dry out the cakes.
Tips & Tricks for Apple Cider Whoopie Pies
Mistakes to Avoid
- Overmixing the Batter: This can lead to dense cakes, so mix just until combined.
- Not Cooling Properly: Ensure the cakes are completely cool before frosting; otherwise, the frosting may melt away.
- Skipping the Cider Reduction: This step adds essential depth of flavor—don’t skip it!
Extra Tips for Better Results
- Use Room Temperature Ingredients: Using eggs and butter at room temperature helps the batter mix more evenly.
- Test the Spice Amounts: Feel free to adjust spices to match your flavor preferences—experimenting can lead to new favorites!
- Try Different Fillings: Customize with different creams or jams between the whoopie pies to switch things up.
Recipe Variations of Apple Cider Whoopie Pies
Creative Twists
- Pecan or Walnut Addition: Chopped nuts can add a satisfying crunch and elevate the flavor.
- Pumpkin Spice: Incorporate pumpkin puree into the batter for a seasonal twist.
- Chocolate Drizzle: Add a drizzle of melted chocolate on top for a decadent finish.
Dietary Adjustments
- Gluten-Free: Use a gluten-free flour blend in place of all-purpose flour to make these pies gluten-free.
- Dairy-Free: Swap butter with non-dairy options and use almond milk or coconut milk to create a dairy-free version.
- Vegan: Substitute egg with flaxseed meal or applesauce and use plant-based butter and milk.
Conclusion about Apple Cider Whoopie Pies
In conclusion, these Apple Cider Whoopie Pies are a delightful addition to any dessert table. Their warm flavors, comforting texture, and easy preparation make them a must-try for anyone looking to add a little autumn magic to their baking. Perfect for celebrations, cozy nights, or just because, they are versatile and family-friendly.
So why not give this recipe a try? Your taste buds will thank you, and you might just find yourself baking these often! Don’t forget to share your experience and let us know how your whoopie pies turn out!
FAQs about Apple Cider Whoopie Pies
What if it doesn’t turn out right?
Don’t worry! Baking can be tricky. If your whoopie pies are too flat, check that your baking powder and soda are fresh. If they’re dry, be sure you didn’t overmix or overbake!
Can I prepare them ahead of time?
Absolutely! You can bake the pies a day or two in advance and store them in an airtight container. Frosting can be made ahead too; just keep it refrigerated.
What are the best ingredient substitutions?
For common swaps, you can use almond milk instead of whole milk for a dairy-free option, or try coconut sugar in place of light brown sugar for a hint of caramel flavor.
How long can it be stored?
In an airtight container, whoopie pies can last in the fridge for up to 5 days. If frozen, they can maintain their quality for up to 3 months.
Can I use store-bought dough or crust?
While it’s best to make the batter from scratch to capture the true flavor, you can attempt using pre-made cookie dough for a quicker version, but the taste may differ.
Is this recipe kid-friendly or family-appropriate?
Absolutely! The flavors are gentle and appealing, making them a hit with kids. Plus, they can help out in the kitchen during the preparation!
Can I make this recipe allergen-free?
Yes! Using gluten-free flour and plant-based butter and milk can make these whoopie pies allergen-friendly. Just be sure to check ingredient labels for any hidden allergens.
In conclusion, enjoy these delightful Apple Cider Whoopie Pies with family and friends, and trust that they will be a warm, buttery, and flavorful addition to your repertoire! Enjoy baking!

Apple Cider Whoopie Pies
Ingredients
For the Whoopie Pies
- 2 ½ cups all-purpose flour
- 1 tsp baking soda
- 1 tsp baking powder
- ½ tsp salt
- 1 tsp ground cinnamon
- ½ tsp ground nutmeg
- ¼ tsp ground cloves
- ½ cup unsalted butter, softened
- 1 cup light brown sugar, packed
- 1 large egg, room temperature
- 1 tsp vanilla extract
- 1 cup apple cider, reduced to ¼ cup Reduce 1 cup of cider to ¼ cup
- ½ cup whole milk
For the Apple Cider Buttercream
- ½ cup unsalted butter, softened
- 3 cups powdered sugar
- ¼ cup reduced apple cider
- 1 tsp vanilla extract
- pinch of salt
For the Caramel Filling
- ½ cup store-bought caramel sauce (or homemade)
- pinch of flaky sea salt (optional)


Instructions
Preparation
- Start by getting your workspace ready. Gather all the ingredients, measuring cups, and mixing bowls. It’s helpful to line two baking sheets with parchment paper to make the process smoother.
- Pour 1 cup of apple cider into a saucepan and simmer it over medium heat. Allow it to reduce until you’re left with about ¼ cup, which takes around 10-15 minutes. Once it’s reduced, set it aside to cool.
- While your cider is cooling, preheat your oven to 350°F (175°C).
- In a medium bowl, whisk together the flour, baking soda, baking powder, salt, cinnamon, nutmeg, and cloves.
- In a large mixing bowl, beat the softened butter and brown sugar together until light and fluffy, about 2-3 minutes.
- Add in the egg and vanilla extract, beating until combined.
- Gradually mix in the reduced apple cider until well incorporated.
- Add the dry ingredient mixture in three parts, alternating with the whole milk. Begin and finish with the dry ingredients, mixing only until just combined.
Baking
- Drop tablespoon-sized rounds of batter onto the lined baking sheets, leaving about 2 inches between each one.
- Bake for 10-12 minutes, or until firm to the touch and a toothpick inserted in the center comes out clean.
- Transfer the whoopie pie halves to a wire rack to cool completely.
Buttercream Preparation
- Beat the butter until creamy, then gradually add the powdered sugar, followed by the reduced apple cider, vanilla, and a pinch of salt. Beat until fluffy and smooth.
Assembly
- On the flat side of one whoopie pie half, pipe or spoon a generous amount of buttercream. Drizzle caramel on top and, if desired, sprinkle flaky sea salt.
- Press the second half on top to create a sandwich. Repeat until all pies are assembled.