
This post may contain affiliate links. As an Amazon Associate, I earn from qualifying purchases at no extra cost to you.
Table of Contents
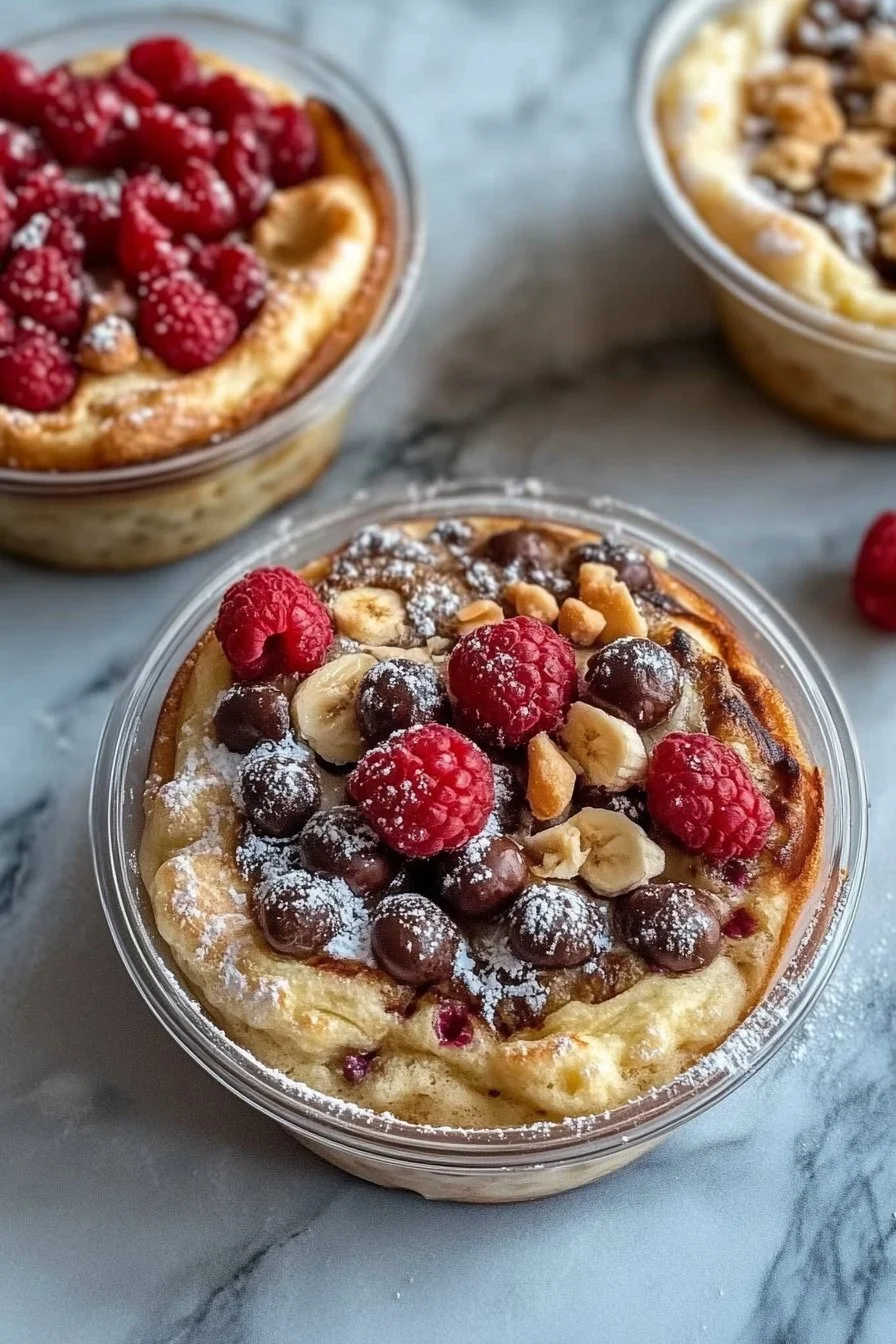
Have you ever craved a delicious breakfast that’s both nutritious and simple to make? If so, you’re in the right place! Let me introduce you to Baked Protein Pancake Bowls – great for meal prep and no banana needed! This delightful dish not only satisfies your taste buds but is also a fantastic option for busy mornings.
Imagine waking up to the comforting aroma of freshly baked pancakes, all packed with protein to fuel your day—sounds good, right? And the best part? You don’t even need a ripe banana to enjoy this recipe! Whether you’re a busy professional, a parent, or just someone who enjoys a hearty breakfast, these pancake bowls are your new best friend.
With easy prep steps and customizable toppings, this recipe is incredibly versatile. You can whip up several bowls in advance for breakfast meal prep, ensuring you always have a wholesome meal at your fingertips. So, let’s dive into this irresistible creation!
🍴 Top Kitchen Essentials You'll Love


Key Benefits of Baked Protein Pancake Bowls – Great for Meal Prep and No Banana Needed!
Why You’ll Love This Recipe
- High in Protein: Packed with protein powder and yogurt, these bowls will keep you feeling full longer.
- No Banana Needed: If you’re not a fan or just don’t have bananas on hand, this recipe is perfect!
- Versatile and Customizable: Tailor your pancake bowls with various toppings like fruits, nuts, or even chocolate chips.
- Easy Meal Prep: Prepare multiple bowls at once, making breakfast ready to go!
- Family-Friendly: Perfect for kids and adults alike, everyone will love these delicious treats.
What Makes It Stand Out
One of the standout features of Baked Protein Pancake Bowls is their adaptability to different dietary needs and preferences. This means you can easily tweak the ingredients based on what you have available or what you personally enjoy. Whether you’re gluten-free, dairy-free, or looking to incorporate seasonal flavors, this recipe offers creative avenues to explore.
What’s more, they showcase the original concept of combining traditional pancakes with the ease of a baked dish. Instead of standing over the stove flipping pancakes, you can simply mix your ingredients, pour them into bowls, and let the oven do the magic. It’s breakfast made easy, bringing a fun twist to your morning routine!
Ingredients for Baked Protein Pancake Bowls – Great for Meal Prep and No Banana Needed!
Complete Ingredient List with Measurements
To make your own Baked Protein Pancake Bowls, gather the following ingredients:
- 1 Egg
- 50 g Yogurt (vanilla or unflavored)
- 70 ml Milk (soy, almond, or any milk you prefer)
- 35 g All-Purpose Flour
- 25 g Protein Powder
- 5 g Zero-Calorie Granulated Sweetener (or 1 tsp sweetener of choice)
- 1/2 tsp Baking Powder
Substitutes and Alternatives
- Egg: Replace with a flaxseed meal or chia seed mixture for a vegan option.
- Yogurt: Use a dairy-free yogurt for a vegan alternative.
- Milk: Any type of milk will work; feel free to use oat or coconut milk based on your preference.
- Flour: Almond flour or coconut flour can be used for a gluten-free option.
- Protein Powder: Any protein powder you like should work, including plant-based versions.
- Sweetener: Honey or maple syrup can be used if you prefer natural sweeteners.
How to Make Baked Protein Pancake Bowls – Great for Meal Prep and No Banana Needed! – Step-by-Step Directions
Step 1 – Prep Your Workspace and Ingredients
Start by clearing off your kitchen counter. Gather all your ingredients and preheat the oven to 180°C (356°F) so it’s ready when you are. Having everything at your fingertips will make the process smooth and enjoyable.
Step 2 – Prepare the Base
In an oven-safe glass bowl, crack in one egg. Then, add 50g of yogurt followed by 70ml of milk. This mixture will serve as the base of your pancake bowl, ensuring it’s moist and flavorful.
Step 3 – Combine Dry Ingredients
In a separate bowl, mix together the 35g of all-purpose flour, 25g of protein powder, 5g of zero-calorie sweetener, and 1/2 tsp of baking powder. This will ensure even distribution of the baking agent, which helps your pancake bowls rise properly.
Step 4 – Mix Wet and Dry Ingredients
Now, gradually add the dry mixture into your wet mixture, stirring well as you go. Aim for a consistent batter without lumps. If it feels too thick, don’t hesitate to add a splash more milk!
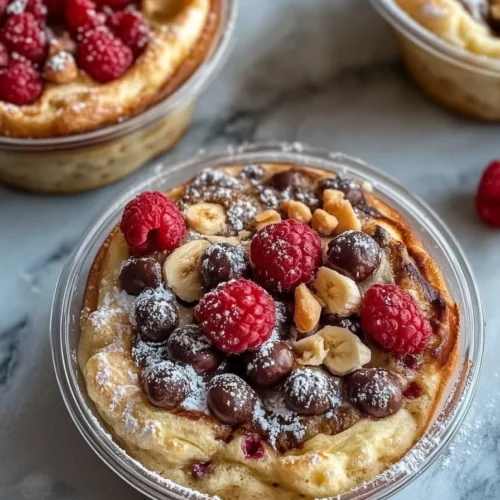
Step 5 – Customize Your Bowls
Here comes the fun part! You can fold in any mix-ins you prefer at this stage. Think about adding sugar-free chocolate chips, fruits, or even shredded carrots for a unique twist. Personalizing your bowls is part of the appeal!
Step 6 – Pour the Batter into Bowls
Evenly distribute the batter into multiple oven-safe glass bowls if you’re meal prepping. Make sure to leave a bit of space at the top for rising. You should get about 3-4 bowls, depending on the size.
Step 7 – Add Toppings
Feel free to sprinkle additional toppings on the batter before placing the bowls in the oven. This could be anything from cinnamon to nuts or indeed whatever captures your taste buds.
Step 8 – Bake to Perfection
Place the bowls in the oven and bake for about 20–22 minutes. Keep an eye on them during the last few minutes; you’ll want a golden top and a toothpick inserted in the center to come out clean when they’re done.
Step 9 – Cool Down
Once baked, remove the pancake bowls from the oven and let them cool for 5-10 minutes. This will help them firm up a bit more and makes them safer to handle.
Step 10 – Serve and Enjoy!
Finally, it’s time to serve! Top with extra yogurt, peanut butter, maple syrup, or whatever else you fancy for an added burst of flavor. Enjoy your delicious Baked Protein Pancake Bowls fresh or allow them to cool completely before storing them for later!
Serving Suggestions for Baked Protein Pancake Bowls – Great for Meal Prep and No Banana Needed!
Best Occasions to Serve This Dish
Baked Protein Pancake Bowls are versatile enough for any occasion. Consider serving them for:
- Everyday Breakfast: Kick off your day with a healthy start.
- Brunch Parties: Impress your guests with this simple yet impressive dish.
- Post-Workout Meal: Fuel your body with protein after a workout.
- Quick Snacks: Perfect for a mid-day pick-me-up when you need a boost.
What to Serve with It
Enhance your pancake bowls with these delightful pairings:
- Fresh fruits (e.g., berries, bananas, etc.)
- Maple syrup or honey
- Nut butters (e.g., almond or peanut butter)
- Whipped cream (regular or dairy-free)
- A sprinkle of nuts or seeds for crunch
Storing Baked Protein Pancake Bowls – Great for Meal Prep and No Banana Needed! Properly
Best Storage Practices
To keep your Baked Protein Pancake Bowls fresh, consider the following tips:
- Refrigerate: Store them in airtight containers in the fridge for up to 3-4 days.
- Freeze: For longer storage, you can freeze the cooled bowls wrapped well in plastic wrap and then in foil.
Reheating and Freezing Tips
- Thaw & Reheat: If frozen, thaw your bowls in the fridge overnight before reheating.
- Microwave: Heat them in the microwave for about 30-60 seconds or until warm throughout.
- Avoid overdoing it; otherwise, they may become rubbery.
Tips & Tricks for Baked Protein Pancake Bowls – Great for Meal Prep and No Banana Needed!
Mistakes to Avoid
- Overmixing: Mixing the batter too much can lead to tougher pancake bowls. Stir just enough to combine.
- Skipping the Baking Powder: Don’t forget the leavening agent; it’s crucial for that fluffy texture!
- Not Preheating the Oven: Ensure your oven is fully preheated to avoid uneven baking.
Extra Tips for Better Results
- Experiment with Flavors: Feel free to try out different extracts such as vanilla or almond for added depth.
- Use Lightly Sweetened Yogurt: This will bring an extra layer of flavor without overpowering the dish.
- Check for Doneness: Each oven varies, so keep an eye on your bowls for the perfect bake.
Recipe Variations of Baked Protein Pancake Bowls – Great for Meal Prep and No Banana Needed!
Creative Twists
- Chocolate Chip: Add sugar-free chocolate chips for a sweet treat.
- Spiced: Incorporate pumpkin spice or cinnamon for a seasonal flair.
- Nutty: Fold in chopped nuts, such as walnuts or pecans, for added texture and flavor.
Dietary Adjustments
- Gluten-Free: Use almond flour or a gluten-free flour mix in place of all-purpose flour.
- Vegan: Substitute the egg with a flax egg and use plant-based yogurt and milk.
- Dairy-Free: Opt for almond milk and non-dairy yogurt to suit your dietary requirements.
Conclusion about Baked Protein Pancake Bowls – Great for Meal Prep and No Banana Needed!
In summary, Baked Protein Pancake Bowls are not only delicious but also incredibly easy to make, adaptable for various diets, and perfect for meal prep. You can enjoy them for a quick breakfast or serve them at gatherings without any hassle. Plus, they remove the need for bananas, making them inclusive for everyone!
I encourage you to try this simple yet magical dish and share your results with family and friends. After all, who doesn’t love starting the day with a healthy and satisfying meal? Get ready to indulge in Baked Protein Pancake Bowls – great for meal prep and no banana needed!
FAQs about Baked Protein Pancake Bowls – Great for Meal Prep and No Banana Needed!
What if it doesn’t turn out right?
If your pancake bowls don’t turn out as expected, don’t fret! It could be due to overmixing or incorrect measurements. Keep practicing and adjusting as needed; soon you’ll have it just right!
Can I prepare it ahead of time?
Absolutely! You can prepare the batter the night before, store it in the fridge, and bake it in the morning. Alternatively, bake multiple bowls in advance and store them for later.
What are the best ingredient substitutions?
For eggs, try a flax egg. Use dairy-free yogurt and milk to cater to vegan diets. Almond or coconut flour can replace all-purpose flour for gluten-free options.
How long can it be stored?
In the fridge, these pancake bowls last about 3-4 days. If you freeze them properly, they can be stored for up to 3 months!
Can I use store-bought dough or crust?
This recipe is unique to the pancake bowl concept. It’s best to use the ingredients outlined for optimal results.
Is this recipe kid-friendly or family-appropriate?
Yes! Kids will love the flavor and fun aspect of personalized toppings. It’s a great way to get them involved in the kitchen.
Can I make this recipe allergen-free?
Certainly! Substitute the ingredients based on allergies—like using gluten-free flour, dairy-free yogurt, and plant-based milk—to cater to various allergies.
Now you’re all set to create your delicious Baked Protein Pancake Bowls – great for meal prep and no banana needed! Enjoy!
Baked Protein Pancake Bowls
Equipment
- Mixing Bowl
- Whisk
- Oven-Safe Glass Bowls
- Oven
Ingredients
- 1 egg
- 50 g yogurt vanilla or unflavored
- 70 ml milk soy, almond, or preferred type
- 35 g all-purpose flour
- 25 g protein powder any type
- 5 g zero-calorie granulated sweetener or 1 tsp alternative sweetener
- ½ tsp baking powder
- optional toppings fruits, nuts, cinnamon, or chocolate chips


Instructions
- Preheat oven to 180°C (356°F).
- In an oven-safe bowl, whisk egg, yogurt, and milk together.
- In another bowl, mix flour, protein powder, sweetener, and baking powder.
- Combine dry ingredients with wet mixture to form a smooth batter. Add more milk if needed.
- Fold in optional mix-ins such as fruits or chocolate chips.
- Pour batter into 3–4 small oven-safe bowls, leaving room for rising.
- Top with desired toppings like nuts or cinnamon.
- Bake for 20–22 minutes, until golden and a toothpick comes out clean.
- Cool slightly before serving. Enjoy warm or save for meal prep.