
This post may contain affiliate links. As an Amazon Associate, I earn from qualifying purchases at no extra cost to you.
Table of Contents
🍴 Top Kitchen Essentials You'll Love


Introduction to Chicken Chimichanga
Have you ever craved a delicious, crispy, and satisfying meal that’s easy to prepare at home? Look no further than the Chicken Chimichanga! This delightful dish is a crowd-pleaser and a fantastic way to transform simple ingredients into a mouthwatering experience. Imagine golden-brown tortillas wrapped around a savory filling of tender, seasoned chicken, fluffy rice, and zesty salsa. With each bite, you’ll enjoy the delightful crunch that contrasts beautifully with the warm, cheesy interior.
What makes Chicken Chimichanga so special is its versatility. You can customize the fillings to your taste preferences, swap out ingredients, and make it your own. Whether it’s a family dinner, a cozy night in, or a festive gathering, this recipe shines bright on any table. The beauty of Chicken Chimichanga lies not just in its taste, but in how simple it is to create a feast that looks and tastes gourmet without extensive culinary skills.
So, are you ready to dive into this culinary adventure? Grab your apron and let’s explore the world of Chicken Chimichanga together—it’s sure to become a staple in your kitchen rotation.
Key Benefits of Chicken Chimichanga
Why You’ll Love This Recipe
- Flavorful filling: The combination of chicken, rice, cheese, and salsa creates an irresistible blend of flavors.
- Simple preparation: This recipe is straightforward and doesn’t require advanced cooking skills.
- Customizable: Easily swap ingredients for your dietary needs or favorites.
- Perfect for meal prep: Make a batch ahead of time and enjoy throughout the week.
- Great for gatherings: Impress friends and family during parties or game nights.
What Makes It Stand Out
One standout feature of Chicken Chimichanga is its adaptability. Not only can you change the protein from chicken to beef, beans, or tofu, but the spices can also be adjusted to suit your preferences. This allows for endless variations, making it worthwhile for those who appreciate homemade meals. Additionally, the satisfaction of crisping the chimichangas to golden perfection makes each bite an indulgent treat.
These tasty tortilla pockets are perfect for various occasions. Whether celebrating a holiday, hosting a taco night, or meal prepping for the week, Chicken Chimichanga fits the bill. With its flavorful filling and satisfying crunch, it’s sure to appeal to everyone at the table.
Ingredients for Chicken Chimichanga
Complete Ingredient List with Measurements
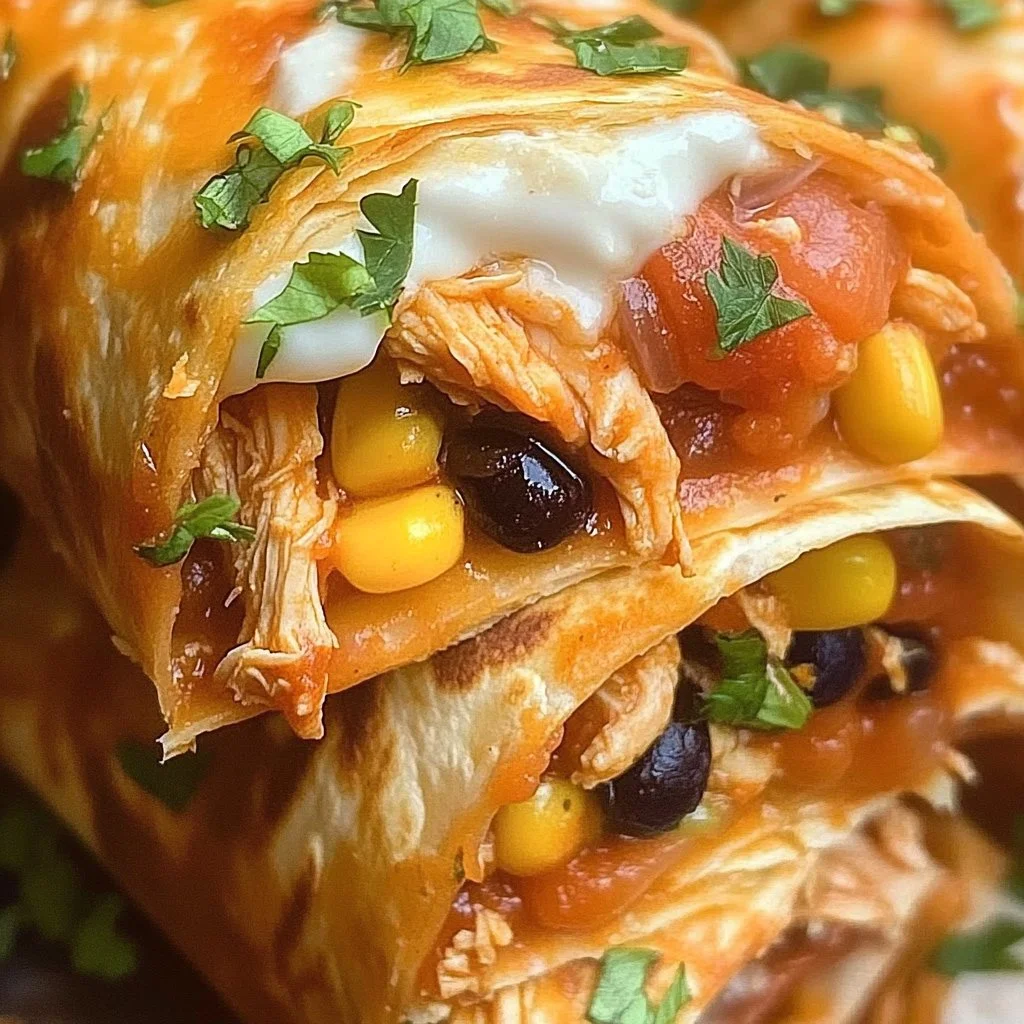
- 2 cups cooked shredded chicken
- 1 cup cooked rice
- 1 cup shredded cheddar cheese
- ½ cup canned black beans (drained and rinsed)
- ½ cup canned corn (drained)
- ½ cup salsa
- ¼ cup fresh cilantro (chopped)
- 4 large flour tortillas
- 2 tablespoons vegetable oil
Substitutes and Alternatives
If you have any dietary restrictions or are looking for alternatives, you can easily modify this recipe. For a healthier twist, consider using whole wheat or corn tortillas instead of flour. If you’re vegetarian or vegan, substitute the chicken with a mixture of sautéed vegetables or jackfruit. For lactose-free options, use dairy-free cheese or omit the cheese entirely.
Should you need a gluten-free version, try gluten-free tortillas, and if you’re avoiding beans, feel free to throw in some extra veggies or quinoa in its place. The beauty of Chicken Chimichanga lies in its flexibility, allowing you to enjoy it no matter your dietary needs.
How to Make Chicken Chimichanga – Step-by-Step Directions
Step 1 – Prepare Ingredients
Start by gathering all your ingredients. Ensure that your chicken is thoroughly cooked and shredded. Prepare the rice as well; fluff it with a fork for the best texture.
Step 2 – Cook the Base
In a large mixing bowl, combine the chicken, cooked rice, cheddar cheese, black beans, corn, salsa, and cilantro. Mix until everything is well incorporated. The mixture should be hearty, with each ingredient evenly distributed.
Step 3 – Assemble Tortillas
Lay each flour tortilla on a flat surface. Spoon an even portion of the filling into the center of each tortilla, making sure not to overfill.
Step 4 – Fold the Tortillas
Carefully fold in the sides of each tortilla over the filling. Then, roll the tortilla tightly from the bottom up to secure all the delicious contents within.
Step 5 – Heat Oil in Skillet
In a large skillet, heat the vegetable oil over medium heat. You want enough oil to lightly coat the bottom of the pan without drowning the chimichangas.
Step 6 – Fry the Chimichangas
Once the oil is hot, place the chimichangas seam-side down in the skillet. Fry them for about 3-4 minutes on each side or until they are golden brown and crispy.
Step 7 – Drain Excess Oil
After frying, remove the chimichangas from the skillet and place them on a paper towel-lined plate. This will absorb any excess oil and keep them light.
Step 8 – Bake (Optional)
For a healthier option, preheat your oven to 400°F (200°C). Brush the chimichangas lightly with oil and place them seam-side down on a baking sheet. Bake for 20-25 minutes, turning halfway through, until they are equally golden.
Step 9 – Cool and Serve
Let the chimichangas cool slightly before serving. This cooling period helps them maintain their shape, making them easier to handle.
Serving Suggestions for Chicken Chimichanga
Best Occasions to Serve This Dish
Chicken Chimichanga is perfect for various occasions. It’s a fantastic choice for casual family dinners or when hosting friends for a game night. Its convenient handheld format makes it an excellent option for picnics or potluck gatherings.
If you’re preparing for a special celebration, such as a birthday, don’t hesitate to make a large batch. Serve them up buffet-style, allowing guests to choose their toppings and sides. Regardless of the event, Chicken Chimichanga will be a definite highlight at mealtime.
What to Serve With It
Pair Chicken Chimichanga with refreshing sides to enhance your meal. Consider serving it with a crisp green salad tossed with lime vinaigrette or Mexican rice on the side. Additionally, toppings such as guacamole, sour cream, and salsa can elevate the flavors even more.
For a drink pairing, try serving them with margaritas or a simple, refreshing limeade. The bright flavors will balance well with the richness of the chimichangas, making for a delightful dining experience.
How to Store Chicken Chimichanga Properly
Best Storage Practices
To store leftover Chicken Chimichanga, allow them to cool completely. Place them in an airtight container in the refrigerator. They will typically keep well for 3-4 days. For longer storage, consider freezing them. Wrap each chimichanga in aluminum foil or plastic wrap before placing them in a freezer-safe bag or container.
Reheating and Freezing Tips
When you’re ready to enjoy your leftovers, reheating is simple. For the best results, use the oven. Preheat it to 350°F (175°C) and place the chimichangas on a baking sheet. Heat for about 10-15 minutes until warmed through and crisp.
If reheating from frozen, you can bake them directly without thawing, adding an extra 5-10 minutes to the baking time. Alternatively, microwaving them is a quick option, but be aware that this might remove some of the crispiness.
Tips & Tricks for Chicken Chimichanga
Mistakes to Avoid
1 – Overfilling the tortillas can cause the filling to spill out during cooking, leading to a messy outcome.
2 – Not sealing the chimichangas properly can result in the filling leaking out while frying.
3 – Frying at too high a temperature can burn the tortillas before the filling heats through.
4 – Using cold filling can lead to soggy tortillas; warm ingredients help maintain a crispy texture.
5 – Skipping the cooling time after frying can cause them to fall apart when serving.
Extra Tips for Better Results
Consider adding some spices to the filling mix for extra flavor. A pinch of cumin or chili powder can work wonders. Additionally, try garnishing with fresh avocado or sliced jalapeños for an exciting presentation and added taste. Remember that the best Chimichangas are hearty but well-balanced in flavor, so don’t be shy about experimenting with ingredients.
Recipe Variations of Chicken Chimichanga
Creative Twists
- Buffalo Chicken Chimichanga: Use shredded buffalo chicken mixed with cream cheese for a spicy spin.
- Breakfast Chimichanga: Fill with scrambled eggs, cheese, and breakfast sausage for a hearty breakfast option.
- Veggie Chimichanga: Substitute the chicken with sautéed bell peppers, onions, and mushrooms for a vibrant vegetarian option.
Dietary Adjustments
For a gluten-free version, use corn tortillas or gluten-free flour tortillas. If you’re looking to make it dairy-free, opt for dairy-free cheese or skip it altogether, relying on flavorful spices and salsas to enhance the overall taste.
Conclusion about Chicken Chimichanga
In conclusion, Chimichanga is not just a delightful meal; it’s an experience that brings flavor and satisfaction to your plate. With its crispy exterior and savory filling, it’s a dish that resonates with many people who appreciate hearty comfort food. Its simplicity, combined with the ease of customization, makes it an accessible option for both novice and seasoned cooks alike.
By following this recipe, you can create a memorable dish that can impress family and friends at any gathering. Whether you choose to fry or bake them, you’re sure to enjoy each bite of this irresistible recipe. So why wait? Grab your ingredients and start preparing Chimichanga today—it may just become a new family favorite!
FAQs about Chicken Chimichanga
Can I make Chicken Chimichanga ahead of time?
Yes, you can assemble the chimichangas ahead of time and store them in the refrigerator until ready to cook.
How should I store leftover Chicken Chimichanga?
Store leftovers in an airtight container in the refrigerator for up to 3-4 days. You can also freeze them for longer storage.
What are some good topping ideas for Chicken Chimichanga?
Top with guacamole, sour cream, salsa, chopped cilantro, or sliced jalapeños for added flavor and freshness.
Can I use raw chicken in this recipe?
It’s best to use cooked chicken to ensure the filling heats through properly without undercooking.
Is there a gluten-free option for Chicken Chimichanga?
Absolutely! You can use corn tortillas or gluten-free flour tortillas to make this dish gluten-free.
How do I reheat leftover Chicken Chimichanga?
For best results, reheat in the oven at 350°F (175°C) for about 10-15 minutes or microwave for a quicker option.
What can I add to the filling?
Feel free to customize the filling with your favorite ingredients, such as bell peppers, onions, or additional spices.
How spicy can I make Chicken Chimichanga?
You can adjust the spice level by adding hot sauce to the filling or using spicy salsa for a kick.
Can I make Chicken Chimichanga vegan?
Yes! Substitute the chicken with sautéed vegetables, beans, or tofu, and use dairy-free cheese.
What sides pair well with Chicken Chimichanga?
Serve with rice, salad, or corn on the cob for a complete meal that complements the chimichangas perfectly.

Chicken Chimichanga
Ingredients
Main Ingredients
- 2 cups cooked shredded chicken Ensure it’s thoroughly cooked and shredded.
- 1 cup cooked rice Fluff with a fork for best texture.
- 1 cup shredded cheddar cheese Can substitute with dairy-free cheese if needed.
- ½ cup canned black beans Drained and rinsed.
- ½ cup canned corn Drained.
- ½ cup salsa Choose your preferred spiciness.
- ¼ cup fresh cilantro Chopped.
- 4 large flour tortillas Can substitute with whole wheat or corn tortillas.
- 2 tablespoons vegetable oil For frying; can also use olive oil.


Instructions
Preparation
- Gather all ingredients, ensuring chicken is thoroughly cooked and shredded.
- Prepare the rice and fluff it with a fork.
Mix Filling
- In a large mixing bowl, combine the chicken, cooked rice, cheddar cheese, black beans, corn, salsa, and cilantro.
- Mix until everything is well incorporated.
Assemble Chimichangas
- Lay each tortilla on a flat surface and spoon an even portion of filling into the center.
- Fold in the sides over the filling, then roll tightly from the bottom up.
Cook Chimichangas
- Heat vegetable oil in a large skillet over medium heat.
- Carefully place chimichangas seam-side down in the skillet.
- Fry for 3-4 minutes on each side until golden brown and crispy.
Drain and Serve
- Remove chimichangas from skillet and place on a paper towel-lined plate to drain excess oil.
- Let cool slightly before serving.
Optional Baking
- For a healthier option, preheat the oven to 400°F (200°C).
- Brush chimichangas lightly with oil and place seam-side down on a baking sheet.
- Bake for 20-25 minutes, turning halfway through, until golden.