
This post may contain affiliate links. As an Amazon Associate, I earn from qualifying purchases at no extra cost to you.
Table of Contents
During the holiday season, few things evoke the warmth and nostalgia of baking Christmas Sugar Cookie Ornaments: 7 Joyful Memories to Bake. This delightful recipe isn’t just about cookies; it’s a celebration wrapped in flour and sugar, bringing family and friends together. Have you ever caught the intoxicating scent of freshly baked cookies wafting through a home, instantly transporting you back to childhood memories? These sugar cookies do just that, creating a beautiful connection between the past and present.
Making Christmas Sugar Cookie Ornaments can become a cherished tradition in your household. The joy of rolling out dough, cutting unique shapes, and decorating with colorful royal icing sparks creativity and camaraderie. Plus, the simplicity of the recipe allows bakers of all ages to join in on the fun, making it a great family activity. Imagine gathering around the kitchen table, laughter filling the air as everyone decorates their special cookies. What could be more delightful?
This recipe is special not just for its delicious flavor but also for its adaptability. You can personalize these ornaments to match the unique vibe of your holiday celebrations. Whether you favor classic designs, whimsical shapes, or colorful decorations, Christmas Sugar Cookie Ornaments become a blank canvas for your creativity. There’s something profoundly satisfying about transforming simple ingredients into edible art that enhances your holiday decor.
Every bite of these cookies is a reminder of festive gatherings, sparkling lights, and the warmth of shared moments. The buttery sweetness of each ornament will entice your taste buds and evoke joyful memories. Whether you enjoy them on a cozy evening with loved ones or gift them to friends, there’s no doubt that these sugar cookie ornaments will spread cheer far and wide.
🍴 Top Kitchen Essentials You'll Love


Key Benefits of Christmas Sugar Cookie Ornaments: 7 Joyful Memories to Bake
Why You’ll Love This Recipe
- Delicious Flavor: These cookies are buttery with a hint of sweetness, making them irresistible.
- Simplicity: With straightforward steps and common ingredients, this recipe is easy for all skill levels.
- Versatility: The base dough can be adapted for various flavors or shapes.
- Family-Friendly: Everyone from kids to grandparents can take part in the baking and decorating process.
- Perfect for Gifting: Decorated ornaments make lovely gifts or Christmas decorations, brightening up any home.
What Makes It Stand Out
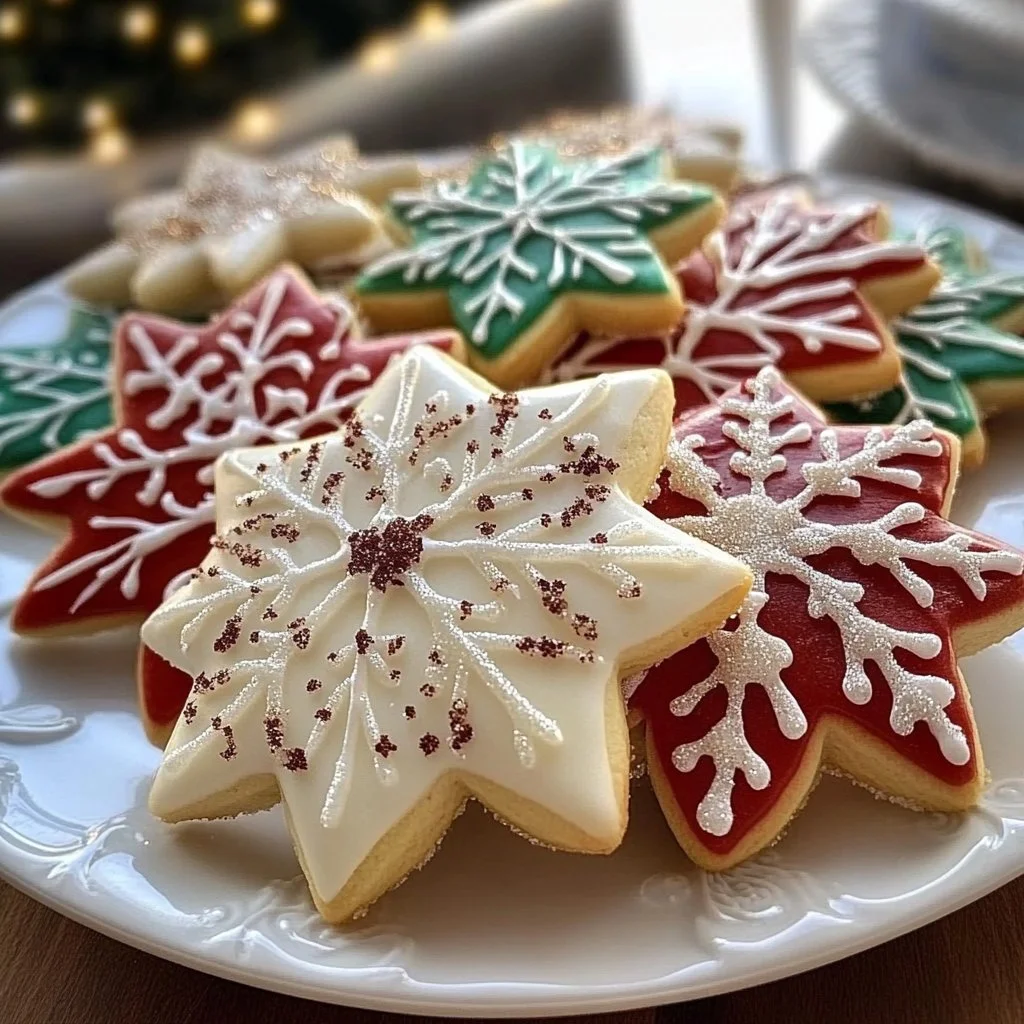
What sets Christmas Sugar Cookie Ornaments apart is their delightful originality. Unlike standard cookies, these are intended to be both decorative and delicious. Each ornament can be uniquely customized, whether through different shapes or personalized icing designs. You can craft stars, snowflakes, or traditional shapes that reflect the season.
Occasions for making these cookies are abundant. They shine at Christmas parties, bake sales, or family gatherings. Plus, they double as a fun activity, ensuring everyone, especially children, can engage in the spirit of the holidays. With every batch, you create lifelong memories tied to the joy of baking.
Ingredients for Christmas Sugar Cookie Ornaments: 7 Joyful Memories to Bake
Complete Ingredient List with Measurements
- 2 3/4 cups all-purpose flour
- 1 teaspoon baking soda
- 1/2 teaspoon baking powder
- 1 cup unsalted butter, softened
- 1 1/2 cups white sugar
- 1 egg
- 1 teaspoon vanilla extract
- 1/2 teaspoon almond extract
- 3 to 4 tablespoons milk
- Royal icing for decoration
These ingredients are perfect for crafting soft, delicious cookies that hold their shape. The balance of butter and sugar creates a tender yet sturdy texture.
Substitutes and Alternatives
If you or someone in your family has dietary restrictions, don’t worry! You can swap some ingredients easily. If you need a dairy-free option, consider using plant-based butter. For a gluten-free version, replace all-purpose flour with a good-quality gluten-free flour blend.
If you want a different flavor, try substituting almond extract for lemon or orange extract. This slight change can bring a fresh twist while maintaining the integrity of the cookie. The versatility makes this a perfect recipe to cater to various preferences.
How to Make Christmas Sugar Cookie Ornaments: 7 Joyful Memories to Bake – Step-by-Step Directions
Step 1 – Prepare Ingredients
Begin by gathering all your ingredients. Ensure everything is measured accurately for the best results. The process is easier when everything is ready to go.
Step 2 – Mix Dry Ingredients
In a large bowl, combine the flour, baking soda, and baking powder. Whisk them together until evenly distributed. This step is crucial for achieving the right texture in your cookies.
Step 3 – Cream Butter and Sugar
In another bowl, cream the softened butter and white sugar together until smooth and fluffy. This should take about 2–3 minutes using a hand mixer or stand mixer. The creaminess will trap air, making your cookies light and tender.
Step 4 – Add Eggs and Extracts
Beat in the egg, vanilla extract, and almond extract. Keep mixing until fully combined. The mixture should be silky and cohesive, filled with lovely aromas that brighten the room.
Step 5 – Incorporate Dry Ingredients
Gradually add the flour mixture to your creamed mixture. Mix on low speed just until the dough comes together. Be careful not to overmix, as this can toughen your cookies.
Step 6 – Adjust Dough Consistency
Add 3 to 4 tablespoons of milk as needed to achieve a workable dough consistency. It should be soft yet not sticky, making it easy to roll out without sticking to surfaces.
Step 7 – Roll Out Dough
On a floured surface, roll out the dough to about 1/4 inch thick. Cut out your ornament shapes using cookie cutters. Place them carefully on ungreased cookie sheets, leaving space between each one.
Step 8 – Bake the Cookies
Preheat your oven to 375°F (190°C) and bake the cookies for 8 to 10 minutes. They should be lightly golden around the edges but still soft in the center. Keep a close eye to avoid overbaking.
Step 9 – Cool the Cookies
Once baked, remove the cookies from the oven and allow them to cool on the sheets for a few minutes. Then, transfer them to wire racks to cool completely. This step is essential for the cookies to hold their shape for decorating.
Step 10 – Decorate with Royal Icing
Once cooled, it’s time to unleash your creativity! Decorate the cookies with royal icing. Pipe on designs or simply outline the edges. Let them dry completely before handling or storing.
Serving Suggestions for Christmas Sugar Cookie Ornaments: 7 Joyful Memories to Bake
Best Occasions to Serve This Dish
Christmas Sugar Cookie Ornaments shine at holiday get-togethers or office parties. Their festive shapes add to the ambiance, becoming a centerpiece on dessert tables. Whether you’re hosting a Christmas dinner or exchanging gifts, these cookies elevate any occasion.
They also make wonderful treats for Christmas morning. As the family gathers to open gifts, having cookies on hand adds a cozy, sweet touch to the celebrations. Imagine the smiles when everyone bites into a delicious ornament!
What to Serve With It
- Hot chocolate or coffee pairs perfectly with these cookies, enhancing the holiday experience.
- Fresh fruit such as strawberries or raspberries provides a nice balance of freshness.
- Consider serving with a scoop of vanilla ice cream for a wonderful dessert twist.
How to Store Christmas Sugar Cookie Ornaments: 7 Joyful Memories to Bake Properly
Best Storage Practices
To keep your cookies fresh, store them in an airtight container at room temperature. If properly sealed, they’ll stay good for up to a week. Place parchment paper between layers of cookies to prevent sticking.
If you have decorated cookies with royal icing, ensure they are completely dry before stacking. This will preserve your beautiful designs and keep them intact.
Reheating and Freezing Tips
If you need to freeze the cookies, they can last up to three months. Wrap them tightly in plastic wrap and then in aluminum foil before placing them in a freezer bag.
To enjoy frozen cookies, let them thaw at room temperature. If you want to warm them, pop them in a 350°F (175°C) oven for a few minutes. They’ll regain their soft texture!
Tips & Tricks for Christmas Sugar Cookie Ornaments: 7 Joyful Memories to Bake
Mistakes to Avoid
- Overmixing the Dough: This can lead to tough cookies. Mix just until the ingredients are combined.
- Not Measuring Ingredients Accurately: Use the right measuring tools to ensure the correct proportions.
- Skipping Cooling Time: Always let the cookies cool completely before decorating to prevent smudging.
- Baking on a Greased Cookie Sheet: These cookies are meant to bake on ungreased sheets, helping them keep their shape.
- Not Using Enough Flour When Rolling: Use enough flour to prevent sticking, but avoid over-flouring as it can alter the cookie texture.
Extra Tips for Better Results
- Chill the dough for 30 minutes before rolling it out for easier handling and less spreading during baking.
- Experiment with flavor extracts to create unique flavors like peppermint or lemon.
- When using royal icing, consider adding food coloring for festive designs and themes.
Recipe Variations of Christmas Sugar Cookie Ornaments: 7 Joyful Memories to Bake
Creative Twists
- Gingerbread Variation: Add ground ginger and cinnamon to the dough for a spicy twist.
- Decorative Sprinkles: Before baking, sprinkle colored sugar or nonpareils to add flair to your ornaments.
- Chocolate-Dipped Cookies: After decorating, dip half the cookie in melted chocolate for a delicious treat.
- Citrus Zest: Incorporate lemon or orange zest into the dough for a refreshing flavor boost.
Dietary Adjustments
- Vegan: Substitute eggs with flaxseed meal or applesauce and use vegan butter.
- Gluten-Free: Use a 1:1 gluten-free flour blend for an easy swap.
- Dairy-Free: Use non-dairy butter or coconut oil to accommodate dietary needs.
Conclusion about Christmas Sugar Cookie Ornaments: 7 Joyful Memories to Bake
There’s something magical about baking Christmas Sugar Cookie Ornaments: 7 Joyful Memories to Bake. The delightful aroma, the sweetness of each bite, and the joy shared with loved ones create lasting memories. Whether you’re a seasoned baker or just getting started, this recipe is accessible and rewarding.
As you pull these cookies from the oven and see the joy on your family’s faces, you’ll understand why this tradition is so beloved. So gather your ingredients, invite your family, and begin this wonderful baking journey. You won’t regret it.
FAQs about Christmas Sugar Cookie Ornaments: 7 Joyful Memories to Bake
Can I prepare it ahead of time?
Yes! You can make the dough ahead of time and refrigerate it for up to a week before baking.
Can I freeze it?
Absolutely! These cookies freeze well. Just make sure they’re stored properly to preserve their flavor.
How long does it last?
Stored in an airtight container, the cookies can last about a week at room temperature.
What are the best substitutions?
The recipe allows for various substitutions, including dairy-free butter and gluten-free flour.
Is this recipe family-friendly?
Yes, this recipe is perfect for family involvement and can be enjoyed by all ages.
Can I decorate in advance?
You can decorate the cookies in advance, but ensure the icing has dried completely before stacking.
What type of icing works best?
Royal icing is ideal for decorating and hardening, which helps the cookies maintain their shape.
How can I make them softer?
For softer cookies, avoid overbaking and consider adding a bit more butter.
Can I add additional flavors?
Certainly! Feel free to experiment with other flavor extracts to create your favorite combinations.
Are these cookies suitable for gifting?
Yes! Decorated and packaged cookies make lovely gifts that spread holiday cheer.

Christmas Sugar Cookie Ornaments
Ingredients
Cookie Base
- 2 ¾ cups all-purpose flour
- 1 teaspoon baking soda
- ½ teaspoon baking powder
- 1 cup unsalted butter, softened
- 1 ½ cups white sugar
- 1 large egg
- 1 teaspoon vanilla extract
- ½ teaspoon almond extract
- 3 to 4 tablespoons milk Add to adjust dough consistency
Decoration
- Royal icing for decoration


Instructions
Preparation
- Gather all your ingredients and measure them accurately.
- In a large bowl, combine the flour, baking soda, and baking powder. Whisk until evenly distributed.
- In another bowl, cream the softened butter and white sugar together until smooth and fluffy (about 2-3 minutes).
- Beat in the egg, vanilla extract, and almond extract until fully combined.
- Gradually add the flour mixture to the creamed mixture, mixing on low speed until the dough comes together.
- Add 3 to 4 tablespoons of milk as needed to achieve a workable dough consistency.
- On a floured surface, roll out the dough to about 1/4 inch thick. Cut out ornament shapes using cookie cutters.
Baking
- Preheat your oven to 375°F (190°C).
- Place the cut-out cookies on ungreased cookie sheets and bake for 8 to 10 minutes until lightly golden.
- Cool the cookies on the sheets for a few minutes, then transfer them to wire racks to cool completely.
Decoration
- Once cooled, decorate the cookies with royal icing as desired. Let them dry completely before handling.