
This post may contain affiliate links. As an Amazon Associate, I earn from qualifying purchases at no extra cost to you.
Table of Contents
🍴 Top Kitchen Essentials You'll Love


Introduction to Classic Homemade Honey Buns
Is there anything better than the aroma of freshly baked sweet buns wafting through your home? Classic Homemade Honey Buns are not only a treat for the taste buds but also a delightful experience for the senses. These golden-brown beauties are soft, fluffy, and generously drizzled with a honey glaze that makes them a perfect breakfast option, snack, or dessert.
What makes Classic Homemade Honey Buns truly special is their simplicity. You don’t need any fancy equipment or hard-to-find ingredients to whip them up. With just a handful of pantry staples, you can create a batch of buns that rival any from a bakery. The balance between the sweetness of honey and the warmth of cinnamon gives these buns a comforting flavor that is both nostalgic and pleasing.
Imagine gathering your friends and family around the table, enjoying warm Classic Homemade Honey Buns with a steaming cup of coffee or tea. They are perfect for Sunday brunch, special occasions, or even just a cozy family night in. Whether you’re a novice baker or a seasoned pro, this recipe is sure to become a staple in your kitchen.
Key Benefits of Classic Homemade Honey Buns
Why You’ll Love This Recipe
- Delicious Flavor: The combination of honey and cinnamon creates a delightful taste that lingers.
- Easy to Make: With straightforward steps, anyone can create these buns without hassle.
- Versatile Enjoyment: Perfect for breakfast, snacks, or dessert, these buns fit any occasion.
- Customizable: Add fillings or toppings to make them uniquely yours.
- Crowd-Pleaser: Everyone loves a freshly baked sweet treat, and these are no exception.
- Nostalgic Experience: The act of baking these buns can bring back fond memories for many.
What Makes It Stand Out
Classic Homemade Honey Buns stand out not just for their flavor but also for their adaptability. You can infuse different spices or add unique fillings, allowing you to customize them to match various tastes and preferences. Whether drizzled with extra honey or topped with nuts, each variation brings an exciting twist to the traditional bun.
Moreover, these buns can be a symbol of togetherness. Sharing warm Classic Homemade Honey Buns can foster a warm atmosphere, perfect for gatherings. Their simplicity allows anyone, irrespective of skill level, to participate in the joyful cooking experience.
Ingredients for Classic Homemade Honey Buns
Complete Ingredient List with Measurements
- 2 cups all-purpose flour
- 1/2 cup sugar
- 1/2 teaspoon salt
- 1 tablespoon cinnamon
- 1 packet (2 1/4 teaspoons) active dry yeast
- 3/4 cup milk
- 1/4 cup unsalted butter
- 1 large egg
- 1/2 cup honey
- 1/4 cup powdered sugar
- 1 tablespoon water
Substitutes and Alternatives
If you have dietary restrictions or preferences, you can easily modify this recipe. For example, if you’re looking to reduce sugar, you can substitute honey for a sugar alternative or use less sugar in the dough. For gluten-free versions, replace all-purpose flour with a gluten-free flour blend that contains xanthan gum, ensuring you achieve a similar texture.
For dairy-free options, consider using almond milk or coconut milk instead of regular milk, and replace unsalted butter with coconut oil or a dairy-free butter alternative. These swaps will help maintain the scrumptious taste while accommodating various dietary needs.
How to Make Classic Homemade Honey Buns – Step-by-Step Directions
Step 1 – Prepare Ingredients
Begin by measuring all your ingredients. Gather your flour, sugar, salt, cinnamon, active dry yeast, milk, butter, egg, honey, powdered sugar, and water. This will streamline the process and make mixing easier.
Step 2 – Cook the Base
In a large bowl, combine the flour, sugar, salt, and cinnamon. These will create the dough’s foundation. In a small saucepan, warm the milk and melt the butter together gently over low heat. Add the yeast to the warm milk mixture and let it sit for about 5 minutes until it bubbles.
Step 3 – Combine Ingredients
Pour the yeast mixture into the bowl with the dry ingredients. Crack and add the egg to the mixture. Use a spatula or your hands to mix until a dough forms, ensuring everything is well incorporated.
Step 4 – Knead the Dough
Transfer the dough to a floured surface and knead for about 5-7 minutes until smooth. The dough should be elastic and slightly tacky but not sticky. This step helps develop the gluten, ensuring your buns will rise beautifully.
Step 5 – Let It Rise
Place the kneaded dough into a greased bowl. Cover it with a cloth and let it rise in a warm, draft-free area for about 1 hour, or until it has doubled in size. This is a crucial step for achieving fluffy buns.
Step 6 – Roll Out the Dough
Once the dough has risen, punch it down gently to release air. Turn it out onto a floured surface and roll it out into a rectangle about 1/4 inch thick. The dough should be easy to handle and pliable.
Step 7 – Add Honey and Cinnamon
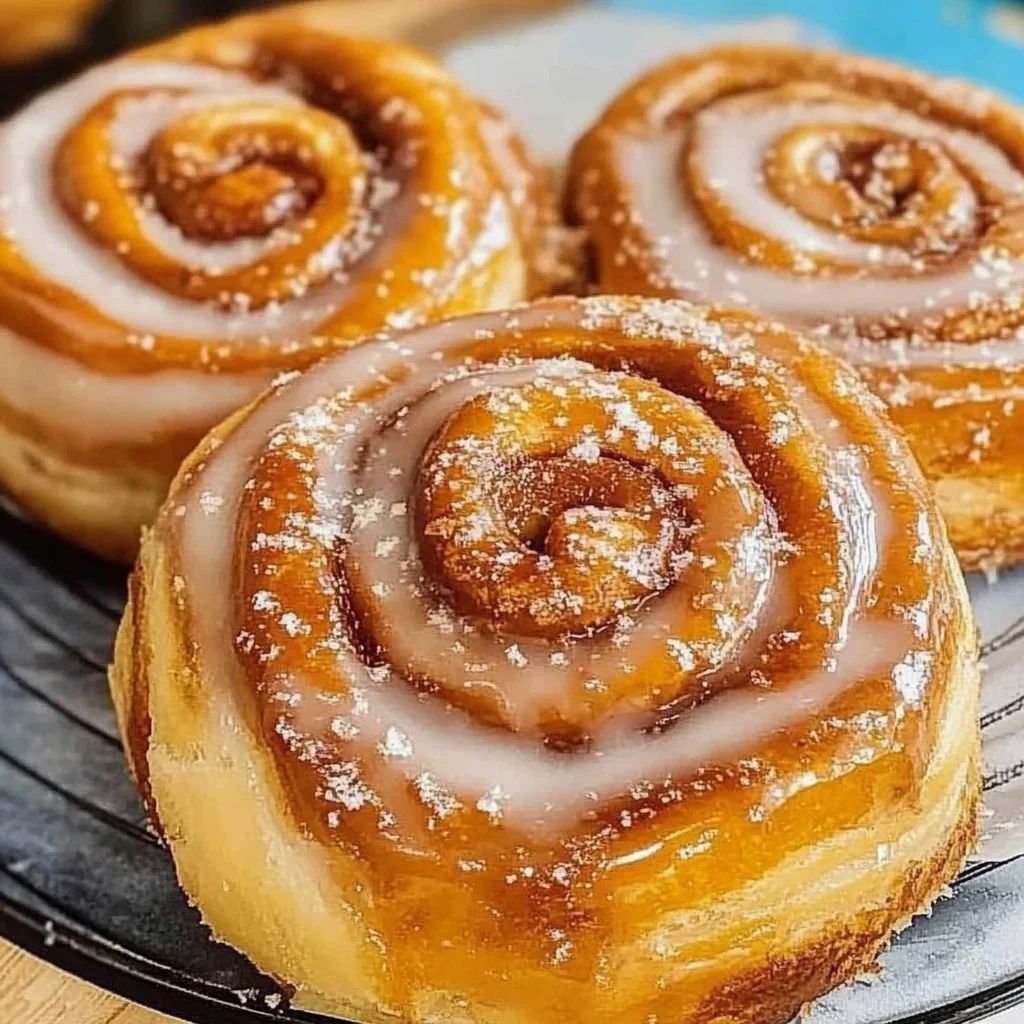
Spread honey generously over the rolled dough, covering it evenly. Sprinkle additional cinnamon and sugar over the honey to infuse every bite with flavor. This combination is what makes Classic Homemade Honey Buns so irresistible.
Step 8 – Shape and Slice the Buns
Starting from one edge, roll the dough tightly into a log. Once rolled, use a sharp knife to cut the log into even pieces, about 1 to 1.5 inches thick. Arrange the pieces in a greased baking dish, cut side up.
Step 9 – Second Rise
Cover the baking dish with a cloth and let the buns rise again for 30 minutes. This second rise helps the buns achieve the perfect fluffy texture, making them light and airy.
Step 10 – Bake the Buns
Preheat your oven to 350°F (175°C). Bake the honey buns for 20-25 minutes or until they are golden brown. You want them to have a nice color on top indicating they are thoroughly baked.
Serving Suggestions for Classic Homemade Honey Buns
Best Occasions to Serve This Dish
Classic Homemade Honey Buns are versatile enough to fit any occasion. They shine during family gatherings, where their delightful aroma can draw everyone in. On holiday mornings, these warm buns can add a sweet touch to your breakfast table, making your celebrations even more special.
Brunch with friends is another perfect occasion; serving warm Classic Homemade Honey Buns can spark joy and laughter. These buns can also be utilized as a comforting treat on rainy days when you want to indulge in something sweet.
What to Serve With It
Pair your Classic Homemade Honey Buns with a variety of options. A hot cup of coffee or tea is a perfect combination for breakfast or a light afternoon snack. If you want to indulge further, consider serving them with a dollop of whipped cream or a scoop of vanilla ice cream for dessert.
Fruits, like strawberries or orange slices, will add a refreshing balance to the sweetness. You can even create a brunch platter with fruits, cheeses, and jams along with your honey buns for a wonderful spread.
How to Store Classic Homemade Honey Buns Properly
Best Storage Practices
For storing your Classic Homemade Honey Buns, allow them to cool completely after baking. Place them in an airtight container to keep them fresh. They can be stored at room temperature for a couple of days or in the refrigerator for up to a week.
If you want to keep them longer, consider freezing them. Place the cooled buns in a freezer-safe bag or container, removing as much air as possible. They can be frozen for up to three months while maintaining quality.
Reheating and Freezing Tips
To reheat your Classic Homemade Honey Buns, place them in the microwave for 10-15 seconds for a quick serving. Alternatively, you can warm them in the oven at 350°F (175°C) for about 5-10 minutes. Be sure to cover them with aluminum foil to prevent them from drying out.
If you’ve frozen your buns, simply take out the desired number, let them thaw in the fridge overnight, and reheat as mentioned above. This way, you can enjoy homemade honey buns anytime you like.
Tips & Tricks for Classic Homemade Honey Buns
Mistakes to Avoid
- Overworking the Dough: Kneading too long can make the buns tough instead of soft. Aim for just 5-7 minutes.
- Not Giving Enough Time to Rise: Skipping the rise time can result in dense buns; always allow for proper fermentation.
- Incorrect Oven Temperature: Use an oven thermometer to ensure your oven heats accurately. Baking at the wrong temperature can affect the texture.
- Skipping the Honey Glaze: The glaze is essential for adding flavor and moisture; don’t bypass it!
- Cutting Uneven Pieces: This will result in inconsistent baking; use a sharp knife for even slices.
Extra Tips for Better Results
To elevate the flavor and texture, consider adding a sprinkle of sea salt to the dough. This contrast can enhance sweetness beautifully. Also, try incorporating bits of pecans or walnuts for a delightful crunch.
For an eye-catching presentation, drizzle the glaze artistically over the buns just before serving. You can even sprinkle some cinnamon sugar on top for an extra touch of sweetness and visual appeal.
Recipe Variations of Classic Homemade Honey Buns
Creative Twists
Embrace creativity by adding various fillings. Try spreading cream cheese or chocolate spread before rolling the dough for an indulgent twist. You might also include dried fruits like raisins or cranberries for an extra burst of flavor.
You can experiment with different spices too. A hint of nutmeg or cardamom can bring a new flavor profile, making your Classic Homemade Honey Buns even more unique.
Dietary Adjustments
If you’re looking for vegan options, substitute with plant-based butter and almond milk, and use a flaxseed mixture as an egg replacer. For gluten-free adjustments, ensure to use a quality gluten-free flour blend to mimic the consistency of traditional flour.
These adaptations make it easier for everyone to enjoy Classic Homemade Honey Buns, regardless of dietary restrictions.
Conclusion about Classic Homemade Honey Buns
Classic Homemade Honey Buns are more than just a recipe; they embody comfort, warmth, and joy. The easy-to-follow steps invite everyone to take part in the baking process, creating lasting memories in the kitchen. Their inviting aroma and delightful sweetness make them a favorite among family and friends alike.
Whether enjoyed fresh from the oven or stored for later, these buns remain a versatile treat ready for any occasion. Try baking a batch, and you’ll soon discover why Classic Homemade Honey Buns are cherished by many. This delightful recipe undeniably deserves a spot in your collection.
FAQs about Classic Homemade Honey Buns
Can I make Classic Homemade Honey Buns ahead of time?
Yes, you can prepare the dough a day in advance and store it in the refrigerator before the first rise. Simply allow it to come to room temperature before proceeding with the recipe.
How long will Classic Homemade Honey Buns stay fresh?
Stored in an airtight container at room temperature, the buns will stay fresh for about 2-3 days. For longer storage, keep them in the refrigerator or freeze them.
Can I freeze Classic Homemade Honey Buns?
Absolutely! Make sure to cool them completely before freezing. They can be stored in a freezer-safe container for up to three months.
How should I reheat Classic Homemade Honey Buns?
Reheat in the microwave for 10-15 seconds or in an oven at 350°F for about 5-10 minutes. Cover them to ensure they don’t dry out.
What if my dough doesn’t rise?
If the dough doesn’t rise, your yeast may be inactive. Ensure that your yeast is fresh and the warm liquid you use isn’t too hot, which can kill the yeast.
Can I add additional flavors to Classic Homemade Honey Buns?
Certainly! Consider adding vanilla extract, nuts, or even chocolate chips to enhance the flavor profile of your buns.
Is it possible to make these buns dairy-free?
Yes, you can replace the milk with a plant-based alternative and use dairy-free butter for the dough.
What is the best way to glaze Classic Homemade Honey Buns?
Mix powdered sugar, honey, and a little water to achieve your desired consistency. Drizzle this glaze over warm buns for a delightful finish.
Are Classic Homemade Honey Buns suitable for breakfast?
Yes! These buns are perfect for breakfast, offering a sweet treat to start your day and pairing wonderfully with coffee or tea.
How can I customize my Classic Homemade Honey Buns?
You can try different spices, fillings, or toppings! Adding cream cheese, fruits, or changing the glaze can provide exciting variations.

Classic Homemade Honey Buns
Ingredients
Dough Ingredients
- 2 cups all-purpose flour Can substitute with gluten-free flour blend.
- ½ cup sugar Can reduce or substitute with a sugar alternative.
- ½ teaspoon salt
- 1 tablespoon cinnamon
- 1 packet active dry yeast (2 1/4 teaspoons)
- ¾ cup milk Can use almond or coconut milk for dairy-free option.
- ¼ cup unsalted butter Can substitute with coconut oil for dairy-free option.
- 1 large egg Can use flaxseed mixture as an egg replacer for vegan option.
- ½ cup honey
Glaze Ingredients
- ¼ cup powdered sugar
- 1 tablespoon water Adjust for desired consistency.

Instructions
Preparation
- Measure all ingredients including flour, sugar, salt, cinnamon, yeast, milk, butter, egg, honey, powdered sugar, and water.
- In a large bowl, combine flour, sugar, salt, and cinnamon.
- In a small saucepan, warm milk and melt butter over low heat. Add yeast to warm milk and let sit for about 5 minutes until bubbly.
- Pour yeast mixture into dry ingredients bowl. Add egg and mix until dough forms.
- Transfer dough to a floured surface and knead for about 5-7 minutes until smooth and elastic.
Rising
- Place kneaded dough in a greased bowl, cover it, and let rise in a warm area for about 1 hour or until doubled in size.
Shaping
- Punch down risen dough and roll out to a rectangle about 1/4 inch thick.
- Spread honey over the rolled dough and sprinkle with cinnamon and sugar.
- Roll the dough tightly into a log and cut into pieces of about 1 to 1.5 inches thick.
- Arrange pieces in a greased baking dish cut side up.
- Cover the baking dish and let buns rise again for 30 minutes.
Baking
- Preheat oven to 350°F (175°C). Bake buns for 20-25 minutes or until golden brown.
- While buns bake, mix powdered sugar with water for glaze if desired.