
This post may contain affiliate links. As an Amazon Associate, I earn from qualifying purchases at no extra cost to you.
Table of Contents
🍴 Top Kitchen Essentials You'll Love


Introduction about Halloween Cauldron Cookies
Halloween is just around the corner! Are you excited to bring the spirit of this spooky season into your kitchen? Imagine the joy of baking a batch of delicious cookies that not only taste great but also look frightfully fun. If you’re searching for a simple yet captivating treat to celebrate, let me introduce you to the wonder of Halloween Cauldron Cookies.
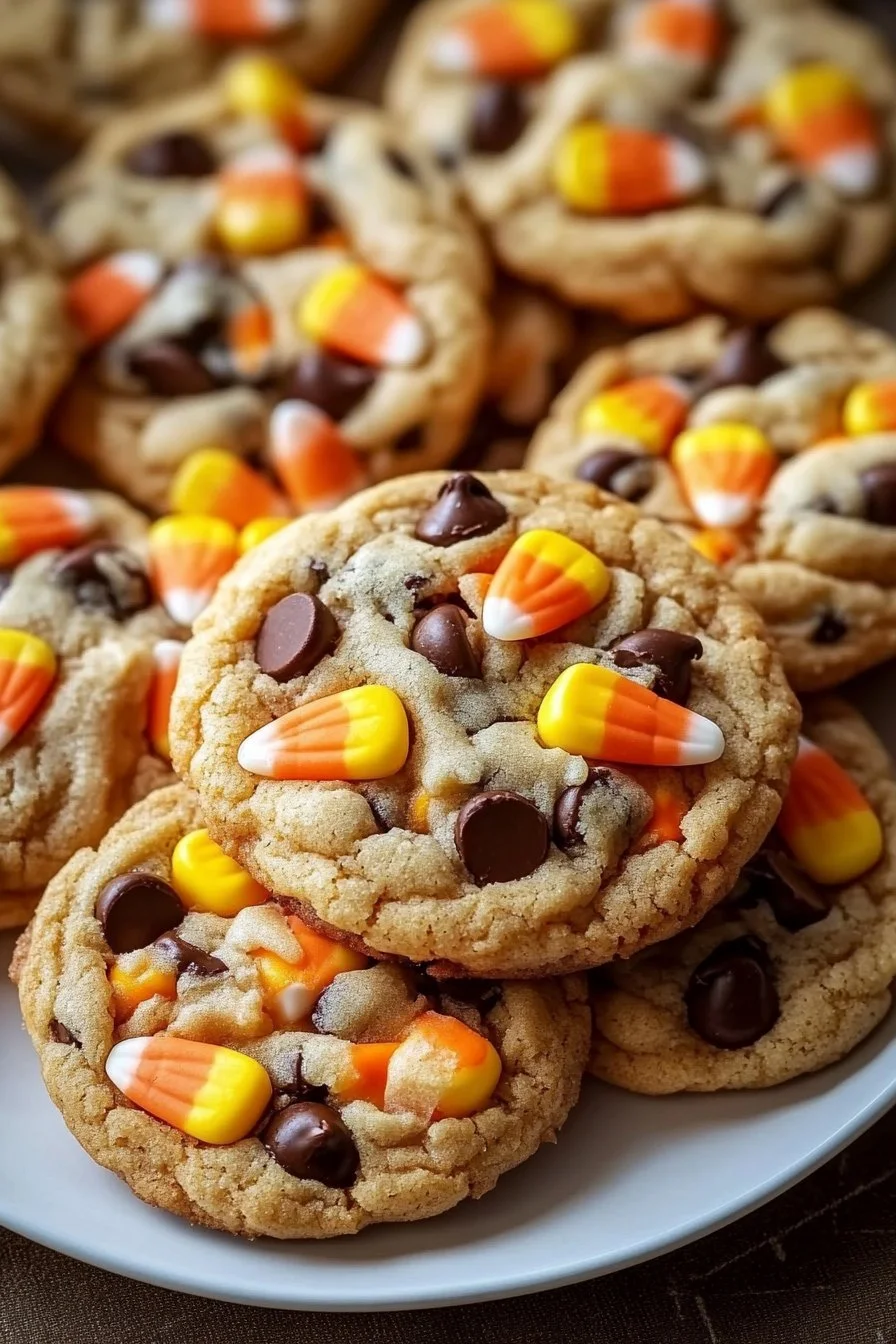
These cookies are a delightful mix of sweetness and whimsy. The combination of chocolate chips, vibrant candy corn, and a soft, chewy texture makes them irresistible. But, what truly sets them apart is how easy they are to make! You don’t need to be a pro in the kitchen to whip these up. In fact, this recipe is designed with simplicity in mind, making it perfect for family baking sessions.
So, whether you’re hosting a Halloween party, looking for a fun activity with your kids, or simply craving a sweet treat, these Halloween Cauldron Cookies are just what you need. Let’s dive into the delightful details that make this recipe an absolute must-try!
Key Benefits of Halloween Cauldron Cookies
Why You’ll Love This Recipe
Here are just a few reasons why Halloween Cauldron Cookies will enchant you and your loved ones:
- Delicious Taste: These cookies blend sweet and savory flavors, thanks to the chocolate chips and candy corn.
- Easy to Make: Step-by-step instructions ensure even novice bakers can enjoy making them.
- Quick Preparation: Bake a batch in about 30 minutes — perfect for last-minute celebrations!
- Family-Friendly Fun: Kids will love helping out, from mixing the ingredients to decorating with candy.
- Customizable: You can tailor the recipe to suit your family’s taste preferences.
- Festive Appeal: The bright colors and fun shapes make these cookies irresistible for any Halloween gathering.
What Makes It Stand Out
Halloween Cauldron Cookies aren’t just any ordinary treat. They capture the spirit of Halloween with their whimsical design and seasonal flavors. The use of candy corn not only adds a delightful crunch but also sprinkles a touch of festive spirit to every bite.
You can easily customize these cookies to make them your own. Want to add some spooky spices like cinnamon or nutmeg? Go for it! Prefer to use white chocolate chips instead of chocolate? That works too! The originality of this recipe lets you experiment while still sticking to the classic cookie base that everyone loves.
Ingredients for Halloween Cauldron Cookies
Complete Ingredient List with Measurements
To create your very own Halloween Cauldron Cookies, you’ll need the following ingredients:
- 2 1/2 cups all-purpose flour
- 1 teaspoon baking soda
- 1/2 teaspoon salt
- 1 cup unsalted butter, softened
- 1 cup granulated sugar
- 1 cup brown sugar, packed
- 1 teaspoon vanilla extract
- 2 large eggs
- 1 cup chocolate chips
- Candy corn for decoration
Substitutes and Alternatives
If you have dietary preferences or allergies, don’t worry! Here are some common substitutions you can consider:
- Gluten-Free: Use a gluten-free flour blend in place of all-purpose flour.
- Dairy-Free: Substitute unsalted butter with a dairy-free alternative, such as coconut oil or a plant-based butter.
- Sugar Alternatives: You can replace granulated sugar with coconut sugar for a healthier option.
- Vegan: Use flax eggs (1 tablespoon flaxseed meal + 2.5 tablespoons water for each egg) instead of regular eggs, and choose a vegan butter substitute.
How to Make Halloween Cauldron Cookies – Step-by-Step Directions
Let’s get right into making your Halloween Cauldron Cookies! Follow these clear, numbered steps to create your spooky treats.
Step 1 – Prep Your Workspace and Ingredients
Before you dive into baking, take a moment to gather your ingredients and clear your workspace. Here’s what to do:
- Gather all ingredients: Make sure nothing is missing!
- Preheat your oven to 350°F (175°C). This ensures your cookies bake evenly.
- Line your baking sheet with parchment paper. It makes for easy cleanup and prevents sticking.
Step 2 – Whisk Dry Ingredients
In a mixing bowl, you’ll want to combine your dry ingredients. This ensures even distribution of baking soda and salt.
- Add 2 1/2 cups of all-purpose flour.
- Incorporate 1 teaspoon of baking soda and 1/2 teaspoon of salt.
- Whisk the mixture together until it’s well combined.
Step 3 – Cream the Butters and Sugars
In a separate bowl, you’re going to make a sweet, creamy mixture!
- Add 1 cup of unsalted butter and let it soften if it hasn’t already.
- Include 1 cup of granulated sugar and 1 cup of brown sugar (packed).
- Pour in 1 teaspoon of vanilla extract.
- Cream the ingredients together until they are light and fluffy — about 2-3 minutes.
Step 4 – Beat in the Eggs
Now, it’s time to incorporate the eggs into your sugary mixture.
- Add 2 large eggs, one at a time, mixing thoroughly after each addition.
- Ensure each egg is fully incorporated before adding the next.
Step 5 – Combine Dry and Wet Ingredients
It’s all coming together now!
- Gradually add the flour mixture to the wet ingredients.
- Stir gently until everything is well combined. Avoid over-mixing; you want your cookies to stay soft!
Step 6 – Fold in the Chocolate Chips
Next, let’s add some chocolatey goodness!
- Gently fold in 1 cup of chocolate chips.
- Ensure the chips are evenly distributed throughout the dough.
Step 7 – Drop Spoonfuls onto Baking Sheet
Now it’s time to shape your cookies:
- Using a spoon or cookie scoop, drop spoonfuls of dough onto the lined baking sheet, spacing them about 2 inches apart.
- Don’t worry about shaping them perfectly — they’ll spread and look delightful once baked.
Step 8 – Bake the Cookies
Now comes the exciting part: baking!
- Slide the baking sheet into your preheated oven.
- Bake for 10-12 minutes or until the edges are golden brown but the centers still look soft.
- Remember, the cookies will continue to cook slightly after being removed from the oven.
Step 9 – Add Candy Corn Decoration
Once you take the cookies out of the oven, don’t wait too long to decorate!
- While the cookies are still warm, gently press a few pieces of candy corn into the top of each cookie.
- This creates an adorable decoration that adds a fun pop of color!
Step 10 – Cool and Enjoy
Your Halloween Cauldron Cookies are almost ready!
- Allow the cookies to cool on the baking sheet for a few minutes before transferring them to a wire rack to cool completely.
- Once cooled, they’re ready to be enjoyed — or shared at your festivities!
Serving Suggestions for Halloween Cauldron Cookies
Best Occasions to Serve This Dish
Halloween Cauldron Cookies are perfect for various occasions, such as:
- Halloween Parties: They make a fantastic spooky treat that guests will love!
- School Events: A great addition to classroom Halloween celebrations.
- Family Gatherings: Everyone, young and old, will enjoy these festive cookies.
- Gifts: Package them up as delightful gifts for friends or neighbors!
What to Serve With It
Pair your Halloween Cauldron Cookies with these delicious accompaniments:
- Milk: A classic pairing that complements the sweetness.
- Hot Chocolate: Perfect for an added cozy touch during chilly evenings.
- Coffee or Tea: This adds a sophisticated twist for adult gatherings.
- Ice Cream: Try serving warm cookies with a scoop of vanilla or pumpkin spice ice cream.
Storing Halloween Cauldron Cookies Properly
Best Storage Practices
To keep your cookies fresh and delicious:
- Room Temperature: Store cookies in an airtight container at room temperature. They should last about 4-5 days.
- Refrigerate: You can also refrigerate for extended freshness, but let them return to room temperature before serving for the best flavor.
Reheating and Freezing Tips
Freezing: If you want to make a big batch, you can freeze the dough:
- Scoop the dough onto a baking sheet. Place the cookie balls in the freezer until solid, then transfer them to a freezer-safe bag.
- To bake from frozen, simply add a couple of extra minutes to the baking time.
Reheating: If cookies lose some of their freshness:
- Microwave one cookie for about 10-15 seconds for a warm treat.
- Avoid overheating to prevent them from becoming hard or chewy.
Tips & Tricks for Halloween Cauldron Cookies
Mistakes to Avoid
When making your Halloween Cauldron Cookies, keep these common pitfalls in mind:
- Overmixing: Mixing the dough too much can result in tough cookies. Stir just until combined.
- Too Much Flour: Measure flour correctly. Scoop it into your measuring cup and level off, don’t pack it down.
- Baking Time: Keep an eye on the cookies as they bake! They might need less time, depending on your oven.
Extra Tips for Better Results
- Chill the Dough: If you have time, refrigerate the dough for 30 minutes before baking. It improves texture and flavor.
- Upgrade with Spices: Add a pinch of cinnamon or nutmeg to the dough for a warm, seasonal flavor.
- Experiment with Toppings: Try using seasonal sprinkles or chopped nuts for extra texture.
Recipe Variations of Halloween Cauldron Cookies
Creative Twists
Make these Halloween Cauldron Cookies your own with these fun variations:
- Add Nuts: Chopped walnuts or pecans can add a lovely crunch.
- Seasonal Flavors: Consider incorporating pumpkin puree or spices to bring in that fall vibe.
- Fun Shapes: Use cookie cutters to make different spooky shapes rather than just round cookies.
Dietary Adjustments
For those with specific dietary needs:
- Gluten-Free: Use gluten-free flour and check that your chocolate chips are gluten-free.
- Dairy-Free/Vegan: Substitute all dairy ingredients with plant-based alternatives, including the butter and eggs.
- Refined Sugar-Free: Opt for natural sweeteners like maple syrup or honey instead.
Conclusion about Halloween Cauldron Cookies
In conclusion, Halloween Cauldron Cookies are a delightful fusion of sweetness and festive fun. With their simple recipe and captivating appearance, these cookies will not only satisfy your sweet tooth but also bring a smile to anyone who enjoys them.
Whether you’re planning a gathering, looking to spice up your family’s routine, or just want to indulge in a tasty treat, these cookies are your go-to solution. So, roll up your sleeves, gather your ingredients, and let the spirit of Halloween inspire you in the kitchen. I can’t wait for you to try out these Halloween Cauldron Cookies and share your experience!
FAQs about Halloween Cauldron Cookies
What if it doesn’t turn out right?
Don’t worry! Baking can be trial and error. If the cookies spread too much, it may be due to too much butter or not enough flour. In the future, try chilling your dough before baking!
Can I prepare it ahead of time?
Absolutely! You can make the dough in advance and refrigerate it for up to 2 days. It’s also great to freeze the shaped cookie dough for a few weeks.
What are the best ingredient substitutions?
You can swap all-purpose flour for gluten-free flour, use coconut sugar in place of granulated sugar, and substitute plant-based butter for a dairy-free option.
How long can it be stored?
These cookies can be kept in an airtight container at room temperature for about 4-5 days. They also freeze well for longer storage!
Can I use store-bought dough or crust?
While this recipe is designed for homemade dough, store-bought cookie dough can be a quick alternative if you’re short on time; just ensure it’s Halloween-friendly!
Is this recipe kid-friendly or family-appropriate?
Definitely! The fun prep process and the cute end result make these cookies great for kids and family gatherings.
Can I make this recipe allergen-free?
Yes! With the right substitutions (gluten-free flour, egg replacements, etc.), these cookies can be made allergen-friendly for safe enjoyment by everyone.
Final Thoughts
Dive into the Halloween spirit with these simple, fun, and utterly delicious Halloween Cauldron Cookies! With endless ways to customize and a recipe that’s beginner-friendly, you’ll have a spooktacular treat that everyone will love. Happy baking!

Halloween Cauldron Cookies
Ingredients
Main Ingredients
- 2 ½ cups all-purpose flour
- 1 teaspoon baking soda
- ½ teaspoon salt
- 1 cup unsalted butter, softened
- 1 cup granulated sugar
- 1 cup brown sugar, packed
- 1 teaspoon vanilla extract
- 2 large eggs
- 1 cup chocolate chips
- Candy corn for decoration


Instructions
Preparation
- Preheat your oven to 350°F (175°C) and line a baking sheet with parchment paper.
- Gather all ingredients.
Mix Dry Ingredients
- In a mixing bowl, whisk together the flour, baking soda, and salt.
Cream Butters and Sugars
- In a separate bowl, cream the softened butter, granulated sugar, brown sugar, and vanilla extract until light and fluffy.
Add Eggs
- Beat in the eggs one at a time, mixing thoroughly after each addition.
Combine Mixtures
- Gradually add the dry mixture to the wet ingredients, stirring gently until combined.
Fold in Chocolate Chips
- Fold in the chocolate chips until evenly distributed.
Shape Cookies
- Drop spoonfuls of dough onto the lined baking sheet, spacing them about 2 inches apart.
Bake
- Bake for 10-12 minutes until edges are golden brown and centers still look soft.
Decorate
- While warm, gently press a few pieces of candy corn into the top of each cookie.
Cool and Enjoy
- Allow cookies to cool on the baking sheet before transferring to a wire rack to cool completely.