

Table of Contents
As the leaves turn orange and nights grow longer, there’s a certain magic in the air that signals the arrival of Halloween. What better way to celebrate this hauntingly delightful season than with a batch of scrumptious Halloween Cookies? These treats aren’t just for the kids; adults can’t resist the charm either! Have you ever wondered how just a few simple ingredients can create something so special? With this beloved recipe, you’ll discover that magic!
Halloween Cookies can light up any gathering, bringing joy to celebrations of all kinds—whether it’s a spooky gathering, a school party, or a cozy night in. The best part? Making these cookies is easy and loads of fun! So, roll up your sleeves, gather your little goblins and witches, and get ready to bake something extraordinary. Let’s dive into the world of Halloween cookies and uncover all the delightful secrets that lie within!
Key Benefits of Halloween Cookies
Why You’ll Love This Recipe
- Unforgettable flavor: The combination of vanilla and almond extracts gives these cookies a delicate, aromatic taste that everyone will adore.
- Ease of preparation: With straightforward steps, you’ll whip up these treats in no time!
- Speedy baking time: These cookies will be ready to devour in about 10 minutes, so it’s perfect for last-minute celebrations.
- Family-friendly fun: Get the whole family involved! Decorating is a fantastic way to create cherished memories together.
- Customizable design: Don’t have all the sprinkles? No problem! You can decorate them however you please—let your creativity shine!
- Seasonal spirit: Embrace the seasonal theme! These cookies are perfect for Halloween parties and can double as festive decorations.
What Makes It Stand Out
Halloween Cookies are not just any cookies; they bring the allure of the spooky season directly to your kitchen. The fun doesn’t end with just making them—the real excitement starts when it comes to decorating! Kids and adults alike can unleash their creativity, turning plain cookies into charming ghosts, spooky pumpkins, or even haunted houses.
These cookies capture the essence of Halloween with their delightful taste and whimsical designs. They are the perfect treat for gatherings, trick-or-treating, or simply indulging on a chilly autumn evening while curled up on the couch. The recipe itself is versatile, enabling you to customize flavors, colors, and decorations to suit your tastes. So, whether you’re a baking novice or a seasoned pro, Halloween Cookies will become a cherished tradition in your home.
Ingredients for Halloween Cookies
Complete Ingredient List with Measurements
To make these delightful Halloween Cookies, you will need the following:
- 2 3/4 cups all-purpose flour
- 1 teaspoon baking soda
- 1/2 teaspoon baking powder
- 1 cup unsalted butter, softened
- 1 1/2 cups white sugar
- 1 egg
- 1 teaspoon vanilla extract
- 1/2 teaspoon almond extract
- 3 to 5 cups confectioners’ sugar (for icing)
- Decorating icing (store-bought or homemade)
- Food coloring
- Sprinkles (assorted Halloween-themed)
Substitutes and Alternatives
If you have dietary restrictions or preferences, you’ll be glad to know there are plenty of ways to adjust this recipe without sacrificing flavor!
- Gluten-free: Use a gluten-free all-purpose flour blend instead of regular flour.
- Dairy-free: Replace the unsalted butter with a dairy-free butter alternative or coconut oil.
- Vegan: Substitute the egg with a flaxseed egg (1 tablespoon of ground flaxseed mixed with 3 tablespoons of water).
- Sugar alternatives: Coconut sugar or stevia can be used to lower the calorie content, but be mindful of the adjustments needed for sweetening ratios.
- Spice it up: Try adding a pinch of cinnamon or nutmeg for a hint of warmth that perfectly complements fall flavors.
How to Make Halloween Cookies – Step-by-Step Directions
Creating Halloween Cookies is a joyful experience, and with these detailed steps, you’re sure to bake a batch that impresses everyone! Let’s get started!
Step 1 – Prep Your Workspace and Ingredients
Before diving into baking, it’s essential to ensure that your workspace is clean and organized. Start by:
- Gathering all your ingredients and tools—mixing bowls, baking sheets, glass for flattening, and measuring cups.
- Preheating your oven to 375°F (190°C). This ensures it’s at the right temperature for baking.
Step 2 – Prepare the Dry Ingredients
In a small bowl:
- Combine 2 3/4 cups of all-purpose flour, 1 teaspoon of baking soda, and 1/2 teaspoon of baking powder.
- Stir well to ensure the ingredients are evenly distributed. This simple step helps achieve a uniform texture in your cookies.
Step 3 – Cream Together Butter and Sugar
In a large mixing bowl:
- Begin creaming 1 cup of softened unsalted butter and 1 1/2 cups of white sugar together until the mixture is light and fluffy.
- This usually takes about 2-3 minutes on medium speed if using a mixer. You’ll notice a change in color, indicating air has been incorporated.
Step 4 – Incorporate Eggs and Extracts
Once the butter and sugar are smooth:
- Beat in 1 egg, followed by 1 teaspoon of vanilla extract and 1/2 teaspoon of almond extract.
- Mix until fully combined, ensuring the egg is thoroughly incorporated for a well-emulsified mixture.
Step 5 – Gradually Add Dry Ingredients
Now, slowly blend the prepared dry ingredients into the creamed mixture:
- Do this a cup at a time to avoid flour flying everywhere!
- Mix gently until just combined; you don’t want to over-mix at this stage.
Step 6 – Shape the Dough
Once your dough is formed:
- Scoop rounded teaspoonfuls of dough and roll them into balls with your hands.
- Arrange these on ungreased baking sheets, leaving about 2 inches of space between each ball, as they will spread as they bake.
Step 7 – Flatten the Dough Balls
To give your cookies a nice shape:
- Dip the bottom of a glass into sugar and gently flatten each dough ball.
- This not only gives them a lovely look, but the sugar adds a subtle sweetness to the base of the cookies.
Step 8 – Bake to Perfection
Place the baking sheets in your preheated oven:
- Bake for 8 to 10 minutes, or until the edges turn golden brown. The centers may look slightly soft—that’s perfect, as they will continue to firm up as they cool.
- Check on them around the 8-minute mark, as oven times can vary.
Step 9 – Cool Down
Once baked:
- Allow the cookies to cool on the baking sheets for five minutes before transferring them to a wire rack.
- This cooling time is crucial as it helps avoid breaking the cookies while moving them.
Step 10 – Decorate Your Halloween Cookies
Now comes the best part—decorating!
- Use 3 to 5 cups of confectioners’ sugar combined with a bit of water or milk to create a simple icing. Add food coloring to create ghoulish shades of orange, green, or purple!
- Get creative! Use the icing and sprinkles to transform your cookies into ghosts, pumpkins, or any other spooky design you can think of!
Serving Suggestions for Halloween Cookies
Best Occasions to Serve This Dish
Halloween Cookies are extremely versatile and can be enjoyed in various settings:
- Halloween parties: They make a perfect treat for any spooky soirée!
- School celebrations: Kids will love bringing these festive cookies to share with classmates.
- Family gatherings: Delight your loved ones by making them part of your Halloween tradition.
- Cookie decorating stations: Set up a decorating station where guests can personalize their own cookies—everyone loves a hands-on experience!
What to Serve with It
These cookies pair beautifully with a variety of drinks and accompaniments:
- Milk (classic choice—always a winner!)
- Hot cocoa for that extra warmth on chilly evenings.
- Apple cider—a seasonal favorite that complements fall flavors.
- Coffee or tea for adults who want a cozy treat with their beverages.
- Whipped cream or frosting for a more indulgent option.
Storing Halloween Cookies Properly
Best Storage Practices
To keep your Halloween Cookies fresh and delicious:
- Store cookies in an airtight container at room temperature. This helps retain their moisture and texture.
- They will stay fresh for about 1 week.
If you want to store them for longer:
- Freezing: Place cooled cookies in a single layer in a freezer bag or container, separated by parchment paper to prevent sticking. They can last up to 3 months in the freezer.
Reheating and Freezing Tips
When it’s time to enjoy your stored cookies:
- To thaw, let them sit at room temperature for about 30 minutes, or pop them in the microwave for just a few seconds to warm them up.
- Avoid reheating in the oven as it can change the texture if they’re already baked; the key is to thaw without further cooking.
Tips & Tricks for Halloween Cookies
Mistakes to Avoid
- Overmixing the dough can lead to tough cookies. Mix just until combined.
- Not preheating the oven could affect baking time and the cookie shape.
- Ignoring cooling time might lead to breakage when transferring cookies.
Extra Tips for Better Results
- Use a cookie scoop for uniform cookie sizes—this ensures they bake evenly.
- Chill the dough for about 30 minutes before rolling if you find it too sticky. This makes handling easier!
- Have fun with your designs! Don’t feel pressured to make them perfect; embrace the homemade charm.
Recipe Variations of Halloween Cookies
Creative Twists
- Add-ins: Chopped nuts, chocolate chips, or dried fruits can add delightful flavors.
- Flavor variations: Try adding a pinch of pumpkin spice or cinnamon for a lovely autumn twist.
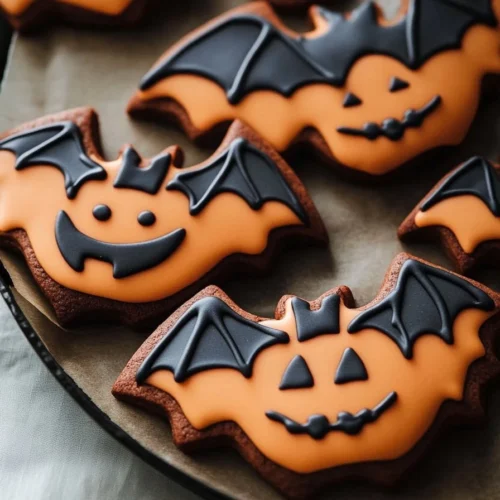
- Festive themes: Shape the cookies into bats, witches, or autumn leaves to make them even more seasonal.
Dietary Adjustments
- For those needing gluten-free options, use certified gluten-free flour.
- Making them dairy-free or vegan is easy with simple substitutions, as mentioned earlier!
Conclusion about Halloween Cookies
These Halloween Cookies are more than just a treat; they are a celebration of creativity, flavor, and the spirit of Halloween itself! With their delightful taste and the joy of decorating, they offer an easy path to creating cherished memories with family and friends. So, gather your ingredients, follow the steps, and bring these spooky delights to life in your kitchen!
We can’t wait to hear how your batch turns out! Enjoy the baking process and relish the laughter and joy that come from sharing your homemade Halloween Cookies with everyone around you!
FAQs about Halloween Cookies
What if it doesn’t turn out right?
If your Halloween Cookies don’t turn out as expected, don’t be disheartened! Baking can be tricky. Check if you might have over-mixed or added too much flour. Experimenting with the recipe will help you learn what works best!
Can I prepare it ahead of time?
Absolutely! You can make the dough ahead of time and refrigerate it for up to 3 days. Just remember to let it sit at room temperature for 10-15 minutes before rolling it out to make your cookies.
What are the best ingredient substitutions?
Some excellent substitutions include using coconut oil in place of butter, flax eggs for those following a vegan diet, or gluten-free flour for those with gluten sensitivity. Get creative based on what you have on hand!
How long can it be stored?
When stored in an airtight container, your Halloween Cookies can last about a week at room temperature. If you decide to freeze them, they can be good for about three months.
Can I use store-bought dough or crust?
Certainly! Store-bought dough can save time. Just make sure to follow baking instructions specific to that dough, and remember that decorating will still make your treats festive.
Is this recipe kid-friendly or family-appropriate?
Yes! This recipe is perfect for all ages—kids love decorating cookies and can enjoy eating them too. The simple ingredients make it safe and accessible for family baking.
Can I make this recipe allergen-free?
Definitely! With a few careful substitutions, such as using gluten-free flour and dairy alternatives, you can easily create allergen-free Halloween Cookies that everyone can enjoy!
By following this detailed recipe and guide, you’re set to create delicious and memorable Halloween Cookies that will surely delight family and friends. Happy baking, and may your Halloween be spooky and sweet!
Halloween Cookies
Equipment
- Mixing Bowls
- Electric Mixer
- Baking Sheets
- Measuring cups and spoons
- Glass (for flattening dough)
Ingredients
Cookie Dough
- 2 ¾ cups all-purpose flour
- 1 tsp baking soda
- ½ tsp baking powder
- 1 cup unsalted butter softened
- 1 ½ cups white sugar
- 1 large egg
- 1 tsp vanilla extract
- ½ tsp almond extract
Decorations
- 3-5 cups confectioners’ sugar for icing
- decorating icing store-bought or homemade
- food coloring
- Halloween-themed sprinkles
Instructions
- Preheat oven to 375°F (190°C). Prepare ungreased baking sheets.
- In a small bowl, whisk flour, baking soda, and baking powder.
- In a large bowl, cream butter and sugar until light and fluffy.
- Beat in egg, vanilla extract, and almond extract.
- Gradually blend dry ingredients into the butter mixture until combined.
- Roll dough into teaspoon-sized balls and place on baking sheets, spacing 2 inches apart.
- Dip the bottom of a glass in sugar and gently flatten each dough ball.
- Bake 8–10 minutes or until cookies are golden at the edges. Cool completely on a wire rack.
- Decorate cooled cookies with icing, food coloring, and sprinkles to create fun Halloween designs.