
This post may contain affiliate links. As an Amazon Associate, I earn from qualifying purchases at no extra cost to you.
Table of Contents
🍴 Top Kitchen Essentials You'll Love


Introduction about HALLOWEEN CRINKLE COOKIES: The Ultimate Spooky Treat
Halloween is just around the corner, and if you’re looking to impress your friends, family, or even trick-or-treaters with a delightful spooky treat, look no further! Allow me to introduce you to the magical world of HALLOWEEN CRINKLE COOKIES: The Ultimate Spooky Treat. Have you ever craved something that’s both fun to make and scrumptious to eat? These cookies are not just aesthetically pleasing; they’re a delicious blend of rich cocoa with a whimsical twist, ideal for the Halloween season.
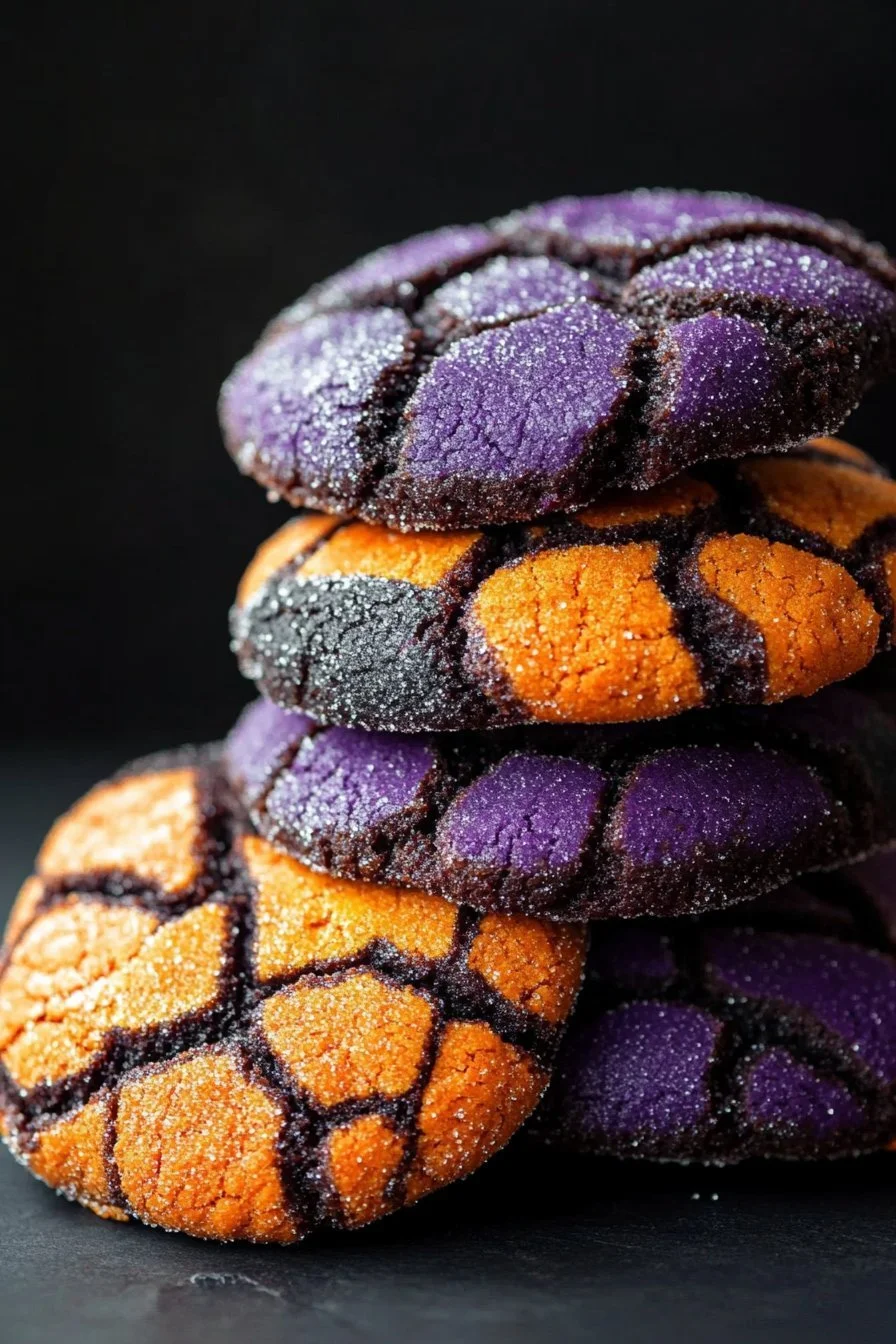
What makes these HALLOWEEN CRINKLE COOKIES so special? They’re soft, chewy, and coated in powdered sugar, giving them that classic crinkle look. Plus, you can customize the colors to match your Halloween theme — think bright orange, deep black, or mysterious purple! So whether you’re hosting a Halloween party, looking for treats for a school event, or simply want to indulge, you’ll find that this recipe is incredibly easy to follow.
Let’s dive in and explore the enchanting world of HALLOWEEN CRINKLE COOKIES: The Ultimate Spooky Treat!
Key Benefits of HALLOWEEN CRINKLE COOKIES: The Ultimate Spooky Treat
Why You’ll Love This Recipe
- Irresistible Taste: The combination of cocoa powder and sugar provides a rich, decadent flavor that will satisfy your chocolate cravings.
- Simple Preparation: With straightforward steps and common ingredients, you’ll whip these up in no time — no gourmet skills needed!
- Family-Friendly Fun: This recipe is perfect for involving kids in baking, making it a fun family activity.
- Versatile Colors: Use gel food coloring to create festive colors that will dazzle your guests.
- Chewy and Soft Texture: These cookies are perfectly soft and chewy, with a delightful powdery finish.
- Quick Bake Time: They only take 10-12 minutes to bake, perfect for when you need a speedy dessert fix!
What Makes It Stand Out
HALLOWEEN CRINKLE COOKIES really shine in their creative presentation. They embody the spirit of Halloween while providing a delightful treat that appeals to people of all ages.
Not to mention, they’re easy to customize! You can use different colors of gel food coloring to create unique themes for various occasions. For instance, orange for Halloween, red for Valentine’s Day, or even pastel shades for spring festivities. It’s like having a canvas to showcase your creativity, making them a hit at any celebration.
Ingredients for HALLOWEEN CRINKLE COOKIES: The Ultimate Spooky Treat
Complete Ingredient List with Measurements
For the perfect HALLOWEEN CRINKLE COOKIES: The Ultimate Spooky Treat, you’ll need the following ingredients:
- 1 cup all-purpose flour (or 1:1 gluten-free baking blend)
- ½ cup unsweetened cocoa powder
- 1 tsp baking powder
- ¼ tsp salt
- 1 cup granulated sugar
- ¼ cup vegetable oil (or melted coconut oil)
- 2 large eggs (room temperature)
- 1 tsp vanilla extract
- Gel food coloring (choose orange, purple, or black)
- ½ cup powdered sugar (for rolling)
Substitutes and Alternatives
If you have dietary needs or allergies, don’t worry! Here are a few substitution options:
- Gluten-Free: Substitute all-purpose flour with a 1:1 gluten-free baking blend.
- Dairy-Free: Use melted coconut oil instead of vegetable oil.
- Vegan: Swap eggs with a flaxseed meal mixture (1 tbsp flaxseed meal + 2.5 tbsp water per egg) and use dairy-free chocolate.
How to Make HALLOWEEN CRINKLE COOKIES: The Ultimate Spooky Treat – Step-by-Step Directions
Step 1 – Prep Your Workspace and Ingredients
Before you dive into baking, it’s essential to set up your workspace. Gather all your ingredients and tools:
- Preheat your oven to 350°F (175°C).
- Line your baking sheets with parchment paper to prevent sticking.
Step 2 – Whisk the Dry Ingredients
In a mixing bowl, whisk together the following dry ingredients until well combined:
- 1 cup all-purpose flour
- ½ cup unsweetened cocoa powder
- 1 tsp baking powder
- ¼ tsp salt
This step helps ensure that even distribution of the leavening agent (baking powder) and cocoa powder.
Step 3 – Combine the Wet Ingredients
In a separate bowl, beat together these ingredients until smooth:
- 1 cup granulated sugar
- ¼ cup vegetable oil (or melted coconut oil)
- 2 large eggs (room temperature)
- 1 tsp vanilla extract
Using a hand mixer or whisk, ensure the mixture is well-mixed and creamy.
Step 4 – Add Gel Food Coloring
Now, it’s time to add some Halloween flair! Mix in a few drops of your chosen gel food coloring into the wet mixture, stirring until you achieve your desired color intensity.
Step 5 – Combine Dry and Wet Ingredients
Gently stir the dry mixture into the wet mixture until just combined. It’s best to use a spatula and make sure not to overmix, as this can affect the cookie texture.
Step 6 – Chill the Dough
To enhance the flavor and texture of your cookies, wrap your dough in plastic wrap or place it in an airtight container and chill it in the fridge for at least 1 hour. This step is crucial for preventing the cookies from spreading too much during baking.
Step 7 – Roll the Dough Balls
Once the dough is chilled, take it out and portion out small amounts. Roll them into 1-inch balls.
Step 8 – Coat in Powdered Sugar
In a shallow bowl, spread the ½ cup powdered sugar. Roll each dough ball in the powdered sugar, ensuring they are well coated. This sugar coating will crinkle and create that iconic look while baking!
Step 9 – Bake the Cookies
Place the powdered sugar-coated dough balls on your lined baking sheets, spacing them about 2 inches apart. Bake them in the preheated oven for 10-12 minutes. You want them to remain soft, so be careful not to over-bake.
Step 10 – Cool and Enjoy!
Once baked, let your cookies cool on the baking sheets for about 5 minutes. Then, transfer them to a cooling rack to cool completely. Enjoy your HALLOWEEN CRINKLE COOKIES: The Ultimate Spooky Treat while they’re still warm or save them for later!
Serving Suggestions for HALLOWEEN CRINKLE COOKIES: The Ultimate Spooky Treat
Best Occasions to Serve This Dish
These delightful cookies are perfect for:
- Halloween Parties: An essential treat for any spooktacular gathering!
- School Events: Treats for bake sales or Halloween festivities at school.
- Family Gatherings: Perfect for sharing with family during any festive occasion.
What to Serve With It
Enhance your cookie experience by pairing them with:
- Milk
- Coffee or Tea
- Ice Cream (vanilla or pumpkin spice)
- Whipped Cream
These beverages and toppings add an extra layer of indulgence, making your treat even more unforgettable.
Storing HALLOWEEN CRINKLE COOKIES: The Ultimate Spooky Treat Properly
Best Storage Practices
To keep your HALLOWEEN CRINKLE COOKIES fresh, follow these tips:
- Room Temperature: Store cookies in an airtight container at room temperature for up to 1 week.
- Refrigeration: If you prefer, you can also store them in the refrigerator for up to 10 days.
- Freezing: For long-term storage, freeze the cookies. Place layers of cookies in an airtight container, separated by parchment paper, to avoid sticking.
Reheating and Freezing Tips
- Reheating: If you prefer warm cookies later, reheat them in the microwave for 10-15 seconds. Avoid overheating, as they can become tough.
- Thawing: To defrost frozen cookies, leave them at room temperature for about 30 minutes before enjoying.
Tips & Tricks for HALLOWEEN CRINKLE COOKIES: The Ultimate Spooky Treat
Mistakes to Avoid
- Overmixing: This can lead to tougher cookies. Mix just until combined.
- Skipping Chilling: Chilling the dough is vital. Skipping this step can cause the cookies to spread too much.
- Overbaking: Keep an eye on your cookies. They should look slightly underbaked when you take them out.
Extra Tips for Better Results
- Use Quality Ingredients: Fresh eggs and high-quality cocoa can elevate flavor.
- Decorate: Consider adding festive sprinkles or chocolate drizzle after baking for a fun touch.
- Taste Test: If you’re unsure of the color intensity, taste-test a tiny bit of the dough. Remember, it will bake slightly darker.
Recipe Variations of HALLOWEEN CRINKLE COOKIES: The Ultimate Spooky Treat
Creative Twists
- Add-Ins: Consider adding chocolate chips, nuts, or Halloween-themed sprinkles to the dough for added flavor and texture.
- Flavored Variations: Experiment with seasonal flavors like peppermint in winter or pumpkin spice in the fall.
Dietary Adjustments
- Gluten-Free: Use the gluten-free baking blend mentioned earlier.
- Dairy-Free: Use dairy-free options for oils and toppings, or skip the powdered sugar for a simpler finish.
- Vegan: Opt for flaxseed eggs or a nut butter to replace the eggs.
Conclusion about HALLOWEEN CRINKLE COOKIES: The Ultimate Spooky Treat
In conclusion, HALLOWEEN CRINKLE COOKIES: The Ultimate Spooky Treat are not just a fun treat for Halloween; they’re a canvas for creativity, easy to make, and delicious enough to please any crowd. Their chewy texture and festive look make them the perfect addition to any celebration or casual snack at home.
With simple ingredients and fun variations, I invite you to try your hand at making these delightful cookies. I can’t wait to hear your feedback, so please share your experiences or any creative twists you come up with. Happy baking!
FAQs about HALLOWEEN CRINKLE COOKIES: The Ultimate Spooky Treat
What if it doesn’t turn out right?
Don’t panic! Baking can sometimes be unpredictable. If your cookies spread too much, it might be due to the dough being too warm. Ensure you chill the dough adequately next time.
Can I prepare it ahead of time?
Absolutely! You can prepare the dough in advance and store it in the fridge for up to 2 days or freeze it for longer storage. Just remember to let it soften slightly before baking.
What are the best ingredient substitutions?
Some great alternatives include using coconut oil for a dairy-free option, using gluten-free baking blends, or flaxseed meals in place of eggs for a vegan version.
How long can it be stored?
Stored properly in an airtight container or the fridge, these cookies can last up to 1 week at room temperature or 10 days in the fridge. Frozen cookies can last up to 3 months.
Can I use store-bought dough or crust?
While homemade is best for flavor and texture, if you’re short on time, using store-bought cookie dough would work, though you may miss out on the custom colors and festive charm!
Is this recipe kid-friendly or family-appropriate?
Definitely! This recipe is perfect for baking with kids. It allows them to be creative with colors and shapes, making it a fun family activity!
Can I make this recipe allergen-free?
Yes! With easy substitutions for gluten, dairy, and eggs, this recipe can be adapted to suit many dietary restrictions. Choose the alternatives that work best for your needs!

HALLOWEEN CRINKLE COOKIES
Ingredients
Dry Ingredients
- 1 cup all-purpose flour or 1:1 gluten-free baking blend
- ½ cup unsweetened cocoa powder
- 1 tsp baking powder
- ¼ tsp salt
Wet Ingredients
- 1 cup granulated sugar
- ¼ cup vegetable oil or melted coconut oil
- 2 large eggs room temperature
- 1 tsp vanilla extract
- Gel food coloring choose orange, purple, or black
Coating
- ½ cup powdered sugar for rolling


Instructions
Preparation
- Preheat your oven to 350°F (175°C) and line your baking sheets with parchment paper.
Mix Dry Ingredients
- In a mixing bowl, whisk together the all-purpose flour, cocoa powder, baking powder, and salt until well combined.
Mix Wet Ingredients
- In a separate bowl, beat together the sugar, vegetable oil, eggs, and vanilla extract until smooth.
Add Color
- Add a few drops of gel food coloring to the wet mixture and mix until you achieve your desired color intensity.
Combine Mixtures
- Gently stir the dry mixture into the wet mixture until just combined using a spatula. Avoid overmixing.
Chill Dough
- Wrap the dough in plastic wrap or place in an airtight container and chill in the fridge for at least 1 hour.
Form Cookies
- After chilling, take the dough out and roll it into 1-inch balls.
- Roll each ball in powdered sugar to coat thoroughly.
Bake
- Place the coated balls on the lined baking sheets, spaced about 2 inches apart, and bake for 10-12 minutes.
Cool
- Let cookies cool on the baking sheets for 5 minutes before transferring them to a cooling rack to cool completely.