
This post may contain affiliate links. As an Amazon Associate, I earn from qualifying purchases at no extra cost to you.
Table of Contents
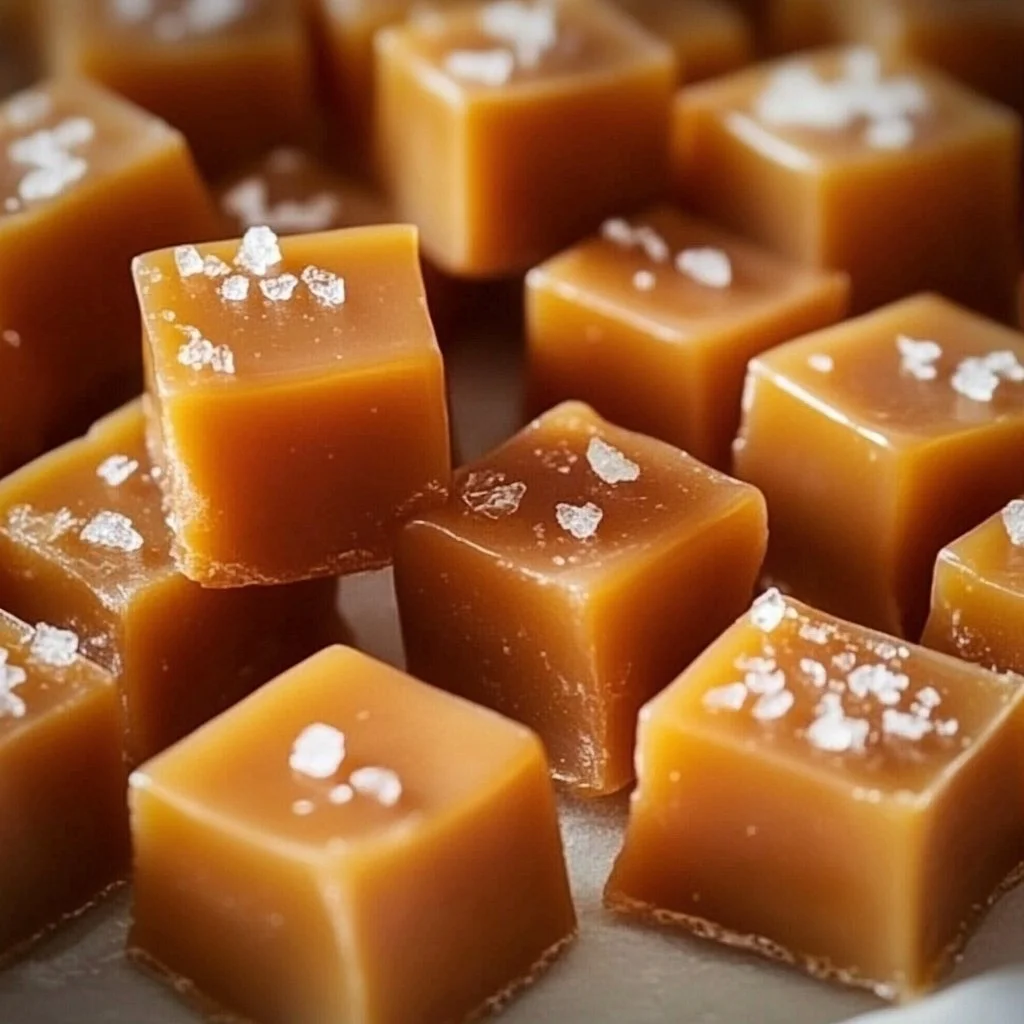
Are you ready to indulge in the delightful world of Homemade Caramels: 5 Simple Steps to Sweet Bliss? These golden, chewy confections are not just candies; they’re a heartwarming creation that brings smiles to faces of all ages. Picture this – the moment you take that first bite, the rich, creamy texture melts in your mouth, and your taste buds dance with joy. Homemade caramels are simple to make, profoundly satisfying, and perfect for sharing! Why spend a fortune on store-bought caramels when you can easily whip up a batch at home?
Whether you’re planning a cozy family gathering, decorating for the holidays, or looking for a thoughtful handmade gift, these homemade caramels are the answer. The beauty of this recipe lies in its ease and simplicity! With just a handful of common ingredients, you can create an irresistible treat that’s sure to impress. Let’s dive into the sweet pleasure of Homemade Caramels: 5 Simple Steps to Sweet Bliss!
🍴 Top Kitchen Essentials You'll Love


Key Benefits of Homemade Caramels: 5 Simple Steps to Sweet Bliss
Making Homemade Caramels: 5 Simple Steps to Sweet Bliss offers more than just a tasty treat; it provides a rich experience with numerous benefits. Here’s why you’ll love this recipe:
Why you’ll love this recipe
- Easy to Follow: Simple steps make it beginner-friendly and fun!
- Customizable: Change ingredients and flavors to suit your taste.
- Perfect for Gifting: Homemade treats are always cherished gifts.
- Cost-Effective: Save money while enjoying gourmet-level caramels.
- Satisfying Experience: There’s something special about creating treats from scratch.
What makes it stand out
This Homemade Caramels: 5 Simple Steps to Sweet Bliss recipe stands out because of its delightful balance of flavors and textures. Unlike many store-bought options that can be overly sweet or packed with preservatives, these caramels allow you to control the sweetness and tailor it to your preferences. You can infuse them with seasonal ingredients like sea salt for a gourmet touch or add seasonal spices for a unique twist.
The versatility of this recipe also offers endless possibilities. Feel free to adapt it for the time of year, incorporating flavors like pumpkin spice in the fall or peppermint during the winter holidays. Homemade caramels are not just a treat; they are a canvas for your culinary creativity!
Ingredients for Homemade Caramels: 5 Simple Steps to Sweet Bliss
Ready to gather your ingredients? Making Homemade Caramels: 5 Simple Steps to Sweet Bliss is straightforward. Here’s what you’ll need to bring this sweet indulgence to life.
Complete ingredient list with measurements
- 1 cup granulated sugar
- 1/2 cup unsalted butter
- 1/2 cup heavy cream
- 1/4 cup light corn syrup
- 1 tsp vanilla extract
- 1/4 tsp salt
Substitutes and alternatives
- Granulated Sugar: Use coconut sugar for a deeper flavor.
- Unsalted Butter: Substitute with coconut oil for a dairy-free version.
- Heavy Cream: Try canned coconut milk for a vegan option.
- Light Corn Syrup: Honey or agave nectar can replace corn syrup.
- Vanilla Extract: Maple extract or almond extract can add a unique flavor.
How to Make Homemade Caramels: 5 Simple Steps to Sweet Bliss – Step-by-Step Directions
Now that you have your ingredients, let’s get started on making your Homemade Caramels: 5 Simple Steps to Sweet Bliss. Follow this straightforward guide, and you’ll be on your way to caramel perfection!
Step 1: Gather Your Equipment (5 minutes)
Before you start, gather all your necessary equipment. You’ll need:
- A heavy-bottomed saucepan
- A wooden spoon or a heat-resistant spatula
- A candy thermometer
- A greased pan for cooling
Step 2: Combine Sugar, Corn Syrup, and Butter (4 minutes)
In your saucepan, combine:
- 1 cup granulated sugar
- 1/4 cup light corn syrup
- 1/2 cup unsalted butter
Place the saucepan over medium heat. Stir the mixture gently until the sugar melts and the butter emulsifies. This is the foundation of your caramel, so make sure everything is well combined.
Step 3: Bring to a Boil (6 minutes)
Continue to cook the mixture, allowing it to boil without stirring. Keep a close eye on it. You’re aiming for it to reach 245°F (118°C), which is the sweet spot for chewy caramels. The bubbling mixture should turn into a beautiful golden hue.
Step 4: Monitor the Temperature (5 minutes)
As it approaches the target temperature, use your candy thermometer meticulously. The texture will start thickening, and a rich aroma will fill your kitchen, signaling that you’re on the right track.
Step 5: Remove from Heat (1 minute)
Once it reaches 245°F, promptly remove the saucepan from heat. Carefully stir in your additives:
- 1/2 cup heavy cream
- 1 tsp vanilla extract
- 1/4 tsp salt
The mixture will bubble vigorously, so be cautious! Stir until everything is fully integrated. The caramel will have a glossy, luscious texture.
Step 6: Pour into the Pan (3 minutes)
Next, pour your caramel into the greased pan. Use a spatula to spread it evenly. Let it sit at room temperature to cool completely. This ensures the caramel sets properly and achieves that delightful chewy consistency.
Step 7: Cool Completely (2 hours)
Allow the caramel to cool for at least 2 hours. This step is crucial, as patience will yield the best texture! You’ll know it’s ready when it’s firm to the touch but not hard.
Step 8: Cut into Squares (10 minutes)
Once the caramel is set, turn it out onto a cutting board and slice it into squares. You can choose any size you prefer, but bite-sized pieces are usually a hit!
Step 9: Wrap and Store (10 minutes)
To keep your Homemade Caramels: 5 Simple Steps to Sweet Bliss fresh, wrap each square in wax paper or parchment paper. This adds a lovely rustic touch while keeping flavors intact.
Step 10: Enjoy! (0 minutes)
Now that your caramels are ready, savor each delightful bite! Whether you share them or keep them all for yourself, these treats will surely bring you sweet bliss.
Serving Suggestions for Homemade Caramels: 5 Simple Steps to Sweet Bliss
Now that you’ve mastered the art of making Homemade Caramels: 5 Simple Steps to Sweet Bliss, let’s explore how to serve these delectable treats.
Best occasions to serve this dish
- Family Gatherings: Hand them out as a sweet surprise during game nights or movie marathons.
- Holiday Celebrations: They make fantastic additions to your holiday baking or as gifts for family and friends.
- Festive Events: Perfect for birthday parties, potlucks, or bake sales.
What to serve with it
- Drinks: A warm cup of tea, coffee, or hot chocolate pairs wonderfully.
- Sauces: Drizzle them with chocolate or caramel sauce for an extra indulgent treat.
- Toppings: Top with sea salt or crushed nuts for a delightful twist.
- Sides: Pair with fresh fruit or cookies for a balanced dessert platter.
Storing Homemade Caramels: 5 Simple Steps to Sweet Bliss Properly
Let’s make sure your Homemade Caramels: 5 Simple Steps to Sweet Bliss stay fresh and delicious for as long as possible!
Best storage practices
Store your wrapped caramels in an airtight container. You can leave them at room temperature for up to two weeks. If you want to extend their shelf life, consider refrigerating them. However, keep in mind that caramels stored in the refrigerator can sometimes become a bit firmer than at room temperature.
Reheating and freezing tips
If your caramels get too hard, simply place them in the microwave for a few seconds to soften. To freeze, wrap them tightly in plastic wrap and store in a freezer-safe container. Frozen caramels will maintain their flavor for up to three months. Just thaw them at room temperature for the best texture before serving.
Tips & Tricks for Homemade Caramels: 5 Simple Steps to Sweet Bliss
To ensure your Homemade Caramels: 5 Simple Steps to Sweet Bliss turn out perfect every time, follow these handy tips!
Mistakes to avoid
- Not Using a Candy Thermometer: Always use a thermometer for precision; guessing can lead to undercooked or overcooked caramels.
- Ignoring Temperature: Watch carefully as the mixture approaches 245°F. This is crucial for achieving the right consistency.
- Stirring Too Much: Once boiling, avoid stirring to prevent sugar crystals from forming.
Extra tips for better results
- Butter Quality: Use high-quality unsalted butter for the best flavor.
- Flavor Enhancements: Add a pinch of sea salt or a splash of whiskey for a unique twist.
- Experiment with Mix-Ins: Try adding toasted nuts or a swirl of chocolate for variety.
Recipe Variations of Homemade Caramels: 5 Simple Steps to Sweet Bliss
Get creative with your Homemade Caramels: 5 Simple Steps to Sweet Bliss! Here are a few delicious variations you can try.
Creative twists
- Nuts: Incorporate chopped pecans or walnuts into the mixture for added crunch.
- Spices: Use ground cinnamon or nutmeg for a warm flavor profile.
- Seasonal Touches: Make holiday-inspired caramels with peppermint extract or candied ginger.
Dietary adjustments
- Vegan: Substitute regular butter with coconut oil and use plant-based cream.
- Gluten-Free: This recipe is naturally gluten-free, so you can enjoy it without worries.
- Dairy-Free: Use alternatives like almond or soy milk instead of heavy cream.
Conclusion about Homemade Caramels: 5 Simple Steps to Sweet Bliss
In conclusion, Homemade Caramels: 5 Simple Steps to Sweet Bliss is an unforgettable recipe that combines ease, taste, and creativity. The rich, creamy caramels deliver delicious flavors while providing the satisfaction of homemade goodness. By following this simple guide, you can whip up a batch that’s perfect for any occasion – be it a feast, a gift, or a personal indulgence.
So, why not gather your ingredients and dive into the sweet adventure of making caramels? Share your creation with family and friends, and enjoy the delightful smiles they bring. Happy caramel-making!
FAQs about Homemade Caramels: 5 Simple Steps to Sweet Bliss
What if it doesn’t turn out right?
If your caramel isn’t set, it might not have reached the right temperature. You can remelt it and boil it again until it does.
Can I prepare it ahead of time?
Absolutely! You can make it a few days in advance. Just store it properly in an airtight container.
What are the best ingredient substitutions?
Common swaps include coconut sugar for granulated sugar, or using coconut milk instead of heavy cream. Feel free to experiment based on your dietary needs!
How long can it be stored?
When properly wrapped and stored in an airtight container, homemade caramels can last up to two weeks at room temperature.
Can I use store-bought dough or crust?
This recipe doesn’t require any dough or crust; it’s all about the caramel itself. However, feel free to incorporate them into desserts if you wish!
Is this recipe kid-friendly?
Absolutely! Kids will love the sweet taste of these caramels. Just supervise them while cooking, as the temperature gets quite high.
Can I make it allergen-free?
Yes! By using substitutions (like dairy-free butter and alternative cream) and ensuring there are no cross-contamination issues, you can make these caramels allergen-free.
With these insights, you are all set to embark on your journey of creating Homemade Caramels: 5 Simple Steps to Sweet Bliss. Enjoy the sweet moments and happy caramel-making!
Homemade Caramels
Ingredients
Main Ingredients
- 1 cup granulated sugar
- ½ cup unsalted butter
- ½ cup heavy cream
- ¼ cup light corn syrup
- 1 tsp vanilla extract
- ¼ tsp salt
Substitutes and Alternatives
- Coconut sugar for granulated sugar
- Coconut oil for unsalted butter
- Canned coconut milk for heavy cream
- Honey or agave nectar for light corn syrup
- Maple extract or almond extract for vanilla extract


Instructions
Preparation
- Gather all your necessary equipment including a heavy-bottomed saucepan, a wooden spoon or heat-resistant spatula, a candy thermometer, and a greased pan for cooling.
- In the saucepan, combine 1 cup granulated sugar, 1/4 cup light corn syrup, and 1/2 cup unsalted butter. Place over medium heat and stir gently until the sugar melts and the butter emulsifies.
- Continue to cook the mixture until it reaches a boil without stirring. Aim for it to reach 245°F (118°C).
- Monitor the temperature closely; as it approaches 245°F, the mixture will thicken and produce a rich aroma.
- Once it reaches 245°F, promptly remove the saucepan from heat and carefully stir in 1/2 cup heavy cream, 1 tsp vanilla extract, and 1/4 tsp salt. The mixture will bubble vigorously.
- Pour the caramel into the greased pan and spread it evenly with a spatula. Allow it to sit at room temperature to cool completely.
- Let the caramel cool for at least 2 hours until firm but not hard.
- Once set, turn out onto a cutting board and slice into squares, wrapping each in wax or parchment paper.
- Enjoy your homemade caramels!