
This post may contain affiliate links. As an Amazon Associate, I earn from qualifying purchases at no extra cost to you.
Table of Contents
🍴 Top Kitchen Essentials You'll Love


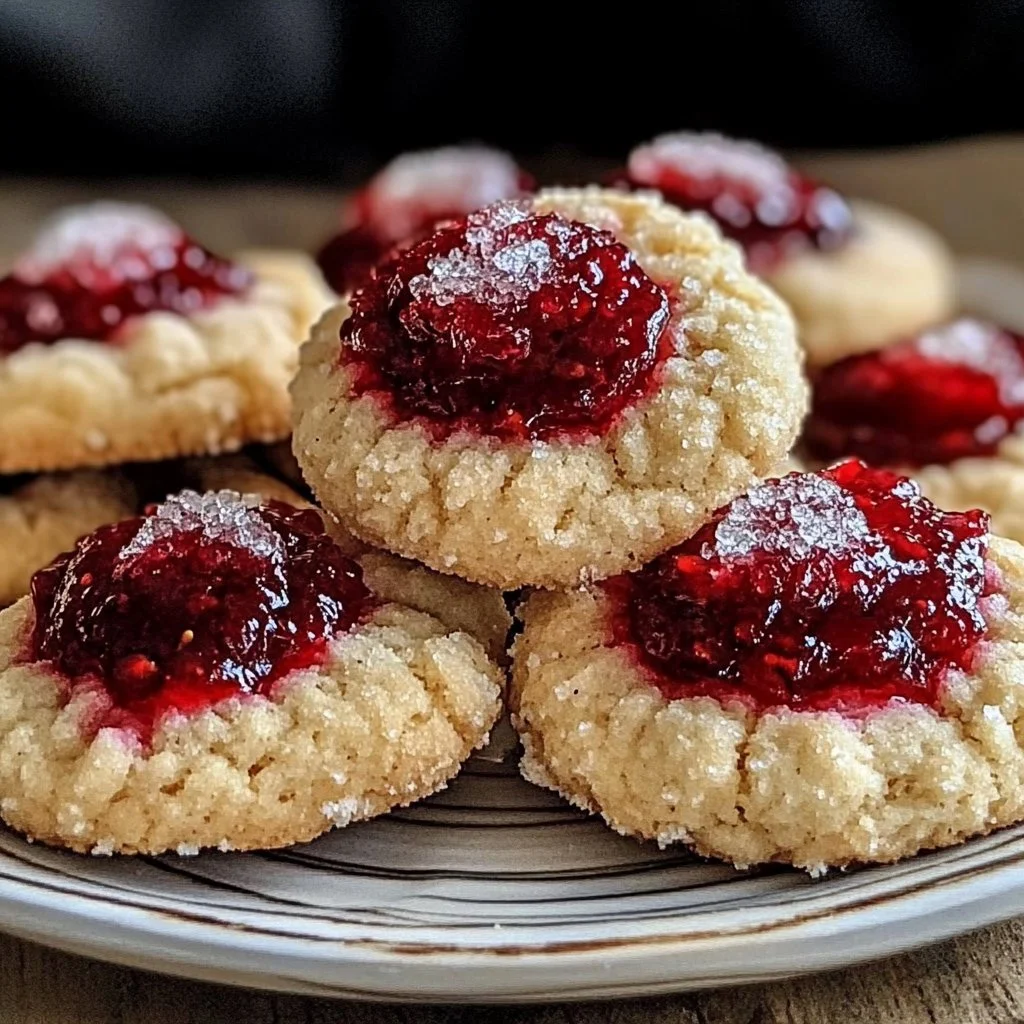
Introduction to Easy Homemade Raspberry Jam Thumbprint Cookies
Who doesn’t love a sweet and tangy treat that melts in your mouth? Easy Homemade Raspberry Jam Thumbprint Cookies have become a timeless classic in the world of baking. With their buttery texture and fruity jam center, each cookie is a little bite of joy. Imagine the aroma of freshly baked cookies wafting through your kitchen as you prepare these delightful treats.
This recipe stands out not only due to its simplicity but also thanks to its versatility. Whether you’re hosting a gathering or simply indulging yourself, these cookies are perfect for any occasion. The combination of soft cookie dough and luscious raspberry jam creates a harmony that keeps you coming back for more. Each bite provides a delightful contrast of textures that makes the experience unforgettable.
The accessibility of ingredients makes Easy Homemade Raspberry Jam Thumbprint Cookies an excellent choice for bakers of all skill levels. Have you ever craved something homemade but didn’t want to wrestle with complicated recipes? This one checks all the boxes! The best part? You likely have most of the ingredients at home right now.
Additionally, the customization options are nearly endless! You can swap out the raspberry jam for other flavors or even add a sprinkle of sea salt for additional depth. Are you ready to make a batch that will impress everyone, from family to friends? Let’s dive deeper into what makes this recipe a must-try!
Key Benefits of Easy Homemade Raspberry Jam Thumbprint Cookies
Why You’ll Love This Recipe
- Quick to prepare: In under 30 minutes, you’ll have fresh cookies ready to enjoy.
- Flavor explosion: The combination of buttery cookie and fruity jam is truly irresistible.
- Versatile: Easily adapt the jam flavor or add nuts for extra crunch.
- Great for sharing: Perfect for parties, picnics, or holiday gatherings.
- Easy for all skill levels: Ideal for beginners and seasoned bakers alike.
- Make ahead: Can be prepared in advance and stored for later enjoyment.
What Makes It Stand Out
What sets Easy Homemade Raspberry Jam Thumbprint Cookies apart is their timeless appeal. The dough is buttery and rich, providing a beautiful foundation for the raspberry jam. The incorporation of optional nuts adds an unexpected surprise, making each cookie unique. You can even get creative by experimenting with different jam flavors or adding spices like cinnamon for warmth.
These cookies are perfect for various occasions. From holiday gatherings to casual get-togethers, they have a way of elevating any dessert table. Friends and family will appreciate the homemade touch, showcasing the effort and care you put into your baking.
Ingredients for Easy Homemade Raspberry Jam Thumbprint Cookies
Complete Ingredient List with Measurements
- 2 cups (250g) all-purpose flour
- 1/2 teaspoon kosher salt
- 1/2 cup (100g) granulated sugar
- 1/2 cup (115g) unsalted butter, softened
- 1 large egg, room temperature
- 1 teaspoon pure vanilla extract
- 1/2 cup (160g) raspberry jam (seedless preferred)
- Optional: 1 tablespoon lemon juice
- Optional: 1/2 cup (50g) finely chopped nuts (pecans or walnuts)
- Optional: 1/4 cup (30g) powdered sugar for dusting
Substitutes and Alternatives
If you have allergies or dietary restrictions, there are several substitutes you can use. For instance, you can replace all-purpose flour with gluten-free flour blend if you’re avoiding gluten. If you’re dairy-free, try using a plant-based butter alternative and non-dairy yogurt mixed with a little vinegar as a replacement for the egg.
For the jam, feel free to swap out raspberry for berry blends, apricot, or even lemon curd for a zestier flavor. Nuts can be omitted or replaced with seeds for nut-free options.
How to Make Easy Homemade Raspberry Jam Thumbprint Cookies – Step-by-Step Directions
Step 1 – Prepare Ingredients
Start by gathering all your ingredients. Let the butter soften at room temperature for a smoother mixing process. Preheat your oven to 350°F (175°C) and line a baking sheet with parchment paper.
Step 2 – Cook the Base
In a medium bowl, cream together the softened butter and granulated sugar until light and fluffy, about 2-3 minutes. This step is crucial for the cookie’s texture. Incorporate the egg and vanilla extract, mixing until just combined.
Step 3 – Mix Dry Ingredients
In a separate bowl, sift together the all-purpose flour and kosher salt. Gradually add this dry mixture to your wet ingredients. Mix on low speed to avoid excess flour flying around and until a soft dough forms. If your dough feels sticky, don’t worry. It’s completely okay to chill it for 10-15 minutes.
Step 4 – Shape the Dough
Scoop 1 tablespoon-sized portions of dough and roll them into balls. If you like a bit of crunch, roll each ball in finely chopped nuts. Place these balls on the prepared baking sheet, leaving about 2 inches of space between each.
Step 5 – Create Indentations
Using your thumb or the back of a small spoon, gently press down into the center of each dough ball to form a deep indentation. Be sure to smooth over any cracks that may appear; this gives a more polished look to the cookies.
Step 6 – Fill with Jam
Spoon about 1/2 teaspoon of raspberry jam into each indentation. If you’d like to add a zesty twist, mix in a tablespoon of lemon juice with your jam before filling. This adds a delightful acidity that enhances the overall flavor.
Step 7 – Bake Cookies
Place your baking sheet in the preheated oven. Bake the cookies for 12-15 minutes, or until the edges are lightly golden and the centers are set. Rotate the pan halfway through baking to ensure even cooking.
Step 8 – Cooling Period
Once baked, remove the cookies from the oven. Allow them to cool on the baking sheet for at least 5 minutes before transferring them to a wire rack. This helps the cookies hold their shape.
Step 9 – Finish with Powdered Sugar
Once cooled, if you desire an extra touch of sweetness, dust the cookies lightly with powdered sugar. It adds an elegant visual as well as a deliciously sweet finish.
Step 10 – Enjoy!
Take a moment to savor your creation. Enjoy the cookies warm or at room temperature, possibly with a cup of tea or coffee for a perfect afternoon treat.
Serving Suggestions for Easy Homemade Raspberry Jam Thumbprint Cookies
Best Occasions to Serve This Dish
Easy Homemade Raspberry Jam Thumbprint Cookies shine at any occasion. Whether you’re enjoying a cozy family gathering or a festive holiday party, these cookies add a homemade charm that everyone will appreciate. They also make wonderful gifts when packaged in a pretty box or jar, showcasing your baking skills to friends and loved ones.
What to Serve With It
Pair these cookies with a cup of tea or coffee for a delightful afternoon pick-me-up. They also complement a scoop of vanilla ice cream beautifully, adding a creamy contrast to the fruity jam. For a more festive touch, consider serving them alongside a cheese platter, providing a sweet balance to savory flavors.
How to Store Easy Homemade Raspberry Jam Thumbprint Cookies Properly
Best Storage Practices
To keep your Easy Homemade Raspberry Jam Thumbprint Cookies fresh, store them in an airtight container at room temperature. They typically last about a week, but you’ll likely find they disappear much sooner! If you want to keep them fresh for a longer period, consider refrigerating them.
Reheating and Freezing Tips
If you have leftover cookies and want to enjoy them warm, simply pop them in the microwave for about 10-15 seconds. For a fresher texture, you can also reheat them in the oven at 300°F (150°C) for a few minutes. If you choose to freeze them, make sure to place them in an airtight container or freezer-safe bag. They can be stored for up to three months; just let them thaw at room temperature when you’re ready to eat.
Tips & Tricks for Easy Homemade Raspberry Jam Thumbprint Cookies
Mistakes to Avoid
- Overmixing the dough: This can lead to tougher cookies. Mix just until blended.
- Skipping the chilling step: If the dough is too sticky, chilling is essential for easier handling.
- Not using room-temperature ingredients: This helps achieve a smooth batter for better texture.
- Ignoring jam quality: Using high-quality jam can elevate the flavor significantly.
- Skipping the indentation: A deep enough hole is necessary for the jam to stay in place while baking.
Extra Tips for Better Results
For a more intense flavor, consider toasting the nuts before adding them to the dough. This extra step can significantly enhance the nutty flavor. For aesthetically pleasing cookies, ensure the jam is generously filled but doesn’t overflow. Finally, experiment with adding spices like cinnamon or nutmeg for added warmth.
Recipe Variations of Easy Homemade Raspberry Jam Thumbprint Cookies
Creative Twists
- Chocolate Thumbprints: Incorporate cocoa powder into the dough and fill with chocolate ganache.
- Nutty Delight: Use almond butter instead of regular butter for a nutty flavor.
- Seasonal Fruits: Try using peach or apricot jam for a fun twist that celebrates different seasons.
- Citrus Zing: Mix the zest of an orange or lemon into the dough for an added burst of flavor.
Dietary Adjustments
For a vegan version, substitute the egg with flaxseed meal or a store-bought egg replacement. You can also use coconut oil in place of butter. To make them gluten-free, simply use a gluten-free flour blend. Check the labels on jams to ensure they meet vegan or dietary requirements too.
Conclusion about Easy Homemade Raspberry Jam Thumbprint Cookies
There you have it—Easy Homemade Raspberry Jam Thumbprint Cookies are a delightful addition to your baking repertoire. Not only do they offer a blend of sweet and tart flavors, but they can also accommodate various dietary needs while remaining incredibly simple to make. With just a few easily accessible ingredients, you can create cookies that are sure to impress.
Whether you’re baking for yourself or sharing with loved ones, their warm, buttery texture paired with fruity jam makes for a comforting treat. So, gather your ingredients and get started—your taste buds will thank you! Make this recipe a staple in your kitchen, and let the sweet aroma of baking cookies fill your home.
FAQs about Easy Homemade Raspberry Jam Thumbprint Cookies
How long do these cookies stay fresh?
When stored in an airtight container at room temperature, these cookies generally last about a week, although they’re likely to be eaten much sooner!
Can I make these cookies ahead of time?
Absolutely! You can prepare the dough a day in advance and refrigerate it. Just let it sit at room temperature for a bit before rolling.
What’s the best way to freeze these cookies?
Place them in a single layer on a baking sheet until frozen solid, then transfer them to an airtight container or freezer-safe bag. They’ll be good for up to three months.
Can I use other flavors of jam?
Yes! While raspberry is delicious, feel free to experiment with any fruit preserves or even lemon curd for a citrus twist.
Is there a gluten-free option for this recipe?
Definitely! You can use a gluten-free flour blend to replace the all-purpose flour in this cookie recipe.
How can I add a nutty flavor to the cookies?
You can do this by incorporating finely chopped nuts into the dough or rolling the dough balls in chopped nuts before baking.
Can I decorate these cookies?
Yes! You can drizzle melted chocolate over the cooled cookies or sprinkle with powdered sugar for a nice touch.
How do I store leftover cookies?
Always store leftovers in an airtight container at room temperature to maintain freshness. You can refrigerate or freeze them for extended storage as well.
Can I replace butter with a different fat?
You can use coconut oil as a dairy-free substitute for butter, or even avocado oil for a healthy option, though it may alter the flavor slightly.
What’s the secret to a perfect thumbprint?
Make sure to apply enough pressure when creating the indentation to ensure the jam sits nicely while baking without overflowing.
Easy Homemade Raspberry Jam Thumbprint Cookies
Ingredients
Dry Ingredients
- 2 cups all-purpose flour
- ½ teaspoon kosher salt
- ½ cup granulated sugar
Wet Ingredients
- ½ cup unsalted butter, softened
- 1 large egg, room temperature
- 1 teaspoon pure vanilla extract
Filling and Optional Ingredients
- ½ cup raspberry jam (seedless preferred)
- 1 tablespoon lemon juice Optional for added zest
- ½ cup finely chopped nuts (pecans or walnuts) Optional for added texture
- ¼ cup powdered sugar Optional for dusting


Instructions
Preparation
- Gather all ingredients and allow butter to soften at room temperature. Preheat the oven to 350°F (175°C) and line a baking sheet with parchment paper.
Mixing the Dough
- Cream together softened butter and granulated sugar until light and fluffy, about 2-3 minutes.
- Incorporate the egg and vanilla extract, mixing until just combined.
Dry Ingredients
- Sift together all-purpose flour and kosher salt in a separate bowl. Gradually add to the wet ingredients, mixing on low speed until a soft dough forms.
- If dough is sticky, chill it for 10-15 minutes.
Shaping Cookies
- Scoop 1 tablespoon portions of dough and roll them into balls. Optionally roll each ball in finely chopped nuts. Place on the prepared baking sheet spacing 2 inches apart.
Adding Jam
- Use your thumb or the back of a spoon to press down into the center of each ball to form an indentation. Smooth over any cracks.
- Spoon about 1/2 teaspoon of raspberry jam into each indentation, optionally mixing in lemon juice for added zest before filling.
Baking
- Bake in the preheated oven for 12-15 minutes or until edges are lightly golden and centers are set.
- Rotate the pan halfway through baking to ensure even cooking.
Cooling and Serving
- Allow cookies to cool on the baking sheet for 5 minutes before transferring them to a wire rack.
- Dust with powdered sugar if desired before serving.