
This post may contain affiliate links. As an Amazon Associate, I earn from qualifying purchases at no extra cost to you.
Table of Contents
Are you tired of commercial shampoos filled with chemicals? Have you ever considered making your own shampoo? The Homemade Shampoo Bar DIY Soap Recipe: 5 Joyful Steps is not just a practical solution, but it’s also a fun and rewarding process. Imagine crafting a shampoo bar that not only cleans your hair gently but also leaves it smelling amazing! This recipe stands out for its simplicity and effectiveness, making it perfect for anyone looking to embrace a more natural hair care routine.
Crafting your own shampoo bar at home doesn’t have to be daunting. With just a few ingredients, you can create a soap that is free from harsh additives. Plus, this DIY project allows you to customize your shampoo to suit your hair type and preferences. Whether you have oily, dry, or normal hair, everyone can benefit from the nourishing oils featured in this recipe. Not to mention, the delightful essential oils add a personal touch that elevates your washing experience.
What if making shampoo could be as enjoyable as using it? The Homemade Shampoo Bar DIY Soap Recipe: 5 Joyful Steps invites creativity and experimentation. You’ll find joy in choosing the scents and textures that resonate with you. Whether you want something refreshing, calming, or invigorating, your shampoo can reflect your personality and needs. It’s time to dive into the world of homemade hair care and discover how easy it is to make something beautiful!
🍴 Top Kitchen Essentials You'll Love


Key Benefits of Homemade Shampoo Bar DIY Soap Recipe: 5 Joyful Steps
Why should you give this recipe a try? Here are some fantastic benefits that will surely convince you:
- Natural Ingredients: Say goodbye to chemicals and hello to nourishing oils that promote healthier hair.
- Eco-Friendly Choice: Reduce plastic waste by using solid shampoo bars instead of bottles.
- Cost-Effective: Save money in the long run by making your own products.
- Customizable: Adjust scents and ingredients to fit your personal preferences or hair type.
- Fun Activity: Making soap is a joyful process, perfect for creative minds or family projects.
What Makes It Stand Out
This recipe is not just another shampoo; it’s a chance for originality! You can play around with different essential oils and adjust the measurements to achieve the perfect formula for your hair. Whether you’re in need of hydration or want a refreshing scent, customization is at your fingertips.
Additionally, this homemade shampoo bar serves as a delightful gift. Birthdays, holidays, or just because—you can create unique bars that friends and family will love. The thoughtful personalization adds a layer of care that commercial products can’t match.
Ingredients for Homemade Shampoo Bar DIY Soap Recipe: 5 Joyful Steps
Here’s everything you need to make your very own shampoo bar:
- 200g Coconut Oil: Adds moisture and shine to your hair.
- 100g Olive Oil: Nourishes and strengthens hair.
- 100g Castor Oil: Promotes hair growth and gives a rich lather.
- 150g Sodium Hydroxide (Lye): Essential for the saponification process.
- 400g Distilled Water: Dilutes lye safely for mixing.
- Essential Oils (optional): For fragrance and additional benefits.
Substitutes and Alternatives
If you’re looking to switch things up, there are several alternatives you can use. For instance, if coconut oil isn’t your favorite, you can substitute it with shea butter or sweet almond oil. Each option will provide different benefits for your hair.
In terms of essential oils, you might want to explore tea tree oil for its antimicrobial properties, or lavender for a calming aroma. Choose oils based on your skin type and scent preference, ensuring your shampoo bar remains effective and delightful.
How to Make Homemade Shampoo Bar DIY Soap Recipe: 5 Joyful Steps – Step-by-Step Directions
Step 1 – Prepare Ingredients
Start by measuring and preparing all your ingredients. This step sets the stage for seamless soap making. Ensuring everything is ready will make the process smoother and more enjoyable.
Step 2 – Cook the Base
In a well-ventilated area, carefully combine the sodium hydroxide with the distilled water. Always add lye to the water, not the other way around, to avoid dangerous reactions. Stir gently until fully dissolved, and set aside to cool.
Step 3 – Heat the Oils
In a pot, gently heat coconut oil, olive oil, and castor oil until fully melted. Allow the oils to cool until they’re at the same temperature as your lye solution. This is crucial for achieving proper emulsion.
Step 4 – Mix the Lye Solution with the Oils
Once both the lye solution and the oils are at similar temperatures—ideally between 37°C to 45°C—slowly mix the lye solution into the oils. Stir gently to combine.
Step 5 – Blend Until Trace is Achieved
Using an immersion blender, blend the mixture until it reaches “trace.” This means that when you drizzle a bit of the mixture over the surface, it leaves a trail before sinking back in. This process usually takes a few minutes.
Step 6 – Add Essential Oils If Desired
If you choose to enhance your shampoo with essential oils, now is the time to add them to the mixture. Stir well to ensure the oils are evenly distributed before proceeding to the next step.
Step 7 – Pour the Mixture Into Molds
Carefully pour the soap mixture into prepared molds. Tap the molds gently to remove air bubbles and ensure an even distribution.
Step 8 – Let it Sit to Harden
Allow the mixture to sit undisturbed for 24-48 hours to harden. After this time, you can safely remove the bars from the molds.
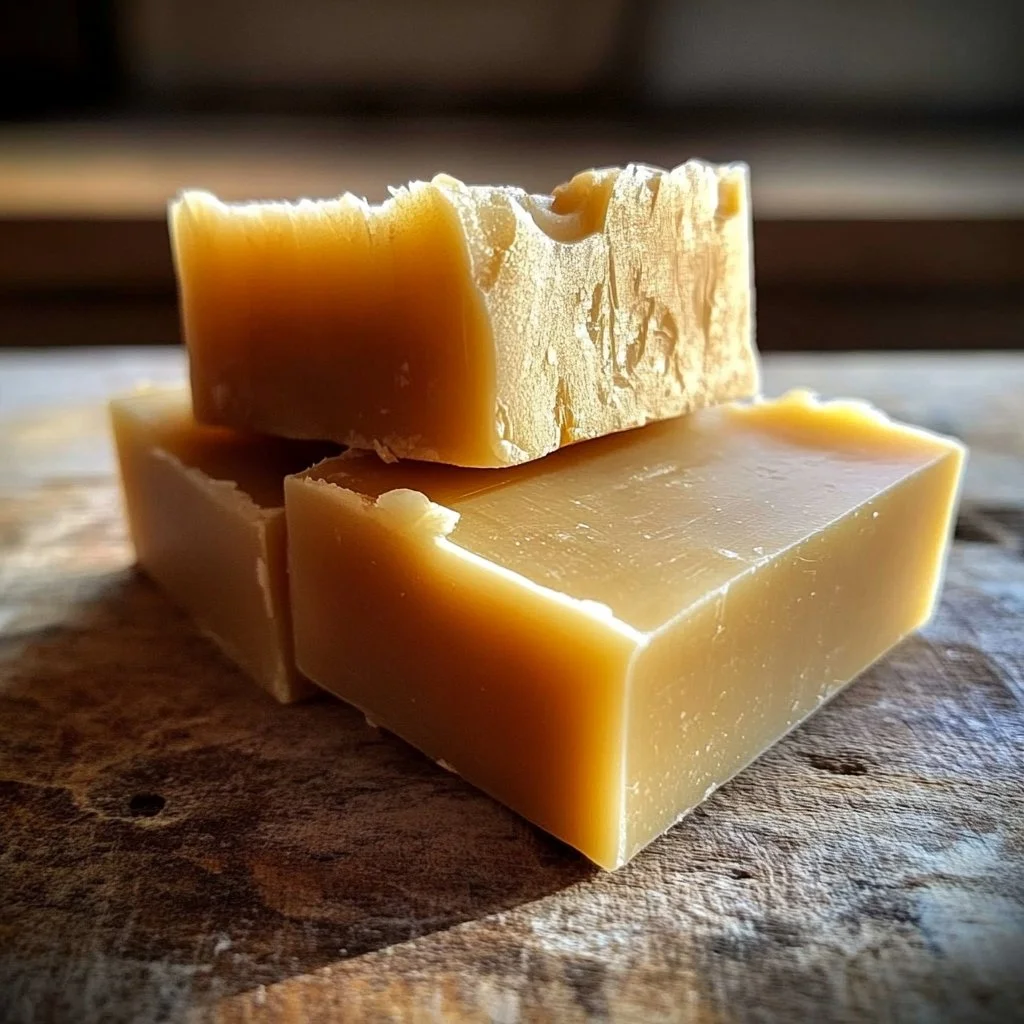
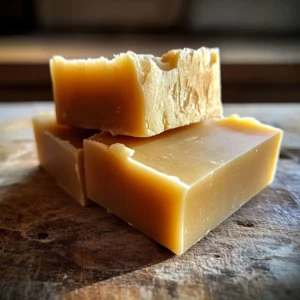
Step 9 – Cut into Bars
Once removed from molds, use a sharp knife to cut the soap into bars. Make sure to wear gloves for safety, as the lye reaction can still be active during this stage.
Step 10 – Cure the Bars
Finally, place the cut bars in a cool, dry area to cure for 4-6 weeks. This aging process ensures the soap is safe and effective for use.
Serving Suggestions for Homemade Shampoo Bar DIY Soap Recipe: 5 Joyful Steps
Best Occasions to Serve This Dish
Once your shampoo bars are ready, they are perfect for personal use or sharing. Consider gifting a set during birthdays, holidays, or as a thoughtful gesture for friends needing natural hair care options.
Additionally, these bars are an excellent addition to eco-friendly events or parties where sustainable practices are encouraged. You can showcase your homemade creations as conversation starters about waste reduction and natural beauty.
What to Serve With It
To create a thoughtful gift set, consider adding:
- A small natural comb or brush
- Handmade fabric drawstring bags
- Informational cards about the benefits of homemade shampoo
These additions not only make your gift more special but also provide useful items for the recipient.
How to Store Homemade Shampoo Bar DIY Soap Recipe: 5 Joyful Steps Properly
Best Storage Practices
To keep your shampoo bars in excellent condition, store them in a cool, dry place. Ensure they are away from direct sunlight and moisture to prevent premature melting.
Wrapping them in recyclable paper or placing them in a breathable container can also help maintain their integrity until you’re ready to use them.
Reheating and Freezing Tips
There’s no need to reheat shampoo bars once they’ve been created and cured. Just use them as is! For extended storage, you can freeze some bars, but it’s usually best to enjoy them fresh after curing.
Tips & Tricks for Homemade Shampoo Bar DIY Soap Recipe: 5 Joyful Steps
Mistakes to Avoid
- Incorrect Lye Mixing: Always add lye to water, not the reverse. This prevents dangerous reactions.
- Ignoring Temperatures: Mixing oils and lye solutions at different temperatures can affect the emulsification process.
- Skipping Trace: Not blending enough before pouring can result in separation.
- Using Low-Quality Oils: Always opt for high-quality oils for the best results and benefits.
- Neglecting Cure Time: Shortening the cure time can result in a soap that is harsh on the skin.
Extra Tips for Better Results
Using high-quality essential oils not only makes your shampoo smell divine but can also enhance its benefits, tailored to your specific hair needs. Always experiment with small batches to discover your ideal formula before making larger quantities.
Recipe Variations of Homemade Shampoo Bar DIY Soap Recipe: 5 Joyful Steps
Creative Twists
- Herbal Infusions: Infuse your oils with dried herbs like rosemary or chamomile before mixing with lye for added benefits.
- Exotic Scents: Use fragrances like sandalwood, or eucalyptus essential oils to create a unique aroma in your shampoo.
- Color Additives: Incorporate natural colorants like spirulina or beetroot powder for visually appealing bars.
Dietary Adjustments
Making your shampoo bar vegan is simple! Use a plant-based substitute for any animal-derived ingredients. This ensures everyone can enjoy a DIY shampoo bar without worry.
Conclusion about Homemade Shampoo Bar DIY Soap Recipe: 5 Joyful Steps
The Homemade Shampoo Bar DIY Soap Recipe: 5 Joyful Steps is not just a fun DIY project; it’s an investment in your and the planet’s well-being. With natural ingredients and the freedom to customize, you can create a product tailored specifically for your hair needs. Imagine the joy of using something crafted by your own hands, free of harmful chemicals, and safe for your family. As you explore this recipe, you may find it becomes a cherished routine—one that brings satisfaction and effervescent joy each time you wash your hair. Whether for personal use or as a thoughtful gift, this shampoo bar not only revitalizes hair but also promotes sustainability and creativity, making it a truly worthwhile endeavor.
FAQs about Homemade Shampoo Bar DIY Soap Recipe: 5 Joyful Steps
Can I prepare it ahead of time? Yes, you can prepare shampoo bars ahead of time and store them in a cool, dry place.
Can I freeze it? Freezing isn’t typically necessary, but it’s possible to store bars in the freezer for extended periods.
How long does it last? Properly stored, these bars can last for several months, especially if kept dry.
What are the best substitutions? Coconut oil can be substituted with shea butter, and various essential oils can always be swapped out depending on your preference.
Is this recipe family-friendly? Absolutely! It’s an enjoyable activity for families, and the resulting shampoo bars are gentle and suitable for all hair types.
Do I need special equipment? Basic kitchen tools and a stable, ventilated workspace are all you need to create this recipe.
Is it suitable for sensitive skin? Many find homemade shampoo bars to be gentler on their skin, but always patch-test first if you’re prone to sensitivities.
Can I use it on color-treated hair? Yes, but it’s wise to choose gentler essential oils to avoid any stripping from harsh ingredients.
What essential oils are best? It depends on your hair type; tea tree oil works well for oily hair, while lavender is good for dry hair.
Is this a suitable project for beginners? Definitely! With careful step-by-step instructions, anyone can successfully make their own shampoo bars.
Homemade Shampoo Bar – DIY Soap Recipe
Equipment
- Soap Mold
- Heatproof Mixing Bowl
- Stick Blender
Ingredients
Oils & Base
- 1 cup coconut oil
- ½ cup olive oil
- ½ cup shea butter
- ⅓ cup castor oil boosts lather
Lye & Liquid
- 3.6 oz lye (sodium hydroxide) use caution
- 9 oz distilled water
Optional Add-ins
- 15 drops essential oils lavender, peppermint, or tea tree
- dried herbs optional for decoration


Instructions
- Measure all oils and shea butter into a heatproof bowl. Melt gently using a double boiler.
- In a separate container, carefully mix lye into distilled water. Stir until dissolved and allow to cool.
- When both the oil mixture and lye water reach similar temperatures (95–110°F), slowly pour the lye mixture into the oils.
- Blend with a stick blender until the mixture reaches trace, resembling a thin pudding.
- Add essential oils or herbs if desired and stir to combine.
- Pour the mixture into soap molds, cover, and allow to harden for 24–48 hours.
- Remove from molds and cure the bars in a cool, dry place for 4–6 weeks before use.