
This post may contain affiliate links. As an Amazon Associate, I earn from qualifying purchases at no extra cost to you.
Table of Contents
🍴 Top Kitchen Essentials You'll Love


Introduction to Knock You Naked Bars: 7 Irresistible Reasons to Make Them
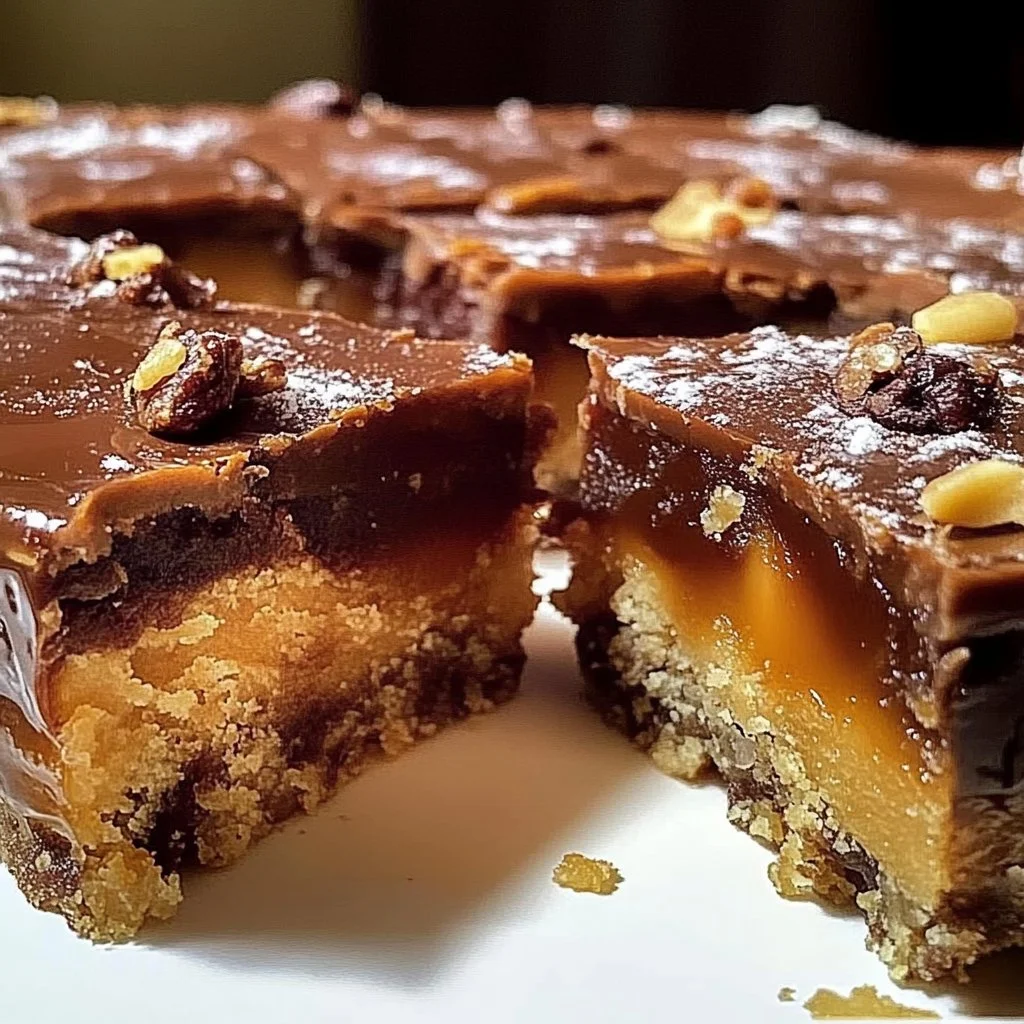
Have you ever tasted something that made you weak in the knees? That’s exactly what Knock You Naked Bars do. With layers of sumptuous flavors and a delightful texture, these bars are nothing short of a dessert revolution. They combine the ever-favorite ingredients of chocolate, caramel, and a buttery base, creating a mouthwatering experience that leaves you craving more. But what separates these bars from the average dessert? The answer lies in their unique combination of ingredients and the warm, indulgent feeling they evoke.
Have you been searching for a simple yet impressive recipe that is sure to wow your friends and family? If so, Knock You Naked Bars: 7 Irresistible Reasons to Make Them is your answer. These bars are easy to prepare and yield delectable results that can be enjoyed by both kids and adults alike. Next time you’re hosting a gathering or just looking for a sweet treat at home, why not try making these? You won’t be disappointed.
These bars don’t just look good; they taste incredible, too. The warm, gooey layers of chocolate chips and caramel sauce create a perfect balance of sweetness and richness that you simply cannot resist. Not to mention, they are a breeze to make—a perfect treat even for novice bakers. The joy of seeing friends and family delight in your homemade creation is unmatched. So, let’s dive into why Knock You Naked Bars: 7 Irresistible Reasons to Make Them should be on your baking list!
Key Benefits of Knock You Naked Bars: 7 Irresistible Reasons to Make Them
- Delicious Flavors: The combination of chocolate, caramel, and buttery goodness creates a flavor explosion.
- Easy to Make: With simple steps and minimal ingredients, this recipe is perfect for busy bakers.
- Versatile Treat: Great for any occasion, from casual family dinners to elegant gatherings.
- Customizable: You can easily swap or add ingredients to suit your taste or dietary needs.
- Perfect for Sharing: Cut them into small squares and bring them along to parties or potlucks.
- Satisfying Dessert: These bars are incredibly filling, allowing you to enjoy a little indulgence with fewer sweets.
What Makes It Stand Out
Knock You Naked Bars stand out because they are not your ordinary dessert bars. The layers of flavors work in harmony, delivering an unforgettable taste sensation. The use of caramel sauce adds a unique twist that elevates these bars to a new level. Additionally, these bars can be made ahead of time, making them ideal for stress-free entertaining. Bake a batch a day or two in advance, and you’ll have a delightful dessert ready for any occasion.
Customization is another key feature of Knock You Naked Bars. Feel free to substitute with different chocolate types, nuts, or even dried fruits. The only limit is your imagination! Special occasions are perfect for these bars, as whether for a birthday, holiday, or just as a sweet surprise, they are guaranteed to be a hit.
Ingredients for Knock You Naked Bars: 7 Irresistible Reasons to Make Them
Complete Ingredient List with Measurements
- 1 cup unsalted butter
- 1 cup brown sugar
- 1 cup granulated sugar
- 1 cup all-purpose flour
- 1 cup chocolate chips
- 1 cup caramel sauce
- 1 tsp vanilla extract
- 1/2 tsp salt
Substitutes and Alternatives
If you’re looking for alternatives due to allergies or dietary needs, there are plenty of options available. For those needing gluten-free options, you can swap out all-purpose flour for a gluten-free blend. If you want to lower sugar content, consider using coconut sugar or a sugar substitute like stevia. Dairy allergies can be addressed by using vegan butter and dairy-free chocolate chips. These substitutions ensure that everyone can enjoy Knock You Naked Bars: 7 Irresistible Reasons to Make Them!
How to Make Knock You Naked Bars: 7 Irresistible Reasons to Make Them – Step-by-Step Directions
Step 1 – Prepare Ingredients
Begin by gathering all your ingredients. This recipe is designed to be simple and straightforward, so having everything ready to go will make the process seamless. Preheat your oven to 350°F (175°C) to ensure it’s hot when your batter is ready.
Step 2 – Cook the Base
In a large mixing bowl, cream together the unsalted butter, brown sugar, and granulated sugar until the mixture is light and fluffy. This step usually takes about 3-5 minutes; you want your mixture to be well-combined, which will create a richer flavor.
Step 3 – Add Flour and Seasonings
Next, add the all-purpose flour, salt, and vanilla extract to the creamed mixture. Stir until fully incorporated. The texture should resemble a thick dough, perfect for layering on the bottom of your baking pan.
Step 4 – Fold in Chocolate Chips
Once the dry ingredients are mixed in, gently fold in the chocolate chips. Make sure they are evenly distributed throughout the mixture for that chocoholic experience in every bite.
Step 5 – Prepare the Baking Pan
Grease a 9×13-inch baking pan with butter or cooking spray to prevent sticking. Alternatively, you can line the pan with parchment paper for easier removal later.
Step 6 – Spread the Base Mixture
Spoon half of the mixture into the prepared baking pan. Use a spatula to spread it evenly, ensuring a solid base for your bars. The layer should be fairly thick but not overwhelming.
Step 7 – Add Caramel Sauce
Generously pour the caramel sauce over the base layer, spreading it out so that it reaches all corners of the pan. This layer will melt into the bars as they bake, creating that rich, gooey texture.
Step 8 – Top with Remaining Mixture
Take the remaining half of the mixture and spread it over the caramel layer, creating a top crust. This step may involve breaking the mixture up into smaller pieces to evenly cover the caramel.
Step 9 – Bake
Place the pan in the preheated oven and bake for 25-30 minutes. The edges should turn golden brown, and the top crust will look set. Keep an eye on the baking process to avoid overcooking.
Step 10 – Cool and Slice
Once baked, remove the pan from the oven and allow the bars to cool completely in the pan. Once cooled, cut into squares, and serve.
Serving Suggestions for Knock You Naked Bars: 7 Irresistible Reasons to Make Them
Best Occasions to Serve This Dish
Knock You Naked Bars: 7 Irresistible Reasons to Make Them fit perfectly into a variety of occasions. Whether you’re hosting a birthday party or having friends over for coffee, these bars make an excellent treat. They also shine at holiday gatherings and potlucks, where everyone loves a sweet addition to the dessert table.
What to Serve With It
These bars can be enjoyed on their own, but for added delight, consider pairing them with a scoop of vanilla ice cream or a dollop of whipped cream. For a more festive touch, serve with a drizzle of chocolate sauce or a sprinkle of nuts. A hot cup of coffee or tea complements the rich flavors beautifully!
How to Store Knock You Naked Bars: 7 Irresistible Reasons to Make Them Properly
Best Storage Practices
To keep your Knock You Naked Bars fresh, store them in an airtight container at room temperature for up to one week. If you want to prolong their freshness, you can refrigerate them, where they will last up to two weeks.
Reheating and Freezing Tips
If you’d like to enjoy the bars warm again, simply pop them in the microwave for about 10-15 seconds. They can also be frozen for up to three months. Just wrap the bars tightly in plastic wrap and then in aluminum foil before placing them in the freezer.
Tips & Tricks for Knock You Naked Bars: 7 Irresistible Reasons to Make Them
Mistakes to Avoid
1 – Overmixing the Batter: Mixing too vigorously can lead to tough bars, so mix just until combined.
2 – Not Measuring Ingredients Correctly: Precision in measuring yields the best texture and flavor, so use measuring cups and spoons.
3 – Skipping the Cooling Time: Allowing the bars to cool in the pan prevents them from falling apart.
4 – Using Expired Ingredients: Fresh eggs and baking products are crucial for optimal texture and taste.
5 – Not Preheating the Oven: Omitting this step can lead to uneven baking, so always preheat to the required temperature.
Extra Tips for Better Results
For enhanced flavor, consider adding a pinch of espresso powder into the mixture. The coffee undertone can elevate the chocolate flavor to new heights. Additionally, for added crunch, mixing in chopped nuts like pecans or walnuts creates a delightful contrast in texture.
Recipe Variations of Knock You Naked Bars: 7 Irresistible Reasons to Make Them
Creative Twists
1 – Nutty Delight: Add chopped nuts for extra crunch. Almonds or pecans work wonderfully with the caramel and chocolate combination.
2 – Fruit Fusion: Fold in dried fruits like cranberries or cherries for a fruity twist that complements the rich flavors.
3 – Spicy Kick: For a unique spin, add a sprinkle of cayenne pepper or cinnamon to the mixture for a warm, spicy undertone.
4 – Peanut Butter Swirl: Drizzle peanut butter on the top layer before baking for a nutty, creamy flavor that pairs perfectly with chocolate.
Dietary Adjustments
For a vegan version, substitute the butter with coconut oil, use maple syrup or agave instead of sugars, and ensure your chocolate chips are dairy-free. To make it gluten-free, swap out the all-purpose flour for an appropriate gluten-free flour blend.
Conclusion about Knock You Naked Bars: 7 Irresistible Reasons to Make Them
In conclusion, Knock You Naked Bars: 7 Irresistible Reasons to Make Them are the ultimate treat for any dessert lover. With their indulgent layers of chocolate and caramel wrapped in a buttery crust, these bars are a true delight. They stand out due to their versatility, ease of preparation, and the unique flavors they offer. Baking them will not only satiate your sweet tooth but also impress anyone lucky enough to taste them. So, gather your ingredients, roll up your sleeves, and start making these heavenly bars — you won’t regret it!
FAQs about Knock You Naked Bars: 7 Irresistible Reasons to Make Them
Can I make Knock You Naked Bars ahead of time?
Yes, you can prepare the bars a day or two in advance, which makes them perfect for entertaining.
How do I store my Knock You Naked Bars?
Store bars in an airtight container at room temperature for up to a week, or refrigerate for up to two weeks.
Can I freeze them for later?
Absolutely! Freeze wrapped bars for up to three months. Reheat in the microwave for warm servings later.
What if I have food allergies?
You can substitute ingredients for allergies, like using gluten-free flour or dairy-free chocolate chips.
How do I know when the bars are baked properly?
They should be golden brown on the edges and a bit soft in the middle. Checking with a toothpick can help; it should come out with a few moist crumbs.
What pairs well with Knock You Naked Bars?
They taste great on their own but are also fabulous topped with ice cream or whipped cream, or served with coffee.
Can I add nuts to the recipe?
Absolutely! Chopped nuts like pecans or walnuts can add a great texture and flavor contrast.
What is the best way to cut the bars once cooled?
Use a sharp knife and, for cleaner slices, warm the knife briefly under hot water before cutting.
What if I want a more chocolatey version?
You can increase the amount of chocolate chips added or try drizzling melted chocolate on top before serving.
Is it okay to use margarine instead of butter?
Yes, in most cases, margarine can be used as a substitute for butter, though the flavor may vary slightly.

Knock You Naked Bars
Ingredients
Base Ingredients
- 1 cup unsalted butter Softened
- 1 cup brown sugar Packed
- 1 cup granulated sugar
- 1 cup all-purpose flour Can be substituted with gluten-free flour
- 1 cup chocolate chips Dairy-free options available
- 1 cup caramel sauce Store-bought or homemade
- 1 tsp vanilla extract
- ½ tsp salt


Instructions
Preparation
- Gather all your ingredients and preheat your oven to 350°F (175°C).
- In a large mixing bowl, cream together the unsalted butter, brown sugar, and granulated sugar until light and fluffy.
- Add the all-purpose flour, salt, and vanilla extract; stir until fully incorporated.
- Gently fold in the chocolate chips until evenly distributed.
- Grease a 9×13-inch baking pan with butter or cooking spray, or line it with parchment paper.
- Spread half of the mixture evenly into the prepared baking pan.
- Pour the caramel sauce over the base layer, spreading it to the edges.
- Top with the remaining mixture, spreading it out as necessary.
- Bake for 25-30 minutes until golden brown. The top should look set.
- Allow the bars to cool completely in the pan before cutting into squares.