
This post may contain affiliate links. As an Amazon Associate, I earn from qualifying purchases at no extra cost to you.
Table of Contents
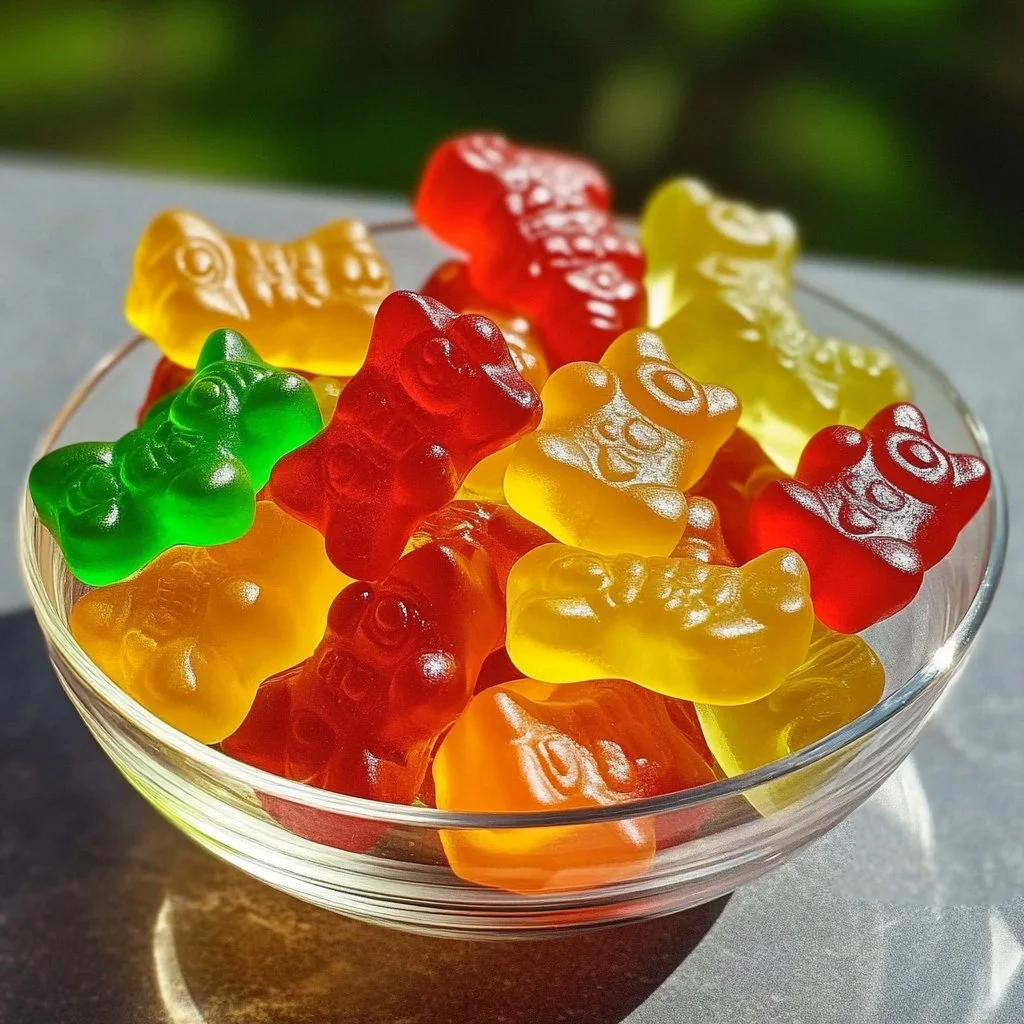
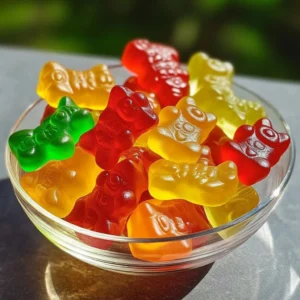
As a child, summers were defined by the sweet, tangy flavor of Kool-Aid, the popular drink mix that seemed synonymous with carefree days of laughter, sunshine, and play. Whether it was a backyard barbecue or a neighborhood block party, setting up a pitcher of Kool-Aid was as much a part of the fun as the games and activities that followed. Now, imagine transforming that iconic drink into chewy, colorful candies that bring back all of those fond memories with each delightful bite. This is where our recipe for Kool Aid Gummy Treats comes in—a modern twist on a classic favorite that’s sure to become a staple in your home, too.
So, why is this recipe so special? Kool Aid Gummy Treats are not just candies; they are a canvas for creativity! With just one packet of Kool-Aid, you can craft your own version of these nostalgic sweets in just five simple steps, ensuring they fit any occasion, from birthday parties to holiday gatherings. The beauty of this homemade treat is its versatility. You can choose any Kool-Aid flavor you adore, creating a rainbow of gummies that can cater to various tastes and preferences. Furthermore, these gummy treats are a fantastic way to involve friends and family in the kitchen. Have the kids help you sprinkle the gelatin, and let everyone pick their favorite flavors.
This recipe is perfect for anyone looking to add a touch of homemade nostalgia into their lives. Young children will be thrilled with the flavors and colors, while adults can reminisce about simpler times. Think of all the possibilities: gift them in cute bags for parties, pack them in lunches, or enjoy them as a sweet treat while binge-watching your favorite series. With the main ingredients being Kool-Aid, sugar, water, and gelatin, making these delightful treats is not only easy but also incredibly rewarding. You’ll have delicious treats that are sure to be a hit!
Now that you know why Kool Aid Gummy Treats: 5 Easy Steps to Nostalgic Fun is so appealing, let’s dive into the benefits of making these delicious treats at home. You won’t want to miss out on the joy, simplicity, and flavor of these delightful candies!
🍴 Top Kitchen Essentials You'll Love


Key Benefits of Kool Aid Gummy Treats: 5 Easy Steps to Nostalgic Fun
Why You’ll Love This Recipe
- Fun for Everyone: Making Kool Aid Gummy Treats is an interactive experience! Kids and adults alike can join in on the fun, making it a great family bonding activity.
- Flavor Variety: With a range of Kool-Aid flavors available, you can customize your gummies to suit your taste or the preferences of those you’re sharing them with.
- Simplicity: The recipe features only a few simple ingredients that you likely have on hand, making it an easy go-to for quick candy-making that doesn’t require extravagant planning.
- Time-Efficient: From prep to setting, the total time needed to make these delicious gummy treats is relatively short. You’ll have your candy ready to enjoy in just a few hours.
- Great for Any Occasion: Whether it’s a summer picnic, a birthday celebration, or just an afternoon snack, Kool Aid Gummy Treats are perfect for any occasion, offering a nostalgic taste that everyone will love.
- Customizable Presentation: The gummies can be shaped into fun molds or cut into bite-sized pieces, making them perfect for festive occasions or personal snacking.
What Makes It Stand Out
The distinctiveness of Kool Aid Gummy Treats lies not only in their nostalgic flavor but also in their appealing texture. Each gummy boasts a chewy consistency that delights the palate, contrasting with their bright, eye-catching colors. This recipe opens up the door to culinary creativity, enabling you to tailor the sweetness level by adjusting the amount of sugar used.
In addition, the adaptability of this gummy treat for various seasonal themes is remarkable. You can add specific flavors for summer BBQs with juicy watermelon or fresh lemonade, while pumpkin spice might work wonders for autumn gatherings. The ability to experiment with different Kool-Aid flavors allows you to celebrate any festivity or occasion in style while also tapping into your creativity.
Ingredients for Kool Aid Gummy Treats: 5 Easy Steps to Nostalgic Fun
Complete Ingredient List with Measurements
- 1 cup water: This is the liquid base that dilutes the Kool-Aid and helps dissolve the sugar and gelatin nicely.
- 1 packet Kool Aid (any flavor): This gives your gummies their vibrant color and mouthwatering flavor.
- 2 cups granulated sugar: This sweetener provides the candy with its necessary sweetness, balancing the tartness of the Kool-Aid.
- 2 tablespoons unflavored gelatin: The key ingredient that transforms the syrupy mixture into chewy gummy treats.
Substitutes and Alternatives
When crafting your Kool Aid Gummy Treats, you may want to consider the dietary needs of those you’re serving. Here are a few alternatives:
- Sugar Alternatives: If you’re looking to reduce sugar, consider using stevia or erythritol as they can provide sweetness without the calories.
- Flavored Gelatin: For a different flavor profile, use flavored gelatin that matches or contrasts with your Kool-Aid. This will enhance the depth of flavor, particularly for those who love a more layered taste.
- Vegan Gelatin: If you are aiming for a vegan adaptation, agar-agar is a wonderful substitute for traditional gelatin. Just keep in mind that this will alter the texture slightly, making it a bit firmer.
Adapting recipes for allergies or dietary requirements allows you to share these delightful gummies with a broader audience, ensuring that no one is left out from the nostalgic fun!
How to Make Kool Aid Gummy Treats: 5 Easy Steps to Nostalgic Fun – Step-by-Step Directions
Step 1 – Prepare Your Workspace and Ingredients
Creating your Kool Aid Gummy Treats starts with an organized workspace. Gather all your ingredients, measuring cups, and mixing bowls, and clear a section of counter space. This mise en place is essential for maintaining a smooth workflow. Taking a few minutes to neatly line up your ingredients can help prevent a chaotic kitchen when the cooking begins.
Step 2 – Heat the Water
In a medium saucepan, pour in 1 cup of water and place it over medium-high heat. Stay close and keep a watchful eye until the water reaches a rolling boil. This step is crucial as boiling water is necessary to properly dissolve the sugar and Kool-Aid while activating the gelatin.
Step 3 – Mix in Kool-Aid and Sugar
Once the water is boiling, remove the saucepan from the heat and immediately stir in one packet of Kool-Aid and 2 cups of granulated sugar. Stir continuously until both the Kool-Aid and sugar are completely dissolved. A fragrant sweetness will emerge, reminiscent of summers past; this sweet aroma will undoubtedly excite your taste buds!
Step 4 – Add Gelatin
Sprinkle 2 tablespoons of unflavored gelatin over the sugar-Kool-Aid mixture. Allow it to sit for a minute to allow the gelatin to bloom, then stir thoroughly until fully dissolved. This step is vital as an incomplete dissolution of gelatin can lead to a lumpy texture in your gummies. The mixture should now be glossy and smooth, increasing in aroma and flavor.
Step 5 – Pour into Molds
Carefully pour the liquid mixture into your chosen molds. Silicone molds work great for making fun shapes. If you’re using rigid molds, be cautious, as the mixture can be hot! Use a funnel or a measuring cup for an easier pour, and ensure each mold is filled evenly.
Step 6 – Refrigerate
Once the molds are filled, place them in the refrigerator. Allow the sweets to set for at least 4 hours, with overnight being preferable for a firmer texture. The anticipation will build as you watch those bright little jellies firm up into their final shape.
Step 7 – Release from Molds
After your gummies have set, carefully remove them from the molds. If using silicone molds, you can gently flex them to release the gummies easily. If you’re using harder molds, you may need to run a thin knife around the edges to help detach the gummies. Enjoy the fun of unveiling your colorful creations!
Step 8 – Enjoy and Share
Once your Kool Aid Gummy Treats are released from their molds, it’s time for the best part: indulging in your sweet rewards! Gather your loved ones, share stories of your gummy-making adventures, and revel in the flavors that evoke those cherished memories.
Serving Suggestions for Kool Aid Gummy Treats: 5 Easy Steps to Nostalgic Fun
Best Occasions to Serve This Dish
Kool Aid Gummy Treats are a crowd-pleaser, making them suitable for various occasions. They are perfect for summer barbecues where guests can snack on them between bites of grilled food. Birthday parties are another festive time to showcase your homemade gummies, especially when presented in whimsical party favor bags.
Holiday-themed get-togethers are an excellent opportunity to experiment with seasonal flavors; consider using cherry for a Valentine’s Day treat or blue raspberry for Independence Day festivities. Whether it’s a movie night, a picnic in the park, or just a rainy day indoors, these delightful candies will serve as the ideal pick-me-up.
What to Serve With It
Kool Aid Gummy Treats pair wonderfully with a variety of other snacks and dishes. They make an excellent addition to a fruit platter, complementing fresh berries and slices of watermelon. You could serve them alongside classic popcorn for a sweet-savory combo, or offer them at a dessert bar with brownies and cookies during celebrations.
Mixing them into party snack bags with nuts or pretzels can provide a delightful contrast of sweet and salty, perfect for movie nights or road trips. If you want a refreshing beverage to wash them down, consider pairing these gummies with an ice-cold glass of lemon lime soda or a non-alcoholic version of a tropical punch for an invigorating summer experience.
Storing Kool Aid Gummy Treats: 5 Easy Steps to Nostalgic Fun Properly
Best Storage Practices
To maintain the freshness of your Kool Aid Gummy Treats, store them in an airtight container. Keeping them sealed will prevent them from becoming hard or losing their chewy texture. You can refrigerate the candies for up to two weeks, allowing you to enjoy them for several days after making them.
If you want to store them for a longer period, it’s recommended to freeze them. Place the gummies in a freezer-safe bag or container, ensuring there are no air gaps. They can be kept frozen for several months. Just remember to thaw them at room temperature before snacking!
Reheating and Freezing Tips
For freezing Kool Aid Gummy Treats, ensure they are completely set and firm before sealing them in a container. When you’re ready to enjoy them again, simply remove the amount you want and allow them to defrost at room temperature for about 30 minutes. Avoid microwaving them as this can alter their texture and cause them to melt or become sticky.
Tips & Tricks for Kool Aid Gummy Treats: 5 Easy Steps to Nostalgic Fun
Mistakes to Avoid
- Using Cold Water: Always use boiling water for dissolving, as cold water will not activate the gelatin correctly.
- Not Stirring Enough: Failing to fully mix the sugar and Kool-Aid could lead to uneven sweetness and flavor.
- Overboiling the Water: While it’s essential to bring the water to a boil, leaving it on too long can result in evaporation and may alter the consistency.
- Skipping the Blooming Step: Not letting the gelatin bloom in the hot mixture can cause a lumpy texture instead of the smooth gummies you desire.
- Neglecting to Grease Mold: If you’re using a hard mold, a light coating of cooking spray can help prevent sticking.
- Rushing the Setting Time: Patience is key, so let them set fully in the fridge to ensure they reach that perfect chewy consistency.
Extra Tips for Better Results
- Experiment with Flavors: Try mixing two different Kool-Aid flavors for a unique taste sensation.
- Add Texture: Consider incorporating small pieces of dried fruits or sprinkles right before the mixture sets to give a fun crunch.
- Create Layered Gummies: If you’re feeling adventurous, create layered gummies by allowing one color/flavor to set first, then adding a second layer on top.
- Cute Packaging: Share your gummies in mason jars or festive containers wrapped with ribbons; they make excellent homemade gifts!
Recipe Variations of Kool Aid Gummy Treats: 5 Easy Steps to Nostalgic Fun
Creative Twists
- Tropical Blend: Use coconut and pineapple flavors for a fun Hawaiian twist, ideal for summer luaus or beach outings.
- Sour Gummies: Incorporate citric acid to the recipe to give a sour surprise that’ll add an exciting zing to your treats.
- Holiday-Themed Flavors: Create specific flavors like green apple for St. Patrick’s Day or cranberry for Thanksgiving; the vibrant colors will surely brighten up your festive gatherings.
Dietary Adjustments
To cater to various dietary preferences:
- Vegan: Use agar-agar instead of gelatin, and substitute sugar with agave syrup for a plant-based option.
- Gluten-Free: The recipe is already gluten-free as it contains no flour or wheat products.
- Low-Sugar: Experiment with stevia or a sugar substitute to reduce the overall caloric content, making these gummy treats more diet-friendly.
- Keto-Friendly: Replace the sugar with erythritol to create a low-carb version of these delightful gummies!
Conclusion about Kool Aid Gummy Treats: 5 Easy Steps to Nostalgic Fun
In conclusion, Kool Aid Gummy Treats are not just simple homemade candies; they are a delightful way to relive childhood memories while creating new ones with your loved ones. The joy of making these sweets, combined with the versatility of flavors and easy preparation, makes them a true standout in the realm of homemade treats.
Now that you’ve learned the ins and outs of making your homemade Kool Aid Gummy Treats, I encourage you to gather your ingredients, invite your family or friends to join in on the fun, and create your own magical batches. Each gummy you make can transform ordinary moments into extraordinary memories, ensuring everyone will be clamoring for more. So go ahead, give it a try, and delight in the smiles that these candies will bring. Enjoy your Kool Aid Gummy Treats: 5 Easy Steps to Nostalgic Fun!
FAQs about Kool Aid Gummy Treats: 5 Easy Steps to Nostalgic Fun
What if it doesn’t turn out right?
If you find that your gummies didn’t set properly, it could be because the gelatin wasn’t fully dissolved or there wasn’t enough time in the fridge. This can happen if the mixture was stirred too little or if the water wasn’t hot enough. Don’t worry! Simply dissolve some more unflavored gelatin in hot water and mix it in; then, set it to cool again.
Can I prepare it ahead of time?
Yes, Kool Aid Gummy Treats can be prepared a few days in advance. Store them in an airtight container in the refrigerator to keep them fresh, and you’ll have a delightful treat ready for guests or your family to enjoy whenever!
What are the best ingredient substitutions?
Some excellent substitutions include using flavored gelatin instead of unflavored for added depth of taste or opting for sugar substitutes like stevia to make it a healthier version. Feel free to experiment according to personal preferences and dietary needs!
How long can it be stored?
When refrigerated, your Kool Aid Gummy Treats can last about two weeks. If you decide to freeze them, they can remain good for several months. Just ensure they are stored properly in an airtight container to maintain freshness.
Can I use store-bought dough or sauce?
This recipe does not require a pre-made dough or sauce, as all the ingredients come together uniquely to create the gummy texture. However, feel free to explore combining with other sweet treats if you’re feeling creative!
Is this recipe kid-friendly?
Absolutely! Kids will love both making and eating these gummies. It’s a fun activity that allows for experimentation with flavors and shapes. Plus, they can help measure and stir, making it a delightful family project.
Can I make it allergen-free?
Yes! You can make Kool Aid Gummy Treats allergen-friendly by using vegan gelatin and ensuring the Kool Aid flavoring used is free from allergens. Always check for specific ingredient details on packages.
What side dishes go best with it?
Kool Aid Gummy Treats are best paired with light snacks like fresh fruit salad or a mixed nut platter. They can also complement more indulgent items like cupcakes or ice cream during celebrations.
Can I double or halve the recipe?
Absolutely! You can easily adjust the recipe size according to your needs. Just make sure to keep the same ratios for each ingredient to maintain the gummy texture.
What’s the secret to the best flavor?
The key to achieving the best flavor is in the quality of your Kool-Aid. Choose a favorite flavor that resonates with you or experiment with unexpected pairings for a unique taste experience that suits your palate perfectly!
Kool-Aid Gummy Treats
Equipment
- Saucepan
- Silicone gummy molds
- Dropper or spoon
Ingredients
Gummy Base
- ½ cup cold water
- 2 packets flavored drink mix (e.g. Kool-Aid) choose any flavor
- 1 cup granulated sugar
- 3 tablespoons unflavored gelatin
- ¼ cup corn syrup


Instructions
- In a small saucepan, mix the cold water and unflavored gelatin. Let it sit for 1-2 minutes to bloom.
- Add the granulated sugar, corn syrup, and packets of flavored drink mix to the saucepan. Whisk until well combined.
- Heat the mixture over medium-low, stirring constantly, until the gelatin and sugar are fully dissolved (~2-3 minutes). Do not boil.
- Remove from heat. Using a dropper or spoon, carefully pour the gummy mixture into silicone molds.
- Allow to set at room temperature for about 30 minutes, then refrigerate for 30 minutes or until firm.
- Pop the gummies out of the molds and store in an airtight container. Enjoy!