
This post may contain affiliate links. As an Amazon Associate, I earn from qualifying purchases at no extra cost to you.
Table of Contents
🍴 Top Kitchen Essentials You'll Love


Introduction about Reese’s Peanut Butter Cup Earthquake Cake
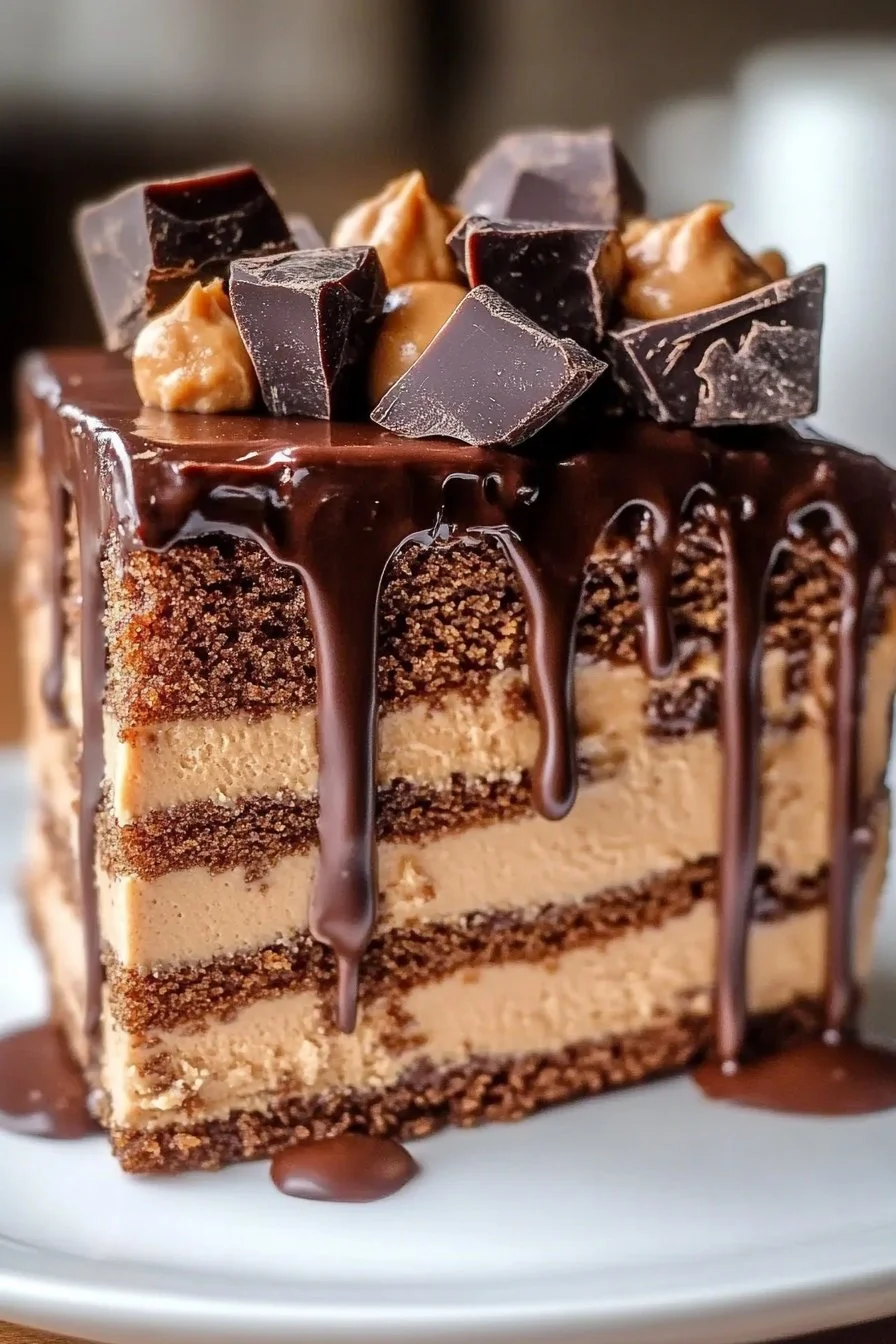
Have you ever craved a dessert so rich and decadent that it feels like a celebration in every bite? Look no further than the Reese’s Peanut Butter Cup Earthquake Cake! This delightful dessert brings together the sumptuous flavors of chocolate fudge cake, creamy peanut butter, and oh-so-sweet Reese’s Peanut Butter Cups. Can you imagine the joy of indulging in a rich chocolate cake filled with pools of creamy peanut butter goodness? Isn’t that the dream dessert combination?
The Reese’s Peanut Butter Cup Earthquake Cake is not just another chocolate cake; it’s a crowd-pleaser, a party centerpiece, and most importantly, a delightful treat that is surprisingly easy to make. Whether you’re a seasoned baker or just starting out, this cake requires minimal effort for maximum reward. It’s perfect for birthdays, potlucks, or even just a cozy night in. With each slice, you’re guaranteed to experience that nostalgic flavor combination that is both familiar and exhilarating.
Let me take you through how to whip up this incredibly satisfying dessert that will surely make your taste buds dance. With simple ingredients and easy steps, you’ll soon be enjoying the delectable layers of chocolate and peanut butter, making every occasion that much sweeter.
Key Benefits of Reese’s Peanut Butter Cup Earthquake Cake
Why you’ll love this recipe:
- Delicious Flavor Combination: The marriage of rich chocolate and creamy peanut butter is a match made in dessert heaven.
- Quick and Easy: With just a few simple steps, you can make a stunning dessert that will impress your friends and family.
- Family-Friendly: Kids and adults alike adore this cake, making it perfect for any gathering.
- Customizable: You can easily tweak this recipe to fit your taste or dietary needs, making it versatile for everyone.
- Great for Any Occasion: Whether it’s a birthday, holiday, or just a Friday night, this cake fits the bill perfectly.
What makes it stand out:
The Reese’s Peanut Butter Cup Earthquake Cake has a unique texture that sets it apart. The contrasting layers of moist chocolate cake and dense peanut butter filling create an explosion of flavors in your mouth with every bite.
Additionally, this cake allows for creative freedom! You can decorate it with various toppings or even use different kinds of candies to make it suit festive occasions. Its gooey chocolate and peanut butter goodness brings joy and excitement, ensuring it’s the star of any dessert table.
Ingredients for Reese’s Peanut Butter Cup Earthquake Cake
Complete ingredient list with measurements:
To create this mouthwatering cake, gather the following ingredients:
- 1 box chocolate fudge cake mix
- 1/2 cup vegetable oil
- 3 large eggs
- 1 1/4 cups water
- 8 oz cream cheese, softened
- 1/2 cup unsalted butter, melted
- 3 cups powdered sugar
- 1/2 cup creamy peanut butter
- 1 tsp vanilla extract
- 1 cup semi-sweet chocolate chips
- 10–12 Reese’s Peanut Butter Cups, chopped
Substitutes and alternatives:
- Cake Mix: You can use a gluten-free chocolate cake mix for a gluten-free version.
- Sugar: Substitute powdered sugar with coconut sugar for a healthier twist.
- Butter: You can replace unsalted butter with coconut oil for a dairy-free option.
- Peanut Butter: Almond butter or sunflower seed butter can be excellent alternatives for those with peanut allergies.
- Chocolate Chips: Try using dark chocolate chips or even white chocolate for a different taste.
How to Make Reese’s Peanut Butter Cup Earthquake Cake – Step-by-Step Directions
Step 1 – Prep your workspace and ingredients
Before we dive into the baking process, it’s essential to create a clean and organized workspace. Gather all your ingredients and tools. Preheat your oven to 350°F (175°C). Lightly grease a 9×13-inch baking pan or line it with parchment paper. This will ensure your cake comes out easily without sticking.
Step 2 – Prepare the cake batter
In a large mixing bowl, combine the chocolate fudge cake mix, vegetable oil, eggs, and water. Using a hand mixer or whisk, beat the mixture until smooth and fully blended, about 2 minutes. You want to ensure no lumps remain in the batter. Once combined, pour the batter into the prepared pan and spread it evenly.
Step 3 – Make the cream cheese filling
In a separate bowl, take the softened cream cheese and melted unsalted butter. Use your mixer to beat these two together until smooth. Gradually add the powdered sugar while mixing on low speed to avoid a cloud of sugar in your kitchen. Then, add the peanut butter and vanilla extract, beating until creamy and thick. This filling is going to add a delightful surprise to your cake!
Step 4 – Layer and swirl
Spoon dollops of the cream cheese mixture evenly over the cake batter in the baking pan. Use a knife to gently swirl the two mixtures together. This step is important in achieving that iconic “earthquake” look with the swirling patterns. Be careful not to overmix; you want to create beautiful ribbons without completely incorporating the cream cheese into the cake batter.
Step 5 – Add toppings
Now for the fun part! Sprinkle the chopped Reese’s Peanut Butter Cups and semi-sweet chocolate chips evenly over the top of the batter. This not only enhances the flavor but also adds a lovely texture and visual appeal to your cake.
Step 6 – Bake the cake
Carefully place the pan in the preheated oven and bake for 35 to 45 minutes. Keep an eye on the cake, and check for doneness by inserting a toothpick into the center. It should come out with moist crumbs but no raw batter sticking to it.
Step 7 – Cool the cake
Once baked to perfection, remove the cake from the oven and let it cool in the pan for at least 30 minutes. This will help it set and make it easier to slice later on. For neat slices, consider chilling it briefly in the refrigerator.
Step 8 – Slice and serve
Once cooled, slice the cake into squares and serve! You can enjoy it as it is, or pair it with your favorite toppings, such as whipped cream or chocolate sauce for an extra indulgence.
Serving Suggestions for Reese’s Peanut Butter Cup Earthquake Cake
Best occasions to serve this dish
This cake is perfect for a variety of occasions:
- Birthdays: Make any celebration memorable with this decadent cake.
- Potlucks: Impress friends with a unique dessert that everyone will love.
- Holidays: Its rich flavors make it ideal for Christmas or Easter gatherings.
- Family Night: Treat your loved ones during a cozy night in.
What to serve with it
Here are some fantastic pairings that complement the Reese’s Peanut Butter Cup Earthquake Cake:
- Vanilla Ice Cream
- Whipped Cream
- Chocolate Sauce
- Milk or Coffee
- Fresh Berries for a touch of freshness
Storing Reese’s Peanut Butter Cup Earthquake Cake Properly
Best storage practices
To keep your cake fresh, follow these storage tips:
- Refrigeration: Store leftover cake in the refrigerator in an airtight container for up to 5 days.
- Freezing: For longer storage, you can freeze the cake for up to 3 months. Slice it first and store it in layers with parchment paper in between.
Reheating and freezing tips
When you’re ready to enjoy your frozen cake:
- Thaw: Leave the cake in the refrigerator overnight or on the counter for a few hours.
- Reheating: If you prefer warm cake, place a slice in the microwave for 15-20 seconds. Just be cautious; avoid overheating, as it may dry out.
Tips & Tricks for Reese’s Peanut Butter Cup Earthquake Cake
Mistakes to avoid
- Overmixing the batter: This can result in a dense cake. Mix until just combined.
- Underbaking: Ensure the cake is fully cooked; a toothpick with moist crumbs means it’s properly baked.
- Skipping the cooling step: Allowing it to cool helps with neat slicing and flavor enhancement.
Extra tips for better results
- Use room temperature ingredients: It helps achieve a smoother batter and filling.
- Don’t rush the cooling process: This is vital for the texture and taste of your cake.
- Add a pinch of salt to your filling to enhance the sweetness and deepen the flavor.
Recipe Variations of Reese’s Peanut Butter Cup Earthquake Cake
Creative twists
Looking to mix things up? Here are a few ideas:
- Nut Additions: Incorporate chopped walnuts or pecans for added crunch.
- Seasonal Flavors: Consider adding a splash of peppermint extract during the holidays for a festive touch.
- Spices: Try adding a hint of cinnamon for an interesting twist in flavor.
Dietary adjustments
You can easily modify this recipe to suit various dietary needs:
- Gluten-Free: Use a gluten-free cake mix.
- Dairy-Free: Substitute all dairy ingredients with non-dairy alternatives.
- Vegan: Opt for a vegan cake mix and use flax eggs instead of regular eggs.
Conclusion about Reese’s Peanut Butter Cup Earthquake Cake
In summary, the Reese’s Peanut Butter Cup Earthquake Cake is a delicious, simple, and versatile dessert sure to delight anyone who tries it. Its rich flavor, delightful texture, and ease of preparation make it a top choice for any occasion. Whether you’re celebrating a special event or simply craving something sweet, this cake ticks all the boxes.
I encourage you to try this recipe for yourself! You’ll find satisfaction in each bite and joy in sharing it with your loved ones. I’m confident the Reese’s Peanut Butter Cup Earthquake Cake will quickly become a cherished favorite in your home—so go ahead and bake some happiness today!
FAQs about Reese’s Peanut Butter Cup Earthquake Cake
What if it doesn’t turn out right?
Don’t worry! Baking can be unpredictable. If the cake is dense, it may have been overmixed. If it’s too dry, it might have been overbaked. You can always serve it with ice cream or whipped cream to help rescue the experience!
Can I prepare it ahead of time?
Absolutely! You can prepare the cake a day before your event. Just ensure it’s stored properly in the fridge. The flavors will meld even more, making it just as delicious, if not better, the next day!
What are the best ingredient substitutions?
Some great substitutions include gluten-free cake mix for a gluten-free option or nut butters if you have peanut allergies. Just ensure to tweak based on your preferences and dietary needs.
How long can it be stored?
When stored properly, leftover cake can last in the refrigerator for about 5 days or in the freezer for up to 3 months. Be sure to cover it well to maintain freshness.
Can I use store-bought dough or crust?
While this recipe is designed for a cake mix, you can experiment with store-bought options if you want to change the texture. Just keep an eye on its baking time!
Is this recipe kid-friendly or family-appropriate?
Definitely! Kids love this cake because of its sweet flavor and fun ingredients. It’s perfect for family gatherings and is a great way to introduce children to baking.
Can I make this recipe allergen-free?
Yes! By using gluten-free cake mix and substituting ingredients as needed (like dairy-free butter and nut-free spreads), you can make a version suitable for those with various allergies. Just be mindful of cross-contamination if you’re serving someone with severe allergies.
Now that you have a comprehensive guide to the Reese’s Peanut Butter Cup Earthquake Cake, go ahead and dive into this delightful baking adventure! Enjoy!
Reese’s Peanut Butter Cup Earthquake Cake
Ingredients
For the Cake
- 1 box chocolate fudge cake mix You can use gluten-free chocolate cake mix for a gluten-free version.
- ½ cup vegetable oil
- 3 large eggs
- 1 ¼ cups water
For the Cream Cheese Filling
- 8 oz cream cheese, softened
- ½ cup unsalted butter, melted Can be replaced with coconut oil for a dairy-free option.
- 3 cups powdered sugar Coconut sugar can be used as a substitute for a healthier twist.
- ½ cup creamy peanut butter Almond butter or sunflower seed butter can be used for nut allergies.
- 1 tsp vanilla extract
For the Toppings
- 1 cup semi-sweet chocolate chips Dark chocolate chips or white chocolate can be a delicious alternative.
- 10–12 pieces Reese’s Peanut Butter Cups, chopped


Instructions
Preparation
- Preheat your oven to 350°F (175°C) and lightly grease a 9×13-inch baking pan or line it with parchment paper.
- In a large mixing bowl, combine the chocolate fudge cake mix, vegetable oil, eggs, and water. Mix until smooth and lump-free.
- Pour the batter into the prepared pan and spread it evenly.
- In a separate bowl, beat the cream cheese and melted unsalted butter together until smooth. Gradually add the powdered sugar, peanut butter, and vanilla until creamy.
- Spoon dollops of the cream cheese mixture over the cake batter and swirl gently with a knife to create an ‘earthquake’ look.
- Sprinkle the chopped Reese’s and chocolate chips evenly over the top.
Baking
- Bake the cake for 35 to 45 minutes, checking for doneness with a toothpick.
- Once baked, let the cake cool in the pan for at least 30 minutes.
Serving
- Slice the cake into squares and serve plain or with toppings like whipped cream or chocolate sauce.