
This post may contain affiliate links. As an Amazon Associate, I earn from qualifying purchases at no extra cost to you.
Table of Contents
Imagine diving into a dessert that perfectly marries the rich flavors of chocolate and peanut butter. That’s exactly what you get with the Peanut Butter Icebox Cake. This delightful treat is not just another ordinary dessert; it brings together the best of both worlds in a delectable, layered masterpiece. Have you ever wanted a dessert that’s impressive yet simple to make? Look no further.
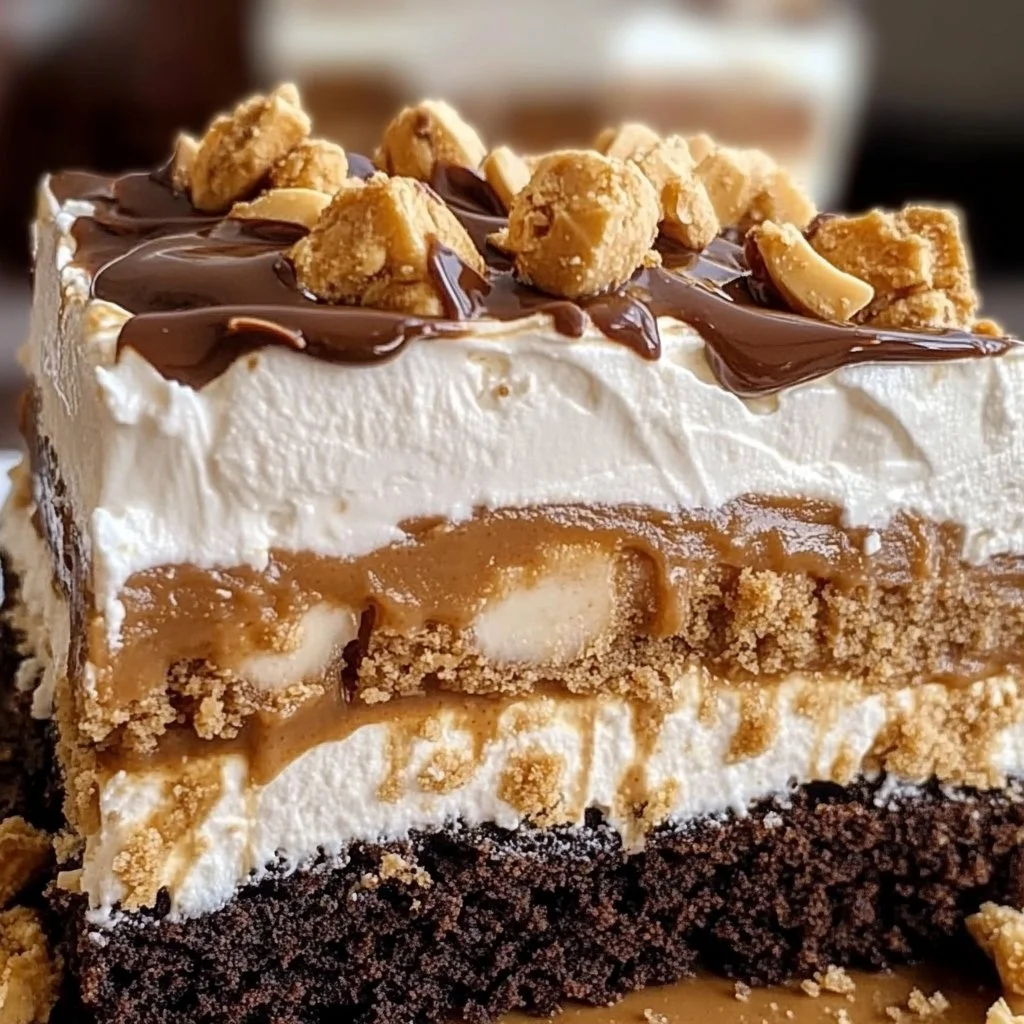
The Peanut Butter Icebox Cake is special because it offers a no-bake solution for warm weather. With crunchy chocolate cookie layers, creamy peanut butter filling, and luscious chocolate pudding, every bite delivers a symphony of flavor and texture. It’s the kind of dessert that will make you the star of any gathering, from family dinners to summer barbecues.
You may ask, “What makes this cake so easy?” The answer lies in the simplicity of the ingredients and the minimal steps involved. There’s no baking required, just layering delicious elements and allowing them to set in the refrigerator. Whether you’re a beginner in the kitchen or an experienced baker, this recipe is approachable and foolproof.
This Peanut Butter Icebox Cake is a showstopper that attracts both kids and adults alike. A classic dessert with a modern twist, it’s sure to evoke smiles and create memories. It’s an easy dessert to whip up, yet it looks and tastes gourmet. Who wouldn’t love to indulge in a rich treat that combines creamy whipped topping, creamy peanut butter, and crunchy chocolate goodness?
In the upcoming sections, you will discover the key benefits of this delightful cake, what makes it stand out from other desserts, and the complete ingredient list necessary to make it. You’ll also uncover alternatives for dietary restrictions and learn how to make this easy, delicious dessert in just a few steps. So grab your apron, and let’s dive into the delightful world of the Peanut Butter Icebox Cake!
🍴 Top Kitchen Essentials You'll Love


Key Benefits of Peanut Butter Icebox Cake
The Peanut Butter Icebox Cake is not only delicious; it’s also packed with benefits that make it a fantastic choice for any occasion.
- Flavor Explosion: The combination of chocolate and peanut butter creates a mouthwatering flavor that everyone loves.
- Simplicity: Easy to make with straightforward layers, so you don’t need baking skills.
- No Baking Required: Perfect for those hot summer days when you want to avoid turning on the oven.
- Family-Friendly: Kids and adults alike will enjoy every creamy bite, making it ideal for gatherings.
- Versatile: You can customize it with different toppings or mix-ins to suit your preferences.
- Make Ahead: This cake can be prepared a day in advance, allowing you to enjoy your time with family and friends.
What Makes It Stand Out
The Peanut Butter Icebox Cake stands out for its unique blend of flavors and textures. It’s a classic dessert reimagined with modern ingredients and effortless preparations. This cake is layered, giving it an impressive look while being surprisingly easy to assemble.
Customization is another fantastic aspect of this recipe. You can easily swap out ingredients based on what you have at home or your dietary preferences. This flexibility makes the Peanut Butter Icebox Cake a crowd-pleaser on any occasion, whether it’s a birthday party, family gathering, or a simple weeknight treat.
Ingredients for Peanut Butter Icebox Cake
Complete Ingredient List with Measurements
Here’s everything you’ll need to create your own Peanut Butter Icebox Cake:
- 19.1 ounces crushed chocolate sandwich cookies (divided into 2¼ cups, 1½ cups, and 1½ cups)
- ⅓ cup salted sweet cream butter, melted
- 7.8 ounces instant chocolate pudding mix (two 3.9-ounce boxes)
- 2¾ cups whole milk
- 2 cups whipped topping, thawed
- 5 cups Miniature Reese’s peanut butter cups, unwrapped and halved (divided into 2 cups and 3 cups)
- 8 ounces cream cheese, softened
- 1 cup creamy peanut butter
- 1½ cups powdered sugar, sifted
- 7.25 ounces chocolate magic shell
These ingredients blend together to create a cake that is not only visually appealing but also incredibly delicious.
Substitutes and Alternatives
You can definitely swap some ingredients in the Peanut Butter Icebox Cake to accommodate dietary needs or preferences. For a gluten-free option, use gluten-free chocolate sandwich cookies. Almond or oat milk works well if you’re looking for a dairy alternative.
If you need a lower-sugar version, consider using sugar substitutes in place of powdered sugar or making your own chocolate pudding from scratch with less sugar. You can also replace the creamy peanut butter with almond or cashew butter for a different flavor profile.
How to Make Peanut Butter Icebox Cake – Step-by-Step Directions
Step 1 – Prepare Ingredients
Gather all the ingredients first to ensure a smooth cooking process. Measure out your crushed chocolate sandwich cookies, melted butter, and pudding mix to streamline your workflow.
Step 2 – Make the Cookie Crust
Add the 2¼ cups of crushed chocolate sandwich cookies into a medium size bowl. Pour the melted butter over these crumbs and mix until they are fully coated. Now, press this mixture firmly into the bottom of a lightly sprayed 9×13 baking dish. Set this crust aside as you prepare the next layers.
Step 3 – Prepare the Pudding
In a large mixing bowl, combine the pudding mix with the 2¾ cups of whole milk. Using a handheld mixer on low speed, combine these until the mixture begins to thicken. This step should take just a few minutes, resulting in a beautifully rich pudding base.
Step 4 – Fold in Whipped Topping
Once your pudding has thickened, gently fold in 2 cups of the thawed whipped topping. This will give the pudding a lighter texture, making it a perfect layer for your cake.
Step 5 – Assemble the First Layer
Spread half of the pudding mixture generously over your cookie crust. This layer will become the foundation for the rich flavors that follow.
Step 6 – Add Peanut Butter Cups
Sprinkle 2 cups of the halved Miniature Reese’s peanut butter cups evenly over the pudding layer. Each piece will enhance the flavors with its delightful peanut butter and chocolate combination.
Step 7 – Add Cookie Crumbs
Now, sprinkle 1½ cups of the remaining crushed chocolate sandwich cookies over the layer of peanut butter cups. This will add a nice crunch that contrasts beautifully with the creamy layers.
Step 8 – Make the Cream Cheese Mixture
In a separate medium-sized bowl, combine the softened cream cheese, creamy peanut butter, and sifted powdered sugar. Use a handheld mixer on medium-high speed until this mixture is smooth and creamy, which usually takes about 1½ to 2 minutes.
Step 9 – Fold in More Whipped Topping
Once your cream cheese and peanut butter mixture is well combined, fold in 2 cups of the remaining thawed whipped topping. This will make your mixture light and fluffy, perfect for spreading as a layer.
Step 10 – Complete the Layering Process
Spread all of the creamy peanut butter mixture evenly over the layer of crushed chocolate sandwich cookies. Then, sprinkle the remaining 1½ cups of crushed cookies on top. Finally, evenly spread the last of the chocolate pudding mixture over this layer.
Step 11 – Drizzle with Magic Shell
To finish off, drizzle the chocolate magic shell over the top of your layered cake. Use a spatula or spoon to spread it evenly for a beautiful finish.
Step 12 – Chill Before Serving
Cover your Peanut Butter Icebox Cake and chill it in the refrigerator for at least 4 hours, or preferably overnight. This ensures all the layers set together and flavors meld beautifully.
Serving Suggestions for Peanut Butter Icebox Cake
Best Occasions to Serve This Dish
The Peanut Butter Icebox Cake is perfect for countless occasions. Its inviting look can elevate any gathering, whether it be a birthday, holiday celebration, or casual family dinner. Imagine bringing it out at a summer barbecue—it’s sure to wow your guests!
For a cozy night in, this dessert pairs well with a movie marathon. Just scoop out slices and enjoy while relaxing on the couch. It’s also a great treat for potluck gatherings, as it’s easy to transport and share.
What to Serve With It
To complement your Peanut Butter Icebox Cake, consider these side options:
- Fresh Berries: Strawberries, raspberries, or blueberries add freshness and balance to the richness of the cake.
- Vanilla Ice Cream: A scoop of vanilla or even chocolate ice cream can elevate your dessert experience.
- Drinks: Iced coffee or a rich hot chocolate can be delightful pairings to enjoy alongside each slice.
How to Store Peanut Butter Icebox Cake Properly
Best Storage Practices
Always ensure that your Peanut Butter Icebox Cake is well covered before storing it in the refrigerator. Use plastic wrap or an airtight container to keep it fresh for longer. When stored this way, it can last for about 4 to 5 days.
If you want to keep it longer, you may consider freezing slices of the cake. Just wrap individual pieces in plastic wrap and place them in a freezer-safe container.
Reheating and Freezing Tips
For serving, there’s no need to reheat the cake, as it’s designed to be served cold. If you choose to freeze it, let it thaw in the refrigerator overnight for the best texture and flavor.
Avoid trying to reheat the cake in the microwave, as it can affect the texture and create a soupy consistency.
Tips & Tricks for Peanut Butter Icebox Cake
Mistakes to Avoid
- Not Chilling Long Enough: Ensure you let your cake chill long enough for the layers to set. Rushing this process may lead to a messy slice.
- Using Warm Ingredients: All ingredients should be at room temperature, especially the cream cheese, to ensure a smooth mixture.
- Overmixing the Pudding: Mix the pudding just until it thickens to avoid a grainy texture.
- Skipping the Whipped Topping: Don’t skip the whipped topping! It’s crucial for achieving the cake’s creamy texture.
- Not Pressing Crust Firmly: Be sure to press the cookie crust down firmly, so it holds together well when serving.
- Ignoring Layers: Follow the layering order as instructed. Each component plays a vital role in the overall taste and texture.
Extra Tips for Better Results
For an added touch of flavor, consider using crunchy peanut butter instead of creamy for a delightful texture. You can also mix in some chopped nuts for an unexpected crunch.
For presentation, drizzle additional chocolate syrup over the top before serving or garnish with extra halved Reese’s peanut butter cups.
Recipe Variations of Peanut Butter Icebox Cake
Creative Twists
- Banana Layer: Add banana slices in between layers for a fruity twist that pairs beautifully with peanut butter.
- Different Cookies: Swap out the chocolate sandwich cookies for vanilla wafers or graham crackers for a different flavor base.
- Nutty Chocolate Chips: Mix in mini chocolate chips or chopped nuts to add a fun texture in the cream cheese layer.
- Toppings Galore: Experiment with toppings by using different kinds of chocolate sauces, caramels, or even fresh fruit.
Dietary Adjustments
To make a gluten-free version of the cake, choose gluten-free cookie options. If you’re vegan, substitute cream cheese for vegan cream cheese, use dairy-free whipped topping, and swap the whole milk for almond milk.
You can create a dairy-free version as well by ensuring all your ingredients are labeled dairy-free, including using nut butter and coconut whipped cream.
Conclusion about Peanut Butter Icebox Cake
In summary, the Peanut Butter Icebox Cake is the ultimate dessert for every occasion. Its irresistible combination of chocolate and peanut butter flavors makes it a guaranteed crowd-pleaser. With its easy, no-bake preparation, even those new to the kitchen can create a stunning dessert.
Whether you enjoy it during a family gathering, a special celebration, or simply as a weekend treat, this icebox cake is sure to impress. The layers of whipped topping, creamy peanut butter, and crunchy cookie base offer a delightful experience with every bite. So why not gather your ingredients and try making this extraordinary dessert today? You won’t regret it!
FAQs about Peanut Butter Icebox Cake
Can I prepare it ahead of time?
Yes, you can make it a day ahead. It actually tastes better after chilling overnight!
Can I freeze it?
Yes, but it’s best to slice it first and wrap individual portions tightly before freezing.
How long does it last?
If stored properly in the refrigerator, it can last for about 4 to 5 days.
What are the best substitutions?
You can substitute with gluten-free cookies, dairy-free milk, or use nut butters for different flavors.
Is this recipe family-friendly?
Absolutely! Kids love the combination of chocolate and peanut butter, making it a family favorite.
Can I use homemade whipped topping?
Yes, homemade whipped topping will work just as well and provide a fresh touch.
Does it need to be covered when stored?
Yes, cover it to keep it fresh and prevent other odors in the fridge from affecting it.
What can I serve it with?
It pairs well with fresh fruit, ice cream, or simply on its own.
Can I add other flavors?
Definitely! Feel free to experiment with layers of banana or caramel for added flavor.
Is this a good recipe for beginners?
Yes! It’s simple and forgiving, perfect for those just starting to bake.

Peanut Butter Icebox Cake
Ingredients
For the Crust
- 2.25 cups 2¼ cups crushed chocolate sandwich cookies divided from 19.1 ounces
- ⅓ cup ⅓ cup salted sweet cream butter, melted
For the Pudding Filling
- 7.8 ounces 7.8 ounces instant chocolate pudding mix two 3.9-ounce boxes
- 2.75 cups 2¾ cups whole milk
- 2 cups 2 cups whipped topping, thawed
For Assembly
- 5 cups 5 cups Miniature Reese’s peanut butter cups, halved divided into 2 cups and 3 cups
- 8 ounces 8 ounces cream cheese, softened
- 1 cup 1 cup creamy peanut butter
- 1.5 cups 1½ cups powdered sugar, sifted
- 7.25 ounces 7.25 ounces chocolate magic shell


Instructions
Preparation
- Gather all ingredients.
- Add 2¼ cups of crushed chocolate sandwich cookies into a medium bowl.
- Pour melted butter over cookies and mix until fully coated.
- Press the mixture into the bottom of a lightly sprayed 9×13 baking dish.
Making the Pudding
- In a large mixing bowl, combine pudding mix with 2¾ cups of whole milk.
- Mix on low speed until thickened.
- Gently fold in 2 cups of thawed whipped topping.
Layering the Cake
- Spread half of the pudding over the cookie crust.
- Sprinkle 2 cups of halved Miniature Reese’s peanut butter cups over the pudding.
- Sprinkle 1½ cups of the remaining crushed cookies over the peanut butter cups.
- In a separate bowl, mix softened cream cheese, peanut butter, and sifted powdered sugar until smooth.
- Fold in 2 cups of remaining whipped topping.
- Spread the cream cheese mixture over the cookie layer.
- Top with remaining 1½ cups of crushed cookies and the last of the pudding.
- Drizzle chocolate magic shell over the top of the cake.
Chilling
- Cover the cake and chill in the refrigerator for at least 4 hours, preferably overnight.