
This post may contain affiliate links. As an Amazon Associate, I earn from qualifying purchases at no extra cost to you.
Table of Contents
🍴 Top Kitchen Essentials You'll Love


Introduction to Hershey’s Red Velvet Blossoms
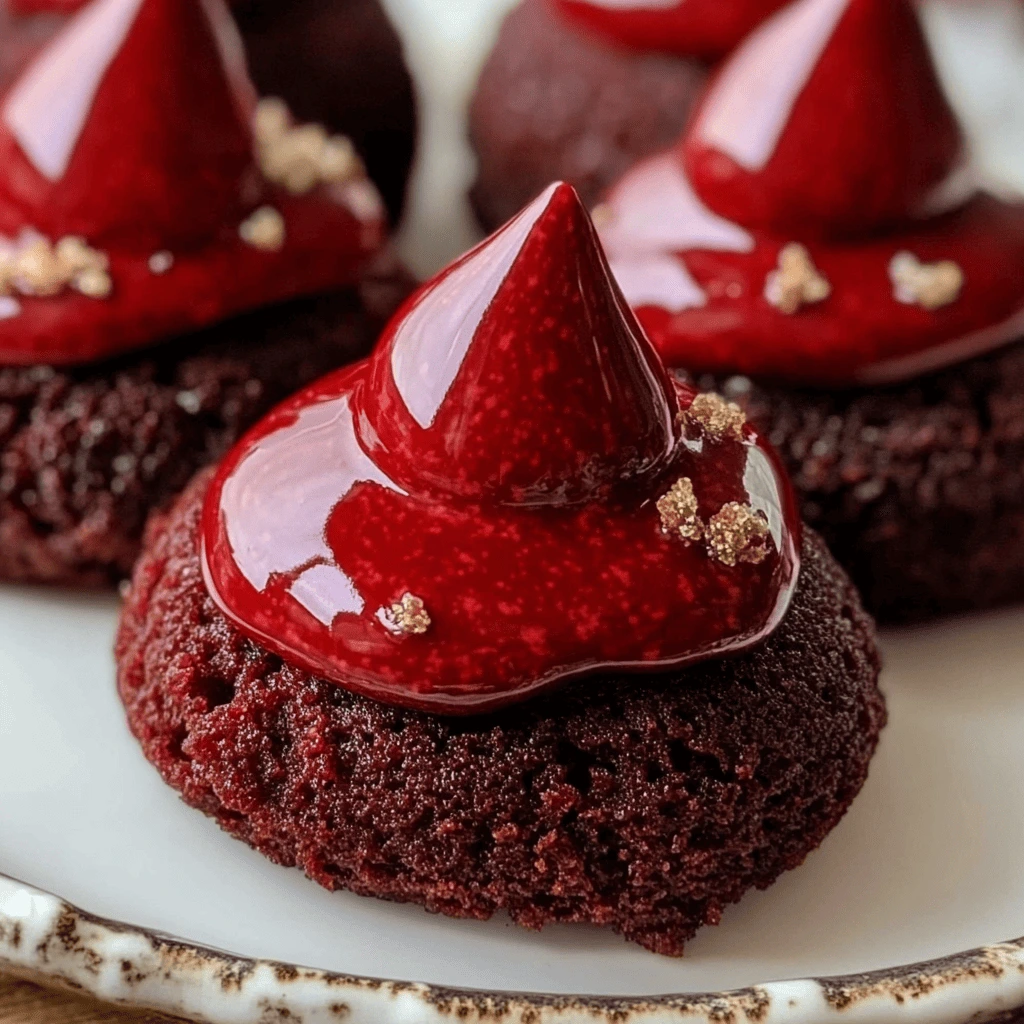
Have you ever found yourself craving a sweet treat that embodies both comfort and style? Look no further than Hershey’s Red Velvet Blossoms. This delightful recipe combines the classic flavors of red velvet cake with a unique twist that makes it perfect for any occasion. Imagine a soft, velvety cookie topped with a rich chocolate kiss melting in your mouth. The vibrant red color not only symbolizes love and passion, making it ideal for Valentine’s Day or anniversaries, but it also looks stunning on any dessert table.
Many of us associate red velvet with special moments rather than everyday delights, but Hershey’s Red Velvet Blossoms breaks that norm by making this beloved flavor accessible and easy to whip up at home. This recipe is not just about indulgence; it captures the essence of family gatherings, holidays, and cozy nights with loved ones. The best part? It’s simple enough for even the busiest bakers. If you’re wondering what makes this cookie so extraordinary, it’s the harmonious blend of butter, sugars, and cocoa, along with that iconic red hue that brings joy and nostalgia into your kitchen.
When it comes to recipes that impress without demanding your entire day, Hershey’s Red Velvet Blossoms truly shine. They strike a perfect balance between visually appealing and mouthwateringly tasty. I can assure you, once you experience the blend of flavors and textures in these cookies, they’ll quickly become a cherished staple in your dessert repertoire. So grab your mixing bowl, and let’s dive into the world of delightful baking!
Key Benefits of Hershey’s Red Velvet Blossoms
Why You’ll Love This Recipe
- Delicious Flavor: A perfect balance of sweetness and cocoa.
- Easy Preparation: Simple steps make it accessible for anyone.
- Stunning Appearance: The vibrant red color catches the eye.
- Versatile Treat: Suitable for any occasion, from birthdays to holidays.
- Family-Friendly: A fun baking project for kids and adults alike.
- Chocolatey Delight: Each bite is topped with a melty Hershey’s kiss.
What Makes It Stand Out
The originality of Hershey’s Red Velvet Blossoms lies in its classic yet modern twist on traditional red velvet. Unlike typical cakes or cupcakes, these cookies provide both the iconic flavor and the ease of a hand-held treat. You can customize them based on your preferences—think adding nuts, using different types of chocolate, or swapping sugars for alternatives.
Best of all, these cookies serve as a wonderful canvas for creativity! Whether you add sprinkles, swap different colored sanding sugars, or adjust the cocoa levels to your liking, each batch can be as unique as the occasion itself. For holidays, consider shaping them into festive forms or using themed décor to make them even more special.
Ingredients for Hershey’s Red Velvet Blossoms
Complete Ingredient List with Measurements
- 7 tbsp butter (salted or unsalted, softened)
- 1/2 cup brown sugar
- 2 tbsp granulated sugar
- 1 tsp vanilla extract
- 1 large egg yolk
- 1/4 tsp red food coloring gel
- 1 cup all-purpose flour
- 1 tbsp cocoa powder
- 1/2 tsp baking powder
- 1/4 tsp salt
- 1/4 cup red sanding sugar
- 18 Hershey’s chocolate kisses
Substitutes and Alternatives
If you’re looking for alternatives due to allergies or dietary preferences, fear not! You may substitute the flour with a gluten-free blend for a gluten-free version without compromising flavor. For those avoiding dairy, consider using coconut oil or a plant-based butter alternative in lieu of regular butter. Furthermore, vegan bakers can replace the egg yolk with a flaxseed meal activated in water or a commercial egg replacer.
For the sugars, maple syrup or agave nectar can work in place of brown sugar, but they may alter the cookie’s texture slightly. It’s fun to explore these options, giving you the flexibility to craft the perfect cookie tailored to your needs.
How to Make Hershey’s Red Velvet Blossoms – Step-by-Step Directions
Step 1 – Prepare Ingredients
Start by gathering all your ingredients and equipment. Preheat your oven to 350°F and line a large baking sheet with parchment paper for easy cleanup later. Having everything in place will make the cooking process smoother and more enjoyable.
Step 2 – Cook the Base
In a stand mixer, cream together the softened butter, brown sugar, and granulated sugar until the mixture is light and smooth. This typically takes about 2-3 minutes. The key here is to ensure the butter is sufficiently softened to incorporate air into the mix, providing a fluffy base for your cookies.
Step 3 – Add Wet Ingredients
Next, add the egg yolk, vanilla extract, and red food coloring gel to the creamed mixture. Mix well until everything is fully combined. The red food coloring is essential not just for aesthetics but also for the signature red velvet flavor.
Step 4 – Combine Dry Ingredients
In a separate bowl, sift together the all-purpose flour, cocoa powder, baking powder, and salt. This ensures there are no clumps and that the baking powder is evenly distributed, which is crucial for the dough’s texture and rise.
Step 5 – Mix the Dough
Slowly add the dry ingredient mixture to the wet mixture, mixing just until the flour disappears. Avoid overmixing, as it can lead to tough cookies. The dough should come together without any visible flour but remain soft and slightly sticky.
Step 6 – Shape the Dough Balls
Using a tablespoon or cookie scoop, portion out 18 equally sized balls of dough. Roll each ball between the palms of your hands to smooth them out, which also helps to create a nice shape during baking.
Step 7 – Coat with Sanding Sugar
Roll each dough ball in the red sanding sugar to give them a lovely, festive finish. This step adds not just sweetness but also a delightful crunch to the exterior of your cookies.
Step 8 – Bake the Cookies
Place the cookie dough balls on the prepared baking sheet with enough space between them, as they’ll spread a bit while baking. Bake in the preheated oven for about 10 minutes. You’ll know they are ready when they start to become firm around the edges while still being soft in the center.
Step 9 – Add Chocolate Kisses
As soon as you pull the cookies from the oven, gently press a Hershey’s chocolate kiss into the center of each cookie while they are still warm. The kiss will melt slightly, creating a delectable chocolate topping.
Step 10 – Cool the Cookies
Allow the cookies to cool on the baking sheet for about 10 minutes before transferring them to a cooling rack to cool completely. This helps them set properly, ensuring they maintain their shape and texture.
Serving Suggestions for Hershey’s Red Velvet Blossoms
Best Occasions to Serve This Dish
Hershey’s Red Velvet Blossoms are perfect for a variety of occasions. They shine at holiday gatherings, birthday parties, and Valentine’s Day celebrations. The vibrant color and taste make them a popular choice for any event that calls for a festive treat.
Whether you are hosting a casual get-together or planning an elaborate dinner, serving these cookies will undoubtedly put smiles on your guests’ faces. Their charm lies in their unique appearance and comforting flavor, perfect for sharing with family and friends.
What to Serve With It
These delightful cookies pair exceptionally well with a variety of beverages. Consider serving them alongside a hot cup of coffee or tea for a comforting afternoon snack. Alternatively, a glass of cold milk enhances the flavors while providing a classic pairing. For something more festive, a warm chocolate drink could complement the rich taste of the cookies beautifully.
How to Store Hershey’s Red Velvet Blossoms Properly
Best Storage Practices
To keep your Hershey’s Red Velvet Blossoms fresh, store them in an airtight container at room temperature. They will remain tasty for about a week. For extended storage, you can place them in the refrigerator, although this may slightly alter their texture.
If you’d like your cookies to last longer, consider freezing them. Place the cookies in a single layer on a baking sheet until they’re frozen solid, then transfer them to a freezer-safe bag or container. They can typically be stored this way for up to three months.
Reheating and Freezing Tips
When you are ready to enjoy a frozen cookie, remove it from the freezer and let it thaw at room temperature for about 15 minutes. For a warm treat, pop it in the microwave for 10-15 seconds. This will warm the chocolate kiss and make the cookie soft again, transporting you back to that fresh-baked feeling.
Tips & Tricks for Hershey’s Red Velvet Blossoms
Mistakes to Avoid
- Overmixing the Dough: This can make your cookies tough instead of soft and chewy.
- Not Softening Butter: Using cold butter will hinder proper creaming and lead to dense cookies.
- Skipping the Cooling Time: Allowing cookies to cool on the baking sheet helps them set properly.
- Using Too Much Flour: Always check for accurate measuring to avoid dry cookies.
- Ignoring Oven Calibration: An oven that’s too hot or cool can alter baking times.
Extra Tips for Better Results
For even more flavor, experiment with different types of chocolate kisses, such as caramel-filled or seasonal flavors. You can also enhance the flavor by adding spices like cinnamon or nutmeg to the dough. For a stunning display, consider drizzling white chocolate over the cookies before serving.
Recipe Variations of Hershey’s Red Velvet Blossoms
Creative Twists
- Add Nuts: Incorporate chopped pecans or walnuts to the cookie dough for a nutty crunch.
- Swirl Cream Cheese: Create a delightful cream cheese filling by mixing softened cream cheese with powdered sugar and swirling it into the cookie dough before baking.
- Different Colors: Experiment with different food coloring to create a rainbow of velvet blossoms suitable for various occasions.
Dietary Adjustments
For a vegan version, use a flaxseed meal mixture and dairy-free butter instead of traditional butter. Gluten-free flour blends can replace the all-purpose flour to make it celiac-friendly. Adjusting the sugars can also create healthier or alternative options depending on your dietary needs.
Conclusion about Hershey’s Red Velvet Blossoms
In summary, Hershey’s Red Velvet Blossoms offer not only an irresistible taste but also a canvas for creativity and personalization in baking. The pairing of soft, fluffy cookie dough with a melted chocolate kiss creates an experience that captures hearts and palates alike. Easy to make and beautiful to present, these cookies are perfect for any gathering, from family dinners to parties.
So why wait? Embrace the joy of baking with this delightful recipe. Whether you stick to the classic preparation or add your unique twists, Hershey’s Red Velvet Blossoms will undoubtedly become a beloved favorite in your dessert collection. Dive into the world of delightful flavors and make memories as you bake these lovely cookies.
FAQs about Hershey’s Red Velvet Blossoms
Can I store Hershey’s Red Velvet Blossoms in the fridge?
Yes, you can store them in the fridge; however, this may slightly alter their texture. It is best to keep them in an airtight container at room temperature.
How long do Hershey’s Red Velvet Blossoms last?
When stored properly in an airtight container at room temperature, they will last about a week. For longer storage, freezing is recommended.
Can I freeze Hershey’s Red Velvet Blossoms?
Absolutely! You can freeze them for up to three months. Simply freeze them in a single layer first, then transfer to a freezer-safe bag.
How do I reheat frozen cookies?
To reheat, let the cookie thaw at room temperature for about 15 minutes and then microwave for 10-15 seconds for that freshly baked feel.
What can I use instead of butter?
Coconut oil or plant-based butter alternatives can replace butter for those looking for dairy-free options.
Can I make these cookies gluten-free?
Yes, simply substitute the all-purpose flour with a gluten-free flour blend without compromising too much on flavor or texture.
What’s the best way to add nuts?
Chop your preferred nuts and fold them into the dough after mixing the wet and dry ingredients, before forming the cookie balls.
How can I make these cookies more festive?
Add colorful sprinkles or use different colored sanding sugars to make them more visually appealing for holidays or celebrations.

Hershey’s Red Velvet Blossoms
Ingredients
Cookie Base
- 7 tbsp butter (salted or unsalted, softened) Ensure butter is softened for proper mixing.
- ½ cup brown sugar Packed for more sweetness.
- 2 tbsp granulated sugar For additional sweetness.
- 1 tsp vanilla extract Enhances flavor.
- 1 large egg yolk For richness.
- ¼ tsp red food coloring gel Essential for red velvet color.
Dry Ingredients
- 1 cup all-purpose flour Can substitute with gluten-free flour.
- 1 tbsp cocoa powder For chocolate flavor.
- ½ tsp baking powder For leavening.
- ¼ tsp salt Balances sweetness.
Coating and Topping
- ¼ cup red sanding sugar For a festive touch.
- 18 pieces Hershey’s chocolate kisses For topping each cookie.


Instructions
Preparation
- Preheat your oven to 350°F and line a large baking sheet with parchment paper.
- Cream together butter, brown sugar, and granulated sugar in a stand mixer until light and smooth (about 2-3 minutes).
Mix Ingredients
- Add egg yolk, vanilla extract, and red food coloring gel to the creamed mixture and mix until combined.
- In a separate bowl, sift together flour, cocoa powder, baking powder, and salt.
- Gradually combine the dry ingredients with the wet mixture until just blended.
Form the Cookies
- Shape the dough into 18 equal balls and roll in red sanding sugar.
- Place on the prepared baking sheet with space between each cookie.
- Bake for about 10 minutes until edges are firm but centers are soft.
Finish and Cool
- Immediately press a Hershey’s kiss into the center of each warm cookie.
- Allow cookies to cool on the baking sheet for 10 minutes before transferring to a cooling rack.