
This post may contain affiliate links. As an Amazon Associate, I earn from qualifying purchases at no extra cost to you.
Table of Contents
Ice cream is a delightful treat that evokes feelings of nostalgia and comfort. Among various flavors, Rose Pistachio Cheesecake Ice Cream holds a special spot in many hearts. Have you ever wondered how the fusion of flavors can bring joy to your palate? This recipe invites you to embark on a flavor journey that celebrates the delicate floral notes of rose water paired with the nutty crunch of pistachios.
The charm of Rose Pistachio Cheesecake Ice Cream: 5 Steps to Bliss lies not only in its taste but also in its simplicity. With just a handful of ingredients, you can create a creamy, dreamy dessert that feels both elegant and indulgent. This isn’t just another ice cream recipe; it’s a celebration of flavors that can elevate any occasion.
What makes this recipe even more enticing is its versatility. Whether hosting a summer gathering or simply wanting to treat yourself, this ice cream fits perfectly. As you savor each spoonful, the sweetness of condensed milk and the richness of heavy cream come together in harmony. Have you ever dreamt of a dessert that combines sophistication with everyday pleasure? Here it is!
In addition to being incredibly delicious, making Rose Pistachio Cheesecake Ice Cream is an exciting experience. The process allows for creativity as you decide how to infuse flavor and texture. Each step is straightforward, making it ideal for both novice and experienced home cooks. So, why not give it a try?
🍴 Top Kitchen Essentials You'll Love


Key Benefits of Rose Pistachio Cheesecake Ice Cream: 5 Steps to Bliss
When it comes to creating homemade treats, there’s always something special that DIY recipes offer. Here are some benefits of making Rose Pistachio Cheesecake Ice Cream:
- Unique Flavor Profile: The combination of rose water and pistachios creates an unforgettable taste.
- Simplicity: With only a few ingredients, it’s easy to whip up.
- Versatile Enjoyment: This ice cream is perfect for any season or occasion.
- Family-Friendly: Kids and adults alike will find joy in its creamy texture.
- Culinary Creativity: Customize it with different toppings or mix-ins.
- Healthier Indulgence: Control the sweetness and dairy quality to fit your diet needs.
What Makes It Stand Out
What sets this ice cream apart from others is its originality. Incorporating rose water gives it an exotic flair that’s often lacking in regular ice cream recipes. It’s like taking a trip without leaving your kitchen.
This recipe also allows room for customization. You may decide to add more pistachios or other toppings. Imagine a scoop adorned with edible flowers for a stunning presentation!
The occasions for serving Rose Pistachio Cheesecake Ice Cream are endless. From birthday parties to festive gatherings, it can be a centerpiece of delight. It’s an impressive dish that invites everyone to share their memories of summer while enjoying something truly special.
Ingredients for Rose Pistachio Cheesecake Ice Cream: 5 Steps to Bliss
Complete Ingredient List with Measurements
- 2 cups heavy cream
- 1 cup sweetened condensed milk
- 1/2 cup milk
- 1/2 cup crushed pistachios
- 1/4 cup rose water
- 1/4 cup sugar
- 1 teaspoon vanilla extract
Each ingredient plays a role in creating the lush texture and flavor. Heavy cream adds richness, while sweetened condensed milk brings sweetness. The crushed pistachios provide that delightful crunch, and the rose water transports your taste buds to a more exotic locale.
Substitutes and Alternatives
If you have dietary restrictions or preferences, fear not! You can easily swap out certain ingredients. For instance, if you’re looking for a lighter option, consider using half-and-half instead of heavy cream.
Those who need a dairy-free alternative can opt for coconut cream and almond milk. The rose water remains a vital component that ties the flavors together beautifully, maintaining the essence of your Rose Pistachio Cheesecake Ice Cream: 5 Steps to Bliss.
How to Make Rose Pistachio Cheesecake Ice Cream: 5 Steps to Bliss – Step-by-Step Directions
Step 1 – Prepare Ingredients
Start by gathering all your ingredients. This step streamlines the process and ensures you have everything on hand when you begin.
Step 2 – Mix the Base
In a large mixing bowl, combine the heavy cream, sweetened condensed milk, and milk. This creates the luscious creaminess that’s essential for your ice cream.
Step 3 – Add Sweetness
Stir in the sugar, rose water, and vanilla extract into your creamy mixture. Ensure everything is well-blended to achieve a homogeneous mix with that signature floral scent swirling through.
Step 4 – Fold in the Pistachios
Gently fold in the crushed pistachios. This adds a delightful crunch as well as a nutty flavor that’s irresistible.
Step 5 – Churn the Mixture
Pour the mixture into your ice cream maker. Follow the manufacturer’s instructions to churn until it achieves a soft-serve consistency. This usually takes around 20-25 minutes.
Step 6 – Transfer to Freezer Container
Once churned, transfer the ice cream to a lidded container. Make sure to smooth out the top before sealing it to prevent ice crystals from forming.
Step 7 – Freeze Until Firm
Place the container in the freezer. Let it freeze for at least 4 hours or longer if you prefer a firmer texture.
Step 8 – Serve and Enjoy
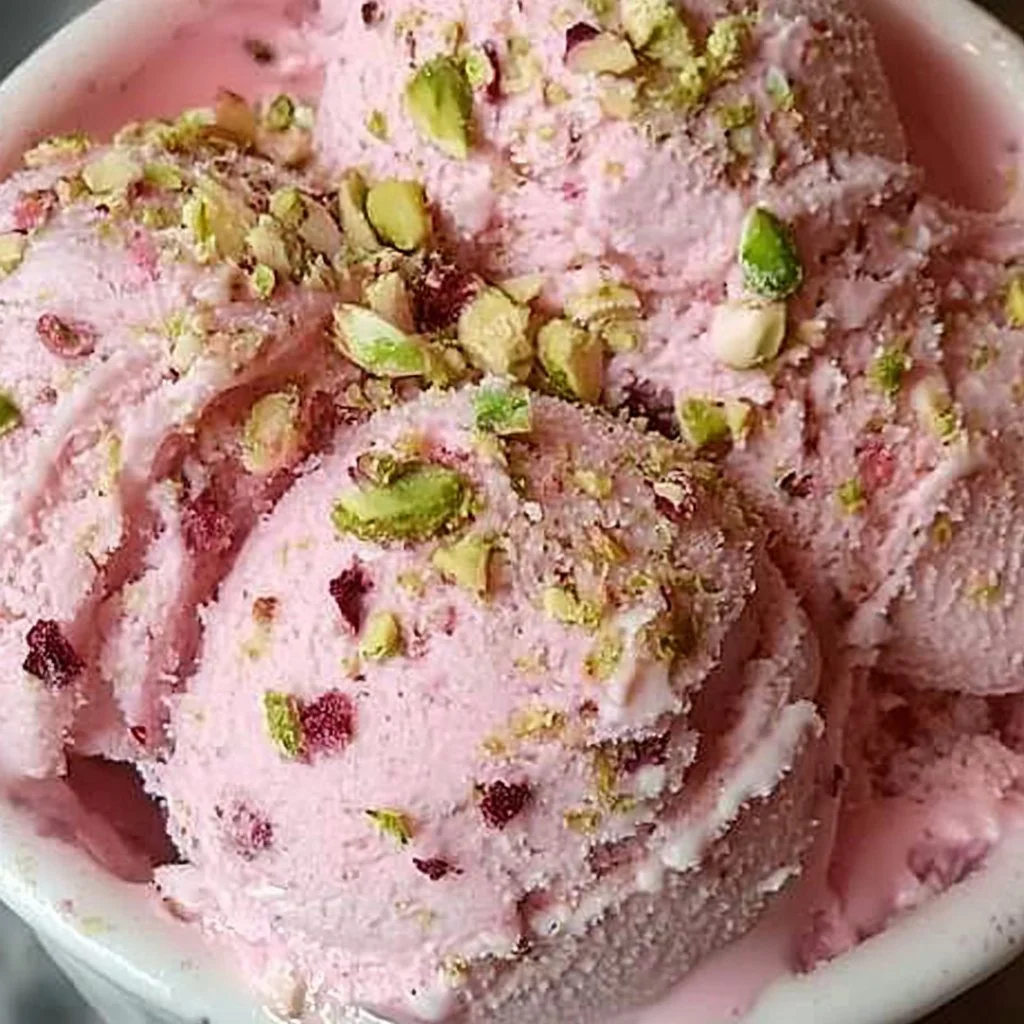
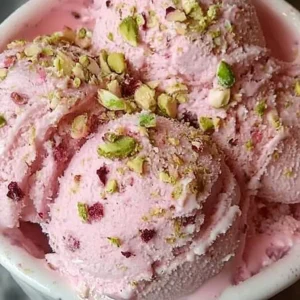
When ready to enjoy, scoop out the Rose Pistachio Cheesecake Ice Cream and serve it in beautiful bowls or cones. Consider adding a sprinkle of crushed pistachios on top for a finishing touch.
Serving Suggestions for Rose Pistachio Cheesecake Ice Cream: 5 Steps to Bliss
Best Occasions to Serve This Dish
Imagine serving this ice cream at a summer barbecue or a cozy holiday gathering. Its unique flavor will certainly make it the star of the dessert table.
You can also serve it during birthday parties as a refreshing alternative to traditional cakes. The elegance of Rose Pistachio Cheesecake Ice Cream strikes the perfect balance between indulgence and lightness, making it a fabulous option for any celebration.
What to Serve With It
- Garnishes: Top with additional crushed pistachios, edible flowers, or a drizzle of honey.
- Dessert Pairings: Serve alongside shortbread cookies or a slice of light sponge cake.
- Beverage Matches: Pair with herbal teas or sparkling lemonade for a refreshing drink.
How to Store Rose Pistachio Cheesecake Ice Cream: 5 Steps to Bliss Properly
Best Storage Practices
Proper storage is key to keeping your ice cream fresh. Store Rose Pistachio Cheesecake Ice Cream in a sealed container in the freezer. This prevents it from absorbing unwanted flavors and odors.
Reheating and Freezing Tips
If your ice cream becomes too firm, let it sit at room temperature for a few minutes before scooping. This softens it to the right texture. Always refreeze promptly after serving to maintain its quality.
Tips & Tricks for Rose Pistachio Cheesecake Ice Cream: 5 Steps to Bliss
Mistakes to Avoid
- Skipping the Churning: Not churning long enough can lead to icy, rather than creamy, ice cream.
- Over-adding Sugar: Balance is key! Too much sugar can make the ice cream overly sweet.
- Forgetting to Fold: Gently folding in the pistachios retains a nice texture.
- Improper Storage: Failing to seal the container can cause freezer burn.
Extra Tips for Better Results
Consider using fresh pistachios for a more vibrant flavor. Also, differentiate the texture by varying the chop size of your nuts. Additionally, incorporating a hint of cardamom alongside the rose water can add a nuanced depth to your ice cream.
Recipe Variations of Rose Pistachio Cheesecake Ice Cream: 5 Steps to Bliss
Creative Twists
- Saffron Infusion: Add a few strands of saffron for a luxurious taste and stunning color.
- Chocolate Swirl: Incorporate a ribbon of chocolate sauce to create a delightful contrast in flavor.
- Mixed Nuts: Substitute pistachios with a blend of different nuts for a more diverse texture.
- Fruit Additions: Consider adding fresh raspberries or strawberries to balance the creaminess with fruity freshness.
Dietary Adjustments
For those who are vegan, use coconut milk and coconut cream instead of dairy. You can also replace the sugar with maple syrup or agave. Gluten-free ingredients ensure this recipe caters to everyone at the table.
Conclusion about Rose Pistachio Cheesecake Ice Cream: 5 Steps to Bliss
In wrapping up, making Rose Pistachio Cheesecake Ice Cream is not just about enjoying a delicious dessert; it’s about the experience of creating something truly special. With easy steps, and delightful flavors, it captures the essence of joyful cooking and indulging. You deserve to treat yourself and your loved ones with this heavenly dessert. Each scoop promises a moment of bliss, inviting you into a world of rich textures and delightful contrasts. If you’re seeking a unique ice cream that shines at any occasion, look no further!
FAQs about Rose Pistachio Cheesecake Ice Cream: 5 Steps to Bliss
Can I prepare it ahead of time?
Absolutely! This ice cream can be made days in advance and stored in the freezer until you’re ready to serve.
Can I freeze it?
Yes, this ice cream is designed to be frozen. Just make sure to store it properly in a sealed container.
How long does it last?
When stored correctly, the ice cream can last up to two weeks in the freezer.
What are the best substitutions?
You can substitute heavy cream with coconut cream for a dairy-free option or use almond milk for a lighter version.
Is this recipe family-friendly?
Yes, it’s a delightful treat that both kids and adults will enjoy, making it perfect for family gatherings.
Can I make it without an ice cream maker?
You can! Just mix all ingredients and store in a container. Stir every 30 minutes for the first few hours to help achieve creaminess.
Is it possible to reduce the sugar?
Yes, you can adjust the sugar to suit your taste or replace it with a natural sweetener.
Can I add more flavors?
Feel free to experiment with other flavors! A dash of orange blossom water or cardamom can elevate the profile.
What’s the best way to serve it?
It’s delicious on its own or paired with shortbread cookies, fresh fruits, or a drizzle of honey.
Can I use unsalted pistachios?
Yes, unsalted pistachios work just fine and can help control the overall sweetness of the recipe.
Rose Pistachio Cheesecake Ice Cream
Equipment
- Mixing Bowl
- Electric Mixer
- Spatula
- Ice Cream Maker (optional)
- Freezer-safe Container
Ingredients
Ice Cream Base
- 2 cups heavy cream
- 1 cup sweetened condensed milk
- ½ cup milk
- ¼ cup rose water adjust to taste
- 1 tsp vanilla extract
- ¼ cup sugar
Add-ins
- ½ cup crushed pistachios
- 4 oz cream cheese softened


Instructions
- Gather all ingredients and ensure the cream cheese is softened to room temperature.
- In a mixing bowl, combine the heavy cream, condensed milk, and milk. Whisk until smooth and creamy.
- Add in the rose water, vanilla extract, sugar, and cream cheese. Blend until well combined and silky.
- Fold in the crushed pistachios gently using a spatula.
- Pour the mixture into an ice cream maker and churn for 20–25 minutes until thick and creamy. If not using an ice cream maker, transfer directly to a freezer-safe container.
- Cover and freeze for at least 4 hours or until firm.
- Scoop and serve topped with extra pistachios or a drizzle of honey.