
This post may contain affiliate links. As an Amazon Associate, I earn from qualifying purchases at no extra cost to you.
Table of Contents
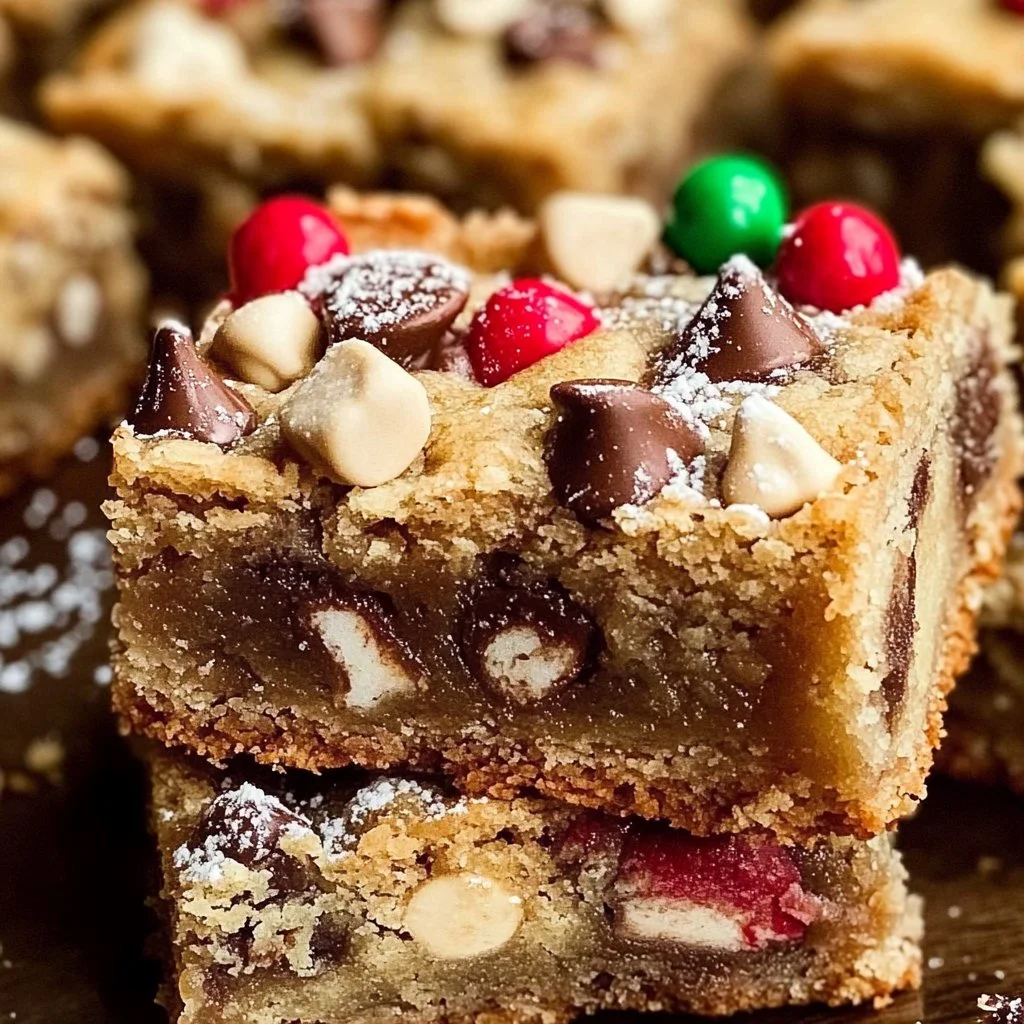
The festive season often sparks a delightful atmosphere of creativity in the kitchen. Have you ever found yourself searching for that one recipe that encapsulates the joy of Christmas? Enter Santa’s Trash Cookie Bars – a treat that brings together an exciting mix of textures and flavors. These cookie bars are not only visually appealing but also a delicious twist on traditional cookies. With unexpected ingredients like potato chips and pretzels, they provide an irresistible crunch that children and adults alike will adore.
What makes Santa’s Trash Cookie Bars special is their versatility. Adaptable for any holiday celebration, they embrace the spirit of togetherness and fun. Imagine a cozy gathering with family and friends, where laughter fills the room, and everyone is enjoying these delightful treats. The unique combination of sweet and salty in each bite makes them a conversation starter. You might even find that they become a staple at your holiday gatherings.
But why specifically choose Santa’s Trash Cookie Bars? For one, they are a great way to use up leftover holiday snacks. If you’ve got extra pretzels, chips, or candies lying around, this recipe encourages creativity while reducing waste. You can let your imagination run wild by adding your favorite elements. Ultimately, they are just plain delicious and wonderfully easy to make.
🍴 Top Kitchen Essentials You'll Love


Key Benefits of Santa’s Trash Cookie Bars
Why You’ll Love This Recipe
- Unexpected Flavors: The combination of sweet and salty is an exciting sensory experience.
- Family-Friendly: Kids love helping to crush the snacks and adding their favorites to the mix.
- Versatile: Incredibly adaptable based on your snack selection and dietary needs.
- Easy to Make: With simple steps, you can whip these up in no time!
- Perfect for Parties: A crowd-pleaser that works beautifully for holiday gatherings.
- Fun Presentation: The vibrant colors from M&Ms and sprinkles make them visually appealing.
What Makes It Stand Out
What truly sets Santa’s Trash Cookie Bars apart is the originality of the ingredients. They break away from the standard cookie bar being those classic chocolate chip varieties. The addition of potato chips and pretzels creates a unique flavor profile that is both nostalgic and fresh. Moreover, they offer endless opportunities for customization.
Occasions for making these bars include holidays, birthday parties, school functions, and even casual get-togethers. This recipe can be tailored to fit any celebration, making it a perfect go-to treat. The playful design not only pleases the taste buds but also brings a festive cheer to any table setting.
Ingredients for Santa’s Trash Cookie Bars
Complete Ingredient List with Measurements
- 1 tablespoon cornstarch
- 1 teaspoon baking soda
- 1 teaspoon salt
- 1 cup unsalted butter, softened
- ¾ cup granulated sugar
- ¾ cup light brown sugar, packed
- 1 teaspoon vanilla extract
- 2 large eggs
- ¾ cup potato chips, crushed
- ¾ cup pretzels, crushed
- ¾ cup chocolate chips
- ¾ cup Christmas M&Ms
- 2 tablespoons Christmas sprinkles
The ingredients are straightforward and easy to source, making this recipe accessible for everyone. Consider using holiday-themed candies to bring extra cheer to your bars.
Substitutes and Alternatives
If you have dietary restrictions or prefer to tweak the recipe, there are plenty of substitutions. For a gluten-free version, simply swap out the all-purpose flour for a gluten-free blend. This way, everyone can enjoy Santa’s Trash Cookie Bars without worry.
If you’re aiming for a lower sugar option, honey or maple syrup can be used in place of some granulated sugar. Moreover, if you’re looking to cut back on dairy, coconut oil can act as a great butter substitute, yielding moist and flavorful bars.
How to Make Santa’s Trash Cookie Bars – Step-by-Step Directions
Step 1 – Prepare Ingredients
Gather all the ingredients and ensure that your butter is softened. Preheating the oven to 350 degrees F is essential for even baking. Line a 9-inch x 13-inch cake pan with aluminum foil or parchment paper and set aside for easy removal later.
Step 2 – Whisk Dry Ingredients
In a medium-sized bowl, whisk the flour, cornstarch, baking soda, and salt together. This mix will provide the right texture to the bars. Setting this aside allows the flavors to meld without overmixing the dough later.
Step 3 – Cream Butter and Sugar
In a large bowl, cream together the softened butter, granulated sugar, brown sugar, and vanilla extract. You’ll know it’s ready when the mixture is light and fluffy. This step is crucial as it helps to incorporate air, giving your bars a delightful texture.
Step 4 – Add Eggs
Incorporate the eggs one at a time into the butter mixture, mixing for about 10 seconds after each addition. This ensures that the eggs are well combined and evenly distributed throughout the dough.
Step 5 – Combine Wet and Dry Ingredients
Next, gradually add the dry ingredients to the butter mixture. Mix just until combined to avoid overworking the dough, which could result in tough cookies.
Step 6 – Fold in the Mix-Ins
Gently fold in the crushed potato chips, pretzels, chocolate chips, M&Ms, and most of the sprinkles. This step adds texture and a burst of flavor, so don’t rush it!
Step 7 – Spread in the Pan
Carefully spread the cookie dough mixture in the prepared cake pan. Ensure it’s evenly distributed for consistent baking.
Step 8 – Top with Extras
Before placing the pan in the oven, top the cookie dough with additional M&Ms, chocolate chips, crushed chips, pretzels, and remaining sprinkles to create a festive look.
Step 9 – Bake
Bake the cookie bars in the preheated oven for about 22 to 25 minutes. Look for golden-brown edges and a slightly soft center. Allow the aroma to fill your home; it will be hard to resist!
Step 10 – Cool and Slice
Remove the bars from the oven and allow them to cool for at least 1 hour in the pan. Once cool, lift them out using the parchment paper or foil edges and slice into squares for serving.
Serving Suggestions for Santa’s Trash Cookie Bars
Best Occasions to Serve This Dish
Santa’s Trash Cookie Bars are an ideal addition to any festive gathering. Whether it’s a holiday party, cookie exchange, or family get-together, these bars steal the spotlight. Their vibrant colors and unique recipe appeal to guests of all ages, making them a must-have treat.
They can even serve as a delightful surprise at a children’s birthday party. Further, these bars are just as enjoyable on casual movie nights at home when you’re craving something sweet.
What to Serve With It
Consider pairing Santa’s Trash Cookie Bars with:
- A warm glass of milk or hot cocoa for that classic feel.
- Scoop of vanilla ice cream for a decadent dessert experience.
- Festive whipped cream topped with chocolate drizzle for added flair.
- A side of fruit like strawberries or apple slices for freshness.
How to Store Santa’s Trash Cookie Bars Properly
Best Storage Practices
To keep your cookie bars fresh, store them in an airtight container at room temperature. They will retain their flavor and texture for up to a week. Keep them away from direct sunlight or heat sources.
For longer storage, you can keep them in the refrigerator, especially in warmer months. If you need to store them for an extended period, freezing is a great option.
Reheating and Freezing Tips
To reheat, simply microwave a portion for about 10-15 seconds to enjoy that fresh-baked taste again. If frozen, allow the bars to thaw overnight in the refrigerator. You can microwave individual pieces afterward if they need a little warming.
Tips & Tricks for Santa’s Trash Cookie Bars
Mistakes to Avoid
- Overmixing the Dough: This can lead to dense, tough bars. Mix just until combined.
- Using Cold Butter: Always use softened butter for optimal texture.
- Not Checking Oven Temperature: An oven thermometer can help if your oven tends to run hot or cold.
- Skipping the Cooling Step: Allowing the bars to cool fully prevents them from falling apart during slicing.
- Ignoring Ingredient Room Temperature: Ensure eggs and butter are at room temperature for better melding.
Extra Tips for Better Results
- Enhance Flavor: Add a pinch of cinnamon or nutmeg for a warm, festive flavor.
- Diverse Toppings: Experiment with different kinds of chips or nuts based on what’s available.
- Presentation Matters: For a holiday touch, arrange the bars on a decorative platter with extra sprinkles on the sides.
Recipe Variations of Santa’s Trash Cookie Bars
Creative Twists
- Peanut Butter Remix: Mix in some creamy or chunky peanut butter for a delicious nutty flavor.
- Holiday Spice Bliss: Add raisins or dried fruits to keep the bars seasonal and fruity.
- Oreo Delight: Crush Oreo cookies instead of potato chips for an ultra-sweet twist.
Dietary Adjustments
To create a gluten-free option, utilize gluten-free flour. For a dairy-free version, replace butter with coconut or vegan butter. These adjustments maintain the scrumptious flavor while catering to various dietary needs.
Conclusion about Santa’s Trash Cookie Bars
Santa’s Trash Cookie Bars embody the spirit of the holidays, combining an eclectic blend of flavors that impress family and friends alike. With their easy preparation and joyful presentation, these bars go beyond mere cookies; they become a centerpiece for gatherings. The combination of sweet treats along with crunchy snacks exemplifies the fun and creativity that the festive season inspires. Not only are they delightful, but they create opportunities for bonding moments in the kitchen with loved ones.
Incorporating unique ingredients like potato chips and pretzels ensures each bite of Santa’s Trash Cookie Bars is surprisingly satisfying. Encourage your family to get involved, choosing their favorite snacks to customize the recipe, making it a cherished tradition. As the holidays approach, consider adding these bars to your baking list. They promise not only an explosion of flavor but also a dash of festive cheer in every square.
FAQs about Santa’s Trash Cookie Bars
Can I prepare it ahead of time?
Absolutely! You can make them a day in advance and store them in an airtight container.
Can I freeze it?
Yes, these bars freeze wonderfully. Just store them properly wrapped in plastic wrap and foil.
How long does it last?
Santa’s Trash Cookie Bars can last up to a week at room temperature and even longer in the refrigerator.
What are the best substitutions?
Feel free to swap granulated sugar with honey or maple syrup, or use gluten-free flour for a gluten-free version.
Is this recipe family-friendly?
Yes! Kids will love to help crush the snacks and decorate the bars with sprinkles.
What if I don’t have M&Ms?
You can replace them with other candies or chocolate chips according to your preferences.
How do I make it more festive?
Add seasonal sprinkles on top or include festive candies to create a colorful display.
Can I make it vegan?
Certainly! Use vegan butter and flax eggs in place of regular eggs for a vegan-friendly version.
Will they stay soft and chewy?
Yes, if left to cool properly and stored in an airtight container, they will remain soft and chewy.

Santa’s Trash Cookie Bars
Ingredients
Dry Ingredients
- 1 tablespoon cornstarch Helps to achieve the right texture
- 1 teaspoon baking soda Leavening agent
- 1 teaspoon salt Enhances flavors
Wet Ingredients
- 1 cup unsalted butter, softened Ensure it’s softened for better mixing
- ¾ cup granulated sugar Can be replaced with honey or maple syrup
- ¾ cup light brown sugar, packed Adds moisture and flavor
- 1 teaspoon vanilla extract For flavor enhancement
- 2 large eggs Should be at room temperature
Mix-Ins
- ¾ cup potato chips, crushed Adds a surprising crunch
- ¾ cup pretzels, crushed For salty flavor
- ¾ cup chocolate chips Use your favorite variety
- ¾ cup Christmas M&Ms Adds color and sweetness
- 2 tablespoons Christmas sprinkles For a festive touch


Instructions
Preparation
- Gather all the ingredients and ensure that your butter is softened.
- Preheat the oven to 350 degrees F and line a 9-inch x 13-inch cake pan with aluminum foil or parchment paper.
Mix Dry Ingredients
- In a medium-sized bowl, whisk together the flour, cornstarch, baking soda, and salt.
Cream Butter and Sugar
- In a large bowl, cream together the softened butter, granulated sugar, brown sugar, and vanilla extract until light and fluffy.
Add Eggs
- Incorporate the eggs one at a time into the butter mixture, mixing for about 10 seconds after each addition.
Combine Mixtures
- Gradually add the dry ingredients to the butter mixture, mixing just until combined.
- Gently fold in the crushed potato chips, pretzels, chocolate chips, M&Ms, and most of the sprinkles.
Bake
- Spread the mixture evenly in the prepared pan.
- Top with additional M&Ms, chocolate chips, crushed chips, pretzels, and remaining sprinkles.
- Bake for about 22 to 25 minutes, until golden-brown edges and a slightly soft center.
- Allow to cool for at least 1 hour before slicing into squares.