
This post may contain affiliate links. As an Amazon Associate, I earn from qualifying purchases at no extra cost to you.
Table of Contents
🍴 Top Kitchen Essentials You'll Love


Introduction to Valentine Cake Popsicles
Are you looking for a fun and unique treat this Valentine’s Day? What if I told you that you could create deliciously adorable goodies that are not only easy to make but also irresistible? Enter Valentine Cake Popsicles. These delightful treats combine the joy of cake and the fun of popsicles, perfect for sharing with loved ones or indulging yourself.
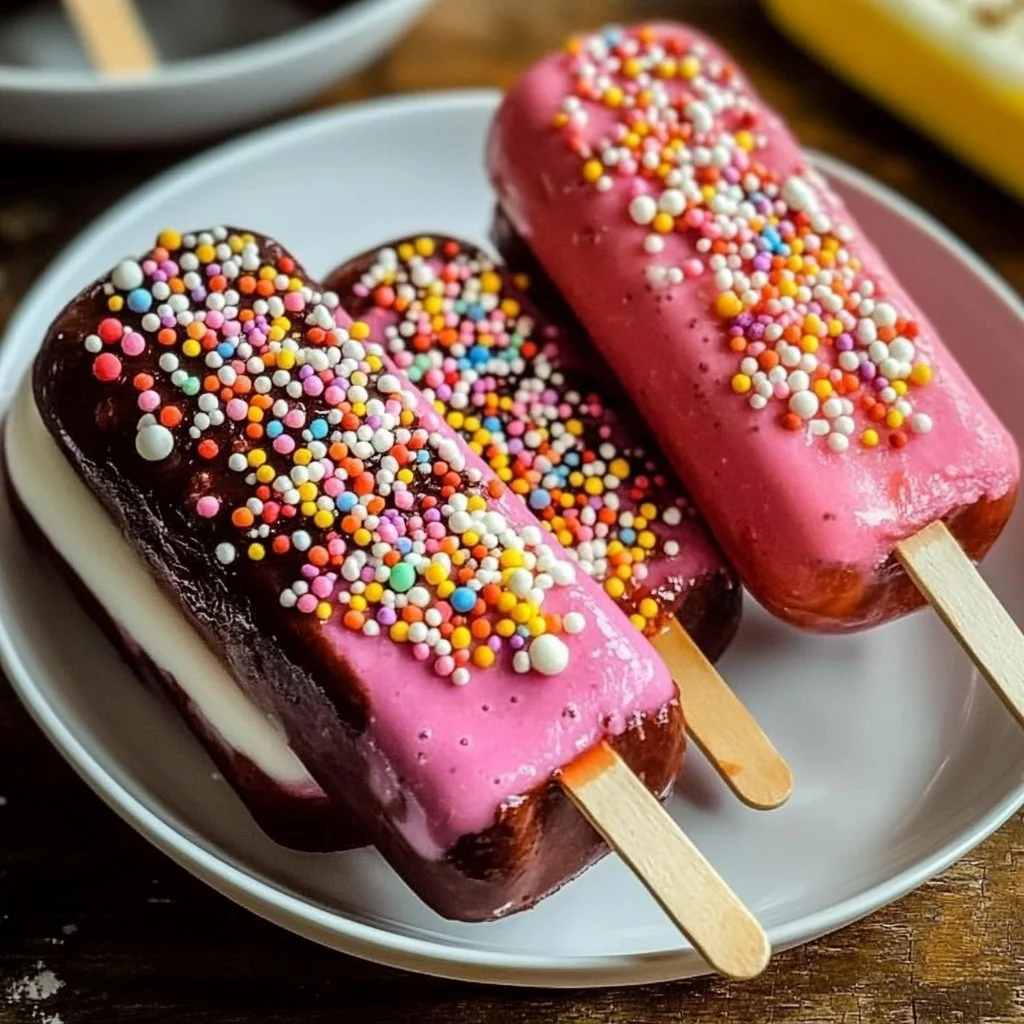
Imagine biting into a sweet, moist cake surrounded by a smooth chocolate coating and festive sprinkles. Valentine Cake Popsicles bring a touch of creativity to traditional cake and elevate your dessert game. They are incredibly versatile, allowing you to choose any cake mix and frosting combination to match your taste preferences. Whether you want something classic, fruity, or indulgently chocolatey, you can customize these treats to suit your desires.
Another appealing aspect of Valentine Cake Popsicles is how they make an impressive presentation. They are delightful to look at and capture the spirit of love and celebration, making them ideal for any Valentine’s gathering. Picture a platter filled with vibrantly coated popsicles, stunning not only in taste but also in looks.
Making these popsicles is a breeze. With just a box of cake mix, some frosting, and a little creativity, you can whip up a batch that’s sure to impress. Perfect for parties, gifts, or just a sweet surprise at home, Valentine Cake Popsicles are bound to become a new favorite in your recipe repertoire.
Key Benefits of Valentine Cake Popsicles
Why You’ll Love This Recipe
- Quick and easy to prepare, making them excellent for last-minute treats.
- Fully customizable with different cake flavors and frostings.
- Fun for kids and adults, making them perfect for family gatherings.
- Great for portion control; enjoy a sweet treat without overindulging.
- They make for stunning gifts or party favors, beautifully wrapped or presented.
What Makes It Stand Out
These Valentine Cake Popsicles stand out for their originality. Instead of serving traditional cake, gifting your loved ones something on a stick adds a playful touch. They are not just treats; they are also a conversation piece.
Customization is another highlight. You can experiment with flavors, colors, and textures. From a rich red velvet cake to a light strawberry frosting, the possibilities are endless. This allows you to cater to various taste preferences and dietary needs.
Ingredients for Valentine Cake Popsicles
Complete Ingredient List with Measurements
- 1 box cake mix (any flavor)
- 1/2 cup frosting (any flavor)
- Candy melts or chocolate for coating
- Sprinkles for decoration
- Popsicle sticks
Substitutes and Alternatives
If you have dietary restrictions or allergies, there are several ways to modify this recipe. You could use gluten-free cake mixes readily available in most stores, ensuring everyone can enjoy this delightful treat. For a dairy-free option, consider plant-based frosting and chocolate alternatives designed for melting. Creativity is key; even if you have dietary needs, these popsicles can suit you perfectly!
How to Make Valentine Cake Popsicles – Step-by-Step Directions
Step 1 – Prepare Ingredients
Start by gathering all your ingredients and tools. Preheat your oven according to the cake mix box instructions, and prepare your baking pan to ensure a smooth baking process.
Step 2 – Cook the Base
Bake the cake mix according to the package instructions. Once baked, allow the cake to cool completely in the pan. The cooling step is crucial for the next part.
Step 3 – Crumble the Cake
Once cooled, transfer the cake to a large bowl and crumble it using your hands until it resembles fine crumbs. This step is vital to achieving a smooth mixture when adding frosting.
Step 4 – Mix with Frosting
Add 1/2 cup of frosting to the crumbled cake. Mix thoroughly until fully combined. The texture should be moist and hold together when you form a ball.
Step 5 – Shape the Mixture
Using your hands, shape the mixture into small balls, roughly the size of a ping pong ball. Insert a popsicle stick into each ball carefully, ensuring it stays centered.
Step 6 – Freeze
Place the shaped popsicles on a lined baking sheet and freeze for about 30 minutes or until firm. Freezing helps stabilize the popsicles to ensure they hold their shape during coating.
Step 7 – Melt the Coating
While the popsicles are freezing, melt the candy melts or chocolate according to the package instructions, usually in a microwave-safe bowl or using the double boiler method. Stir until smooth.
Step 8 – Dip in Coating
Remove the popsicles from the freezer. Dip each popsicle into the melted coating, turning it to cover evenly. Allow excess coating to drip back into the bowl.
Step 9 – Decorate
Before the coating sets, sprinkle your choice of decorations, such as colored sprinkles, on top. This adds a festive flair.
Step 10 – Cool Completely
Place the coated popsicles back onto the lined baking sheet and let them cool completely. Once set, they are ready to be enjoyed!
Serving Suggestions for Valentine Cake Popsicles
Best Occasions to Serve This Dish
Valentine Cake Popsicles shine at any celebration, especially during Valentine’s Day. Their vibrant colors and playful shapes create an inviting atmosphere. They are also great for birthday parties, baby showers, or even casual family get-togethers.
What to Serve With It
Pair these popsicles with an array of delightful beverages, such as pink lemonade, sparkling water, or your favorite wine. For dessert enthusiasts, serve them alongside ice cream or a light fruit salad for a refreshing balance.
How to Store Valentine Cake Popsicles Properly
Best Storage Practices
To keep your Valentine Cake Popsicles fresh, store them in an airtight container in the freezer. They can last for up to two months when properly stored. Be sure to place a piece of parchment paper between the popsicles to prevent sticking.
Reheating and Freezing Tips
These popsicles are enjoyed frozen and should not be reheated. If you have leftover popsicles, simply place them back into the freezer. Always allow them time to thaw slightly at room temperature before eating if you’re craving a softer texture.
Tips & Tricks for Valentine Cake Popsicles
Mistakes to Avoid
- Not cooling the cake completely before crumbling can lead to a mushy mixture.
- Overmixing the frosting mixture may cause the popsicles to be too wet, making shaping difficult.
- Skipping the freezing step could result in melting during the coating process.
Extra Tips for Better Results
For enhanced flavor, consider adding a splash of vanilla or almond extract to the cake mixture. Use high-quality candy melts or chocolate for a smoother, richer coating. Presentation goes a long way, so don’t hesitate to play with colors and sprinkles.
Recipe Variations of Valentine Cake Popsicles
Creative Twists
- Red Velvet Cake with Cream Cheese Frosting: This classic combo makes for a decadent treat that’s perfect for the occasion.
- Funfetti Cake with Vanilla Frosting: Amp up the festive spirit with colorful sprinkles baked right into the cake mix.
- Chocolate Cake with Mint Frosting: For a refreshing twist, this combination is perfect for mint lovers.
Dietary Adjustments
You can make these popsicles vegan by using egg replacement in your cake mix, along with dairy-free frosting and candy melts. For a gluten-free option, use certified gluten-free cake mix and ensure all other ingredients are gluten-free.
Conclusion about Valentine Cake Popsicles
In summary, Valentine Cake Popsicles are a delightful treat that combines fun, flavor, and creativity. Their easy-to-follow recipe makes them accessible for bakers of all skill levels, and their customizable nature allows them to fit any occasion. Whether you’re celebrating love, friendship, or simply indulging in a sweet moment alone, these popsicles are sure to spread joy. So gather your ingredients and start creating a batch that embodies the spirit of Valentine’s Day!
FAQs about Valentine Cake Popsicles
Can I make these cake pops ahead of time?
Absolutely! You can make Valentine Cake Popsicles up to two days in advance and store them in the freezer.
What other flavors can I use for cake and frosting?
You can use any flavor of cake mix and frosting. Chocolate, vanilla, red velvet, and lemon are all great options.
How do I avoid melting my popsicles during coating?
Ensure they are adequately frozen before dipping. Cold popsicles will help keep the coating from melting.
Can I use homemade cake for this recipe?
Yes, using a homemade cake works perfectly! Just crumble it the same way you would with a box mix.
What’s the best way to melt the coating?
The microwave works well, or you can use a double boiler. Stir frequently to ensure it melts evenly without burning.
How long do Valentine Cake Popsicles last?
When properly stored in an airtight container in the freezer, they can last for up to two months.
Can I use any type of chocolate for coating?
Yes, you can use milk, dark, or white chocolate. Just make sure it melts smoothly for the best coating results.
Is it okay to use oil instead of frosting in the mixture?
Frosting is recommended for the right texture, but a small amount of oil might work in a pinch, though it may affect flavor and moisture.
Can I decorate with other toppings?
Absolutely! You can use crushed cookies, coconut, or edible glitter for a unique flair to your Valentine Cake Popsicles.
What do I do if the mixture is too wet?
If the mixture feels too wet and does not hold shape, add more crumbled cake or a little more frosting as needed to achieve the right consistency.
Valentine Cake Popsicles
Ingredients
For the cake popsicles
- 1 box box cake mix (any flavor) Choose any flavor mix
- ½ cup frosting (any flavor) Choose any flavor frosting
- 1 cup candy melts or chocolate for coating Use any type of chocolate
- 1 cup sprinkles for decoration Choose colors that fit the occasion
- 12 pieces popsicle sticks For shaping the popsicles


Instructions
Preparation
- Start by gathering all your ingredients and tools. Preheat your oven according to the cake mix box instructions, and prepare your baking pan.
- Bake the cake mix according to the package instructions. Once baked, allow the cake to cool completely in the pan.
- Once cooled, transfer the cake to a large bowl and crumble it using your hands until it resembles fine crumbs.
- Add 1/2 cup of frosting to the crumbled cake. Mix thoroughly until fully combined.
- Using your hands, shape the mixture into small balls, roughly the size of a ping pong ball. Insert a popsicle stick into each ball.
- Place the shaped popsicles on a lined baking sheet and freeze for about 30 minutes or until firm.
Coating and Decorating
- While the popsicles are freezing, melt the candy melts or chocolate according to the package instructions.
- Remove the popsicles from the freezer. Dip each popsicle into the melted coating, allowing excess coating to drip back into the bowl.
- Before the coating sets, sprinkle your choice of decorations on top.
- Place the coated popsicles back onto the lined baking sheet and let them cool completely before enjoying.