
This post may contain affiliate links. As an Amazon Associate, I earn from qualifying purchases at no extra cost to you.
Table of Contents
As the holiday season approaches, we search for delightful treats that warm hearts and homes. One recipe that perfectly encapsulates this festive spirit is the Christmas Pear Tart: 5 Reasons to Make It Magical. This tart is not just a dessert; it’s a celebration of flavors, aromas, and the joys of gathering together. Have you ever tasted a dessert that feels like a warm hug? That’s exactly what this tart delivers!
The blend of ripe, juicy pears with a hint of cinnamon and the buttery goodness of a perfectly baked tart shell creates a symphony of flavors. Each bite transports you to a cozy winter evening, perhaps with snow gently falling outside, as you sip on hot cocoa. The simplicity of the recipe makes it an accessible treat for both novice bakers and seasoned pastry chefs alike. Imagine serving this enchanting tart to family and friends, with everyone asking for seconds.
In this article, we will explore why the Christmas Pear Tart deserves a spot on your holiday table with “5 Reasons to Make It Magical.” From its delicious taste to its versatility, there’s so much to love. You’ll find that this cozy dessert isn’t just reserved for Christmas; it can be the highlight of any occasion. So, roll up your sleeves, and let’s dive into the magical world of this delectable tart!
🍴 Top Kitchen Essentials You'll Love


Key Benefits of Christmas Pear Tart: 5 Reasons to Make It Magical
Why You’ll Love This Recipe
- Flavorful Delight: The sweet, juicy pears and warm spices create a mouthwatering combination.
- Ease of Preparation: With just a few simple steps, you can make this tart with minimal fuss.
- Versatile Dessert: It can be served warm or cold, and it pairs perfectly with ice cream or whipped cream.
- Family-Friendly: Even picky eaters will find it hard to resist this delicious tart.
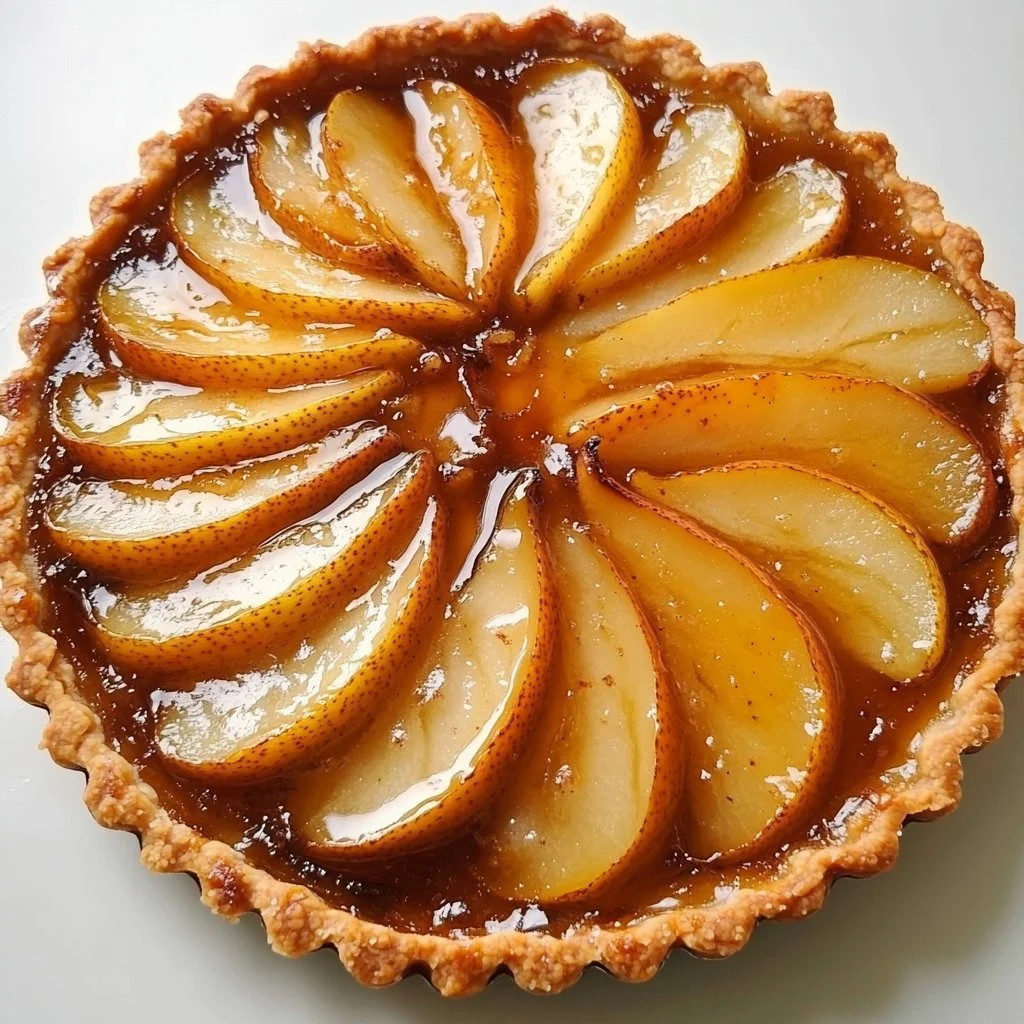
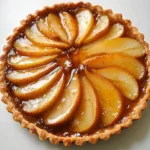
- Impressive Presentation: The pear arrangement looks stunning, making it a great showstopper for any event.
- Seasonal Appeal: Both the flavors and aromas fit perfectly with the holiday season, evoking nostalgia.
What Makes It Stand Out
The Christmas Pear Tart stands out due to its originality. Unlike many holiday desserts that lean heavily on chocolate or spices, this tart showcases the delicate sweetness of pears. It’s a refreshing change that surprises and delights all palates. The simplicity of the ingredient list allows for a focus on the natural flavors, inviting creativity for those who wish to add personal touches.
Customization is another reason this tart shines. You can easily adapt the recipe to include your family’s favorite flavors or seasonal fruits. Whether you want to add nuts for crunch or swap out spices, this tart is a canvas for your culinary imagination. Additionally, it’s suitable for various occasions, from holiday gatherings to casual weeknight dinners. Its versatility means you can enjoy it year-round!
Ingredients for Christmas Pear Tart: 5 Reasons to Make It Magical
Complete Ingredient List with Measurements
- 1 pre-made tart shell
- 3 ripe pears, peeled and sliced
- 1/2 cup sugar
- 1 teaspoon cinnamon
- 1 tablespoon lemon juice
- 2 tablespoons butter, melted
- 1 egg, beaten (for egg wash)
For the best results, choose ripe pears such as Bosc or Bartlett. Their softness and sweetness perfectly complement the tart’s richness.
Substitutes and Alternatives
If you have dietary restrictions, don’t worry! You can swap the sugar for alternatives like maple syrup or honey for a deeper flavor. If you want to avoid butter, consider using coconut oil or vegan butter. The tart shell can also be gluten-free if you use a suitable alternative.
For those who are egg-free, a mixture of almond milk and cornstarch can serve as a good egg wash substitute. By making these adjustments, you can create a Christmas Pear Tart that fits a variety of preferences while still being delicious!
How to Make Christmas Pear Tart: 5 Reasons to Make It Magical – Step-by-Step Directions
Step 1 – Prepare Ingredients
Begin by gathering all your ingredients. Preheat your oven to 375°F (190°C), ensuring you’re ready to bake! Peel and slice the pears, setting them aside in a bowl.
Step 2 – Cook the Base
In a large bowl, mix together the sliced pears, sugar, cinnamon, lemon juice, and melted butter. The combination of these ingredients should create a fragrant mixture infused with sweetness.
Step 3 – Arrange the Pears
Carefully place your pre-made tart shell in a baking dish. The tart shell acts as the perfect vessel for holding the delicious pear filling. Next, evenly pour the pear mixture into the tart shell, making sure to spread it out for even cooking.
Step 4 – Egg Wash the Edges
Before baking, brush the edges of the tart with the beaten egg. This will give the tart a lovely golden color as it bakes. The egg wash is key to achieving that visually appealing crust.
Step 5 – Bake the Tart
Pop the tart into your preheated oven and bake for 25-30 minutes. The baking time may vary based on your oven, so keep an eye on it. You want the pears to be tender and the crust to turn a beautiful golden brown.
Step 6 – Check for Doneness
To check if the tart is done, you can insert a fork into the pears. They should be soft but not mushy. The tart shell should also look crisp and lightly browned around the edges.
Step 7 – Cool Before Serving
Once baked, remove the tart from the oven and let it cool for a few minutes. This step is essential, as it allows the filling to set a little better, making it easier to slice.
Step 8 – Slice and Enjoy
When you’re ready to serve, slice the tart into wedges. You can enjoy it warm, or allow it to cool completely for a delightful chilled treat!
Serving Suggestions for Christmas Pear Tart: 5 Reasons to Make It Magical
Best Occasions to Serve This Dish
The Christmas Pear Tart is perfect for holiday dinners, parties, or family gatherings. Its warm flavors can make any event feel festive and special. It’s also a delightful addition to potlucks or holiday brunches.
Additionally, it serves well as a comforting dessert after a cozy family dinner, making weeknights feel more exciting during the cold season. This tart can adapt to everyday meals or graceful occasions with equal flair.
What to Serve With It
- Vanilla ice cream: The cold creaminess is a perfect contrast to the warm tart.
- Whipped cream: Light and fluffy, whipped topping enhances each bite.
- Caramel sauce: Drizzling a bit of caramel adds an extra layer of sweetness.
- Coffee or tea: A warm beverage pairs well with this delicious dessert.
How to Store Christmas Pear Tart: 5 Reasons to Make It Magical Properly
Best Storage Practices
To keep your Christmas Pear Tart fresh, store any leftovers in the fridge. Use an airtight container to prevent it from absorbing other flavors. It should last for about 3-4 days. If you’re expecting to enjoy it later, you can also freeze it.
Reheating and Freezing Tips
If freezing, wrap the tart tightly in plastic wrap and foil. It can last up to three months in the freezer. To reheat, allow it to thaw in the fridge overnight, then warm it in the oven at 350°F (175°C) for about 10-15 minutes until heated through.
Tips & Tricks for Christmas Pear Tart: 5 Reasons to Make It Magical
Mistakes to Avoid
- Overmixing the Pears: This can lead to mushy fruit. Mix gently to maintain some texture.
- Skipping the Egg Wash: The egg wash adds color and shine to the crust, so don’t skip this step!
- Not Preheating the Oven: Always preheat your oven for even baking.
- Using Unripe Pears: Choose ripe, sweet pears for the best flavor profile.
- Ignoring Baking Time: Keep an eye on the tart to avoid overbaking, which can dry it out.
Extra Tips for Better Results
To enhance the flavor, consider adding a pinch of nutmeg along with the cinnamon. Adding a splash of vanilla extract to the pear mixture can elevate the aroma.
You could also experiment with different spices based on your preference, allowing you to find the perfect combination for your taste buds.
Recipe Variations of Christmas Pear Tart: 5 Reasons to Make It Magical
Creative Twists
- Nutty Kind: Add 1/2 cup of chopped walnuts or pecans for added crunch and flavor.
- Spiced It Up: Incorporate ginger or cloves into the filling for a spiced twist on the traditional tart.
- Fruit Blend: Mix in apples or cranberries with the pears for a delightful combination of flavors.
- Choco-Pear Delight: Drizzle some melted chocolate over the tart before serving for a richer dessert experience.
Dietary Adjustments
To make this tart suitable for a vegan diet, substitute butter with coconut oil and use a plant-based tart shell. You can replace the egg wash with a mixture of soy milk and cornstarch for a beautiful finish. For a gluten-free option, simply choose a gluten-free tart shell.
Conclusion about Christmas Pear Tart: 5 Reasons to Make It Magical
In conclusion, the Christmas Pear Tart: 5 Reasons to Make It Magical is a delightful addition to your holiday dessert repertoire. This recipe captures the essence of the season with its warm flavors and comforting textures. It’s not only easy to prepare, but it also allows for creativity in the kitchen.
Whether you’re baking for a special occasion or simply to enjoy with family, this tart fits perfectly into any scenario. The combination of juicy pears, warm spices, and a flaky crust creates an experience that invites people to savor the moment together. So go ahead, bring a touch of magic to your holiday table with this exquisite Christmas Pear Tart!
FAQs about Christmas Pear Tart: 5 Reasons to Make It Magical
Can I prepare it ahead of time? Yes, you can prepare it a day or two in advance. Just store it in the fridge until you’re ready to serve.
Can I freeze it? Absolutely! Just wrap it well and freeze it for up to three months.
How long does it last? Store leftovers in the fridge for 3-4 days for best freshness.
What are the best substitutions? Maple syrup works beautifully in place of sugar. Coconut oil can replace butter for a dairy-free version.
Is this recipe family-friendly? Yes, its delightful flavors appeal to both kids and adults alike.
What types of pears work best? Bosc and Bartlett pears are excellent choices for this recipe due to their sweetness and texture.
Can I make it gluten-free? Yes, use a gluten-free tart shell for a delicious alternative.
What can I pair it with? It goes well with ice cream, whipped cream, and even a scoop of yogurt for a light touch.
How should I serve it? This tart can be served warm or chilled, depending on preference.
Can I use other fruits? Enjoy blending fruits like apples or cranberries for a unique take on the classic tart!
Christmas Pear Tart
Ingredients
For the Tart
- 1 piece pre-made tart shell Choose a suitable tart shell for your dietary preferences.
- 3 pieces ripe pears, peeled and sliced Bosc or Bartlett pears are recommended.
- ½ cup sugar Can be substituted with maple syrup or honey.
- 1 teaspoon cinnamon For added warmth in flavor.
- 1 tablespoon lemon juice Enhances the flavors and prevents browning of pears.
- 2 tablespoons butter, melted Can be replaced with coconut oil or vegan butter.
- 1 piece egg, beaten (for egg wash) Can be replaced with a mixture of almond milk and cornstarch for egg-free.


Instructions
Preparation
- Preheat your oven to 375°F (190°C) and gather all your ingredients.
- Peel and slice the pears, and set them aside in a bowl.
Cooking
- In a large bowl, mix together the sliced pears, sugar, cinnamon, lemon juice, and melted butter.
- Carefully place your pre-made tart shell in a baking dish and pour the pear mixture into the tart shell.
- Brush the edges of the tart with the beaten egg.
- Bake in the preheated oven for 25-30 minutes until the pears are tender and the crust is golden.
- Check for doneness by inserting a fork into the pears; they should be soft but not mushy.
Serving
- Allow the tart to cool for a few minutes before slicing into wedges.
- Serve warm or let it cool completely for a chilled dessert.