

This post may contain affiliate links. As an Amazon Associate, I earn from qualifying purchases at no extra cost to you.
Table of Contents
Are you searching for a delicious and guilt-free alternative to traditional condensed milk? Look no further! This homemade Vegan Condensed Milk: 5 Reasons You’ll Love This Recipe will quickly become a staple in your kitchen. Imagine a rich, creamy mixture that enhances your sweet treats without any dairy. This recipe not only satisfies your sweet cravings but also aligns perfectly with vegan and plant-based diets. Have you ever had that moment when you realize you need condensed milk for a recipe, but you find yourself without it?
Well, with this simple and quick vegan alternative, you can avoid that disappointment. It takes just a few ingredients to whip up a batch that can be used in various desserts. The beautiful thing about this Vegan Condensed Milk: 5 Reasons You’ll Love This Recipe is how versatile it is. It works wonders in coffee, baking, and even as a topping for your favorite snacks. Are you ready to discover why this recipe should have a permanent place in your culinary repertoire?
This Vegan Condensed Milk recipe is not only easy to make, but it’s also delicious with the perfect balance of sweetness. It allows you to customize flavors and textures to suit your preferences. It’s friendly on the wallet and your diet! There’s no need for refined sugars or dairy, making it an excellent choice for health-conscious individuals. Plus, the aroma of coconut and vanilla that fills your kitchen while you cook is simply irresistible.
It’s time to dive into the many reasons why you’ll absolutely love this recipe. Whether you’re a long-time vegan or just looking to cut back on dairy, this Vegan Condensed Milk: 5 Reasons You’ll Love This Recipe is for you. So, let’s get started on this delightful journey toward a sweeter, healthier kitchen staple!
🍴 Top Kitchen Essentials You'll Love


Key Benefits of Vegan Condensed Milk: 5 Reasons You’ll Love This Recipe
You might be wondering why you should try making this Vegan Condensed Milk. Here are five compelling reasons that showcase its incredible benefits.
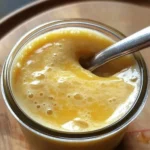
Creamy Texture: Enjoy a smooth and creamy texture that mimics traditional condensed milk perfectly.
Easy to Make: With just a few simple steps, you can whip up this recipe in under 15 minutes.
Versatile Ingredient: Use it in coffee, desserts, or as a topping—its applications are endless!
Natural Sweetness: Made with maple syrup, it offers a healthier sweetness compared to refined sugars.
Customizable Flavors: Feel free to add different flavors or spices to make it uniquely yours.
What Makes It Stand Out
This Vegan Condensed Milk stands out because of its originality. Unlike store-bought versions, this recipe is made from whole-food ingredients without any preservatives. You can customize it with various flavors or sweeteners, allowing you to cater it to your taste.
Another unique aspect is its versatility. You can use it in an array of recipes—from pies and cakes to morning coffee. This makes it an excellent choice for any occasion. Whether you’re baking a cake for a birthday or adding a drizzle to a dessert, this Vegan Condensed Milk has got you covered.
Ingredients for Vegan Condensed Milk: 5 Reasons You’ll Love This Recipe
Complete Ingredient List with Measurements
To make this delightful Vegan Condensed Milk, you’ll need the following ingredients:
- 1 cup coconut milk (preferably full-fat for creaminess)
- 1/3 cup maple syrup (adds natural sweetness)
- 2 tablespoons cornstarch (for thickening)
- 1 teaspoon vanilla extract (for flavor)
Coconut milk is the star of the show here, delivering that creamy texture we love. Maple syrup not only sweetens but also adds depth. The cornstarch will help to achieve the thick consistency you may expect from traditional condensed milk.
Substitutes and Alternatives
If you have dietary restrictions or simply want to switch things up, there are plenty of substitutes for this Vegan Condensed Milk recipe.
If you prefer almond milk or oat milk, feel free to use those in place of coconut milk. Keep in mind, though, that the creaminess may vary. For those who need a sugar substitute, agave syrup or a sugar-free sweetener can work in place of maple syrup.
Cornstarch can be swapped with arrowroot powder or tapioca starch for similar thickening results. These alternatives will still yield a delicious Vegan Condensed Milk.
How to Make Vegan Condensed Milk: 5 Reasons You’ll Love This Recipe – Step-by-Step Directions
Step 1 – Prepare Ingredients
Start by gathering all your ingredients. Measure out the coconut milk, maple syrup, cornstarch, and vanilla extract for easy access.
Step 2 – Cook the Base
In a medium saucepan, combine the coconut milk and maple syrup over medium heat. Stir the mixture gently to combine them, ensuring they’re well blended.
Step 3 – Make the Cornstarch Slurry
In a small bowl, mix the cornstarch with about 2 tablespoons of water to create a slurry. Ensure there are no lumps; this will help the thickening process.
Step 4 – Incorporate the Slurry
After the coconut milk mixture begins to warm, gradually add the cornstarch slurry to the saucepan. Stir continuously to avoid lumps.
Step 5 – Stir and Thicken
Continue to cook the mixture over medium heat, stirring often. You will notice the mixture begin to thicken after about 5-10 minutes.
Step 6 – Check Consistency
When the Vegan Condensed Milk reaches your desired thickness, remove it from the heat. It should have a silky texture, thick enough to coat the back of a spoon.
Step 7 – Add Vanilla
Once removed from the heat, stir in 1 teaspoon of vanilla extract. This will elevate the flavor and enhance the aroma.
Step 8 – Cool Down
Allow the Vegan Condensed Milk to cool before using it. It will thicken even more as it cools.
Step 9 – Store Leftovers
If you have any leftovers, transfer them to an airtight container and refrigerate. It should keep for up to a week.
Step 10 – Enjoy Versatile Uses
Now you can use your delicious Vegan Condensed Milk in various recipes. Pour it over desserts, add it to coffee, or use it in your favorite baked goods.
Serving Suggestions for Vegan Condensed Milk: 5 Reasons You’ll Love This Recipe
Best Occasions to Serve This Dish
This Vegan Condensed Milk is perfect for numerous occasions. It’s an excellent addition to dessert tables during holiday gatherings. Imagine drizzling it over cakes or cupcakes to impress family and friends.
This recipe is also fantastic for casual get-togethers, adding a delightful touch to coffee bars. Serve alongside your favorite pastries for a cozy afternoon treat. Don’t forget about movie nights! Use it as a topping for so many snacks.
What to Serve With It
- Coffee: Add a splash to your morning brew for natural sweetness.
- Pancakes: Use it as a syrup substitute over stacks of fluffy pancakes or waffles.
- Ice Cream: Drizzle over dairy-free ice cream for an indulgent treat.
- Desserts: It pairs beautifully with brownies, cakes, or fruit salads.
- Granola: Top your yogurt or granola for added creaminess.
How to Store Vegan Condensed Milk: 5 Reasons You’ll Love This Recipe Properly
Best Storage Practices
To store your Vegan Condensed Milk properly, pour it into an airtight container. Place it in the fridge, where it can be stored for about a week. Make sure to label the container if you’re storing it with different items.
Reheating and Freezing Tips
When you’re ready to use your Vegan Condensed Milk, you can simply reheat it gently in the microwave or on the stovetop. Stir it well to smooth out any separation that may occur. If you want to freeze it, pour it into ice cube trays and freeze for easy portioning later.
When you’re ready to use, thaw in the fridge or add directly to cooking for a quick, creamy boost.
Tips & Tricks for Vegan Condensed Milk: 5 Reasons You’ll Love This Recipe
Mistakes to Avoid
- Ignoring Temperature: Don’t rush! Ensure you use medium heat for the best results.
- Skipping the Slurry: Always create the cornstarch slurry; adding it directly won’t thicken correctly.
- Not Stirring Enough: Stir constantly to prevent lumps and ensure a smooth finish.
- Using Low-Fat Coconut Milk: Full-fat coconut milk yields the best creamy consistency.
- Overcooking: Pay attention to the cooking time; overcooking can lead to a grainy texture.
Extra Tips for Better Results
- Try different flavor extracts like almond or hazelnut for variety.
- Adjust the maple syrup to suit your sweetness preference.
- Ensure to blend the ingredients well to avoid lumps.
- Use high-quality coconut milk for richer flavor and creaminess.
Recipe Variations of Vegan Condensed Milk: 5 Reasons You’ll Love This Recipe
Creative Twists
- Chocolate Coconut Milk: Add cocoa powder for a decadent chocolate flavor.
- Spiced Version: Blend in a pinch of cinnamon or nutmeg for warm spice notes.
- Mint Infusion: Add a few drops of peppermint extract for a refreshing take.
- Caramel Variation: Use coconut sugar instead of maple syrup for a caramel-like flavor.
Dietary Adjustments
This recipe is already vegan, but it can easily be adjusted for gluten-free needs by ensuring your thickener is certified gluten-free. You can also make it nut-free by choosing a seed-based milk instead of coconut milk.
Conclusion about Vegan Condensed Milk: 5 Reasons You’ll Love This Recipe
In summary, this Vegan Condensed Milk: 5 Reasons You’ll Love This Recipe is not just a delicious alternative to the traditional version—it’s also easy to make, versatile, and packed with natural flavors. Whether drizzled over desserts or added to beverages, it enhances any dish effortlessly. The simplicity of using a few wholesome ingredients makes this a winner for everyone, especially if you’re trying to eat healthier or follow a vegan lifestyle.
With opportunities to customize and flavor this Vegan Condensed Milk, you can make it uniquely yours. So why wait? Try this amazing recipe, and I promise you’ll find it hard to go back to store-bought varieties. Your taste buds will thank you!
FAQs about Vegan Condensed Milk: 5 Reasons You’ll Love This Recipe
Can I prepare it ahead of time?
Yes, you can make it a few days in advance and store it in the fridge.
Can I freeze it?
Absolutely! Pour it into ice cube trays for easy portioning later.
How long does it last?
Homemade Vegan Condensed Milk can last about one week in the fridge.
What are the best substitutions?
Use almond milk or oat milk instead of coconut milk, and agave syrup instead of maple syrup.
Is this recipe family-friendly?
Yes! Most families will love this creamy and sweet addition to various dishes.
Can I use this in baking?
Yes, it’s perfect for recipes that call for traditional condensed milk.
What thickening alternatives work?
Arrowroot powder or tapioca starch can be used in place of cornstarch.
Will it separate in the fridge?
Some separation may occur, so stir before using, and gently reheat if needed.
Is it easy to customize?
Definitely! You can adjust the sweetness or flavors based on your preferences.
Is it suitable for kids?
It’s a great choice for kids, offering a natural sweetness in a fun form!
Vegan Condensed Milk
Ingredients
Main Ingredients
- 1 cup coconut milk (preferably full-fat) Provides creaminess
- ⅓ cup maple syrup Adds natural sweetness
- 2 tablespoons cornstarch For thickening
- 1 teaspoon vanilla extract For flavor enhancement


Instructions
Preparation
- Gather all your ingredients: coconut milk, maple syrup, cornstarch, and vanilla extract.
Cooking
- In a medium saucepan, combine the coconut milk and maple syrup over medium heat. Stir to blend.
- In a small bowl, mix the cornstarch with about 2 tablespoons of water to create a slurry.
- Gradually add the cornstarch slurry to the saucepan while stirring continuously.
- Cook the mixture over medium heat, stirring often, until it thickens (about 5-10 minutes).
- Once thick, remove it from heat and stir in the vanilla extract.
Cooling and Storing
- Allow to cool before using; it will thicken more as it cools.
- Store leftovers in an airtight container in the fridge for up to a week.