 🖤 BLACK FRIDAY SALE: Get the Christmas Cookbook for only
This post may contain affiliate links. As an Amazon Associate, I earn from qualifying purchases at no extra cost to you.
Table of Contents
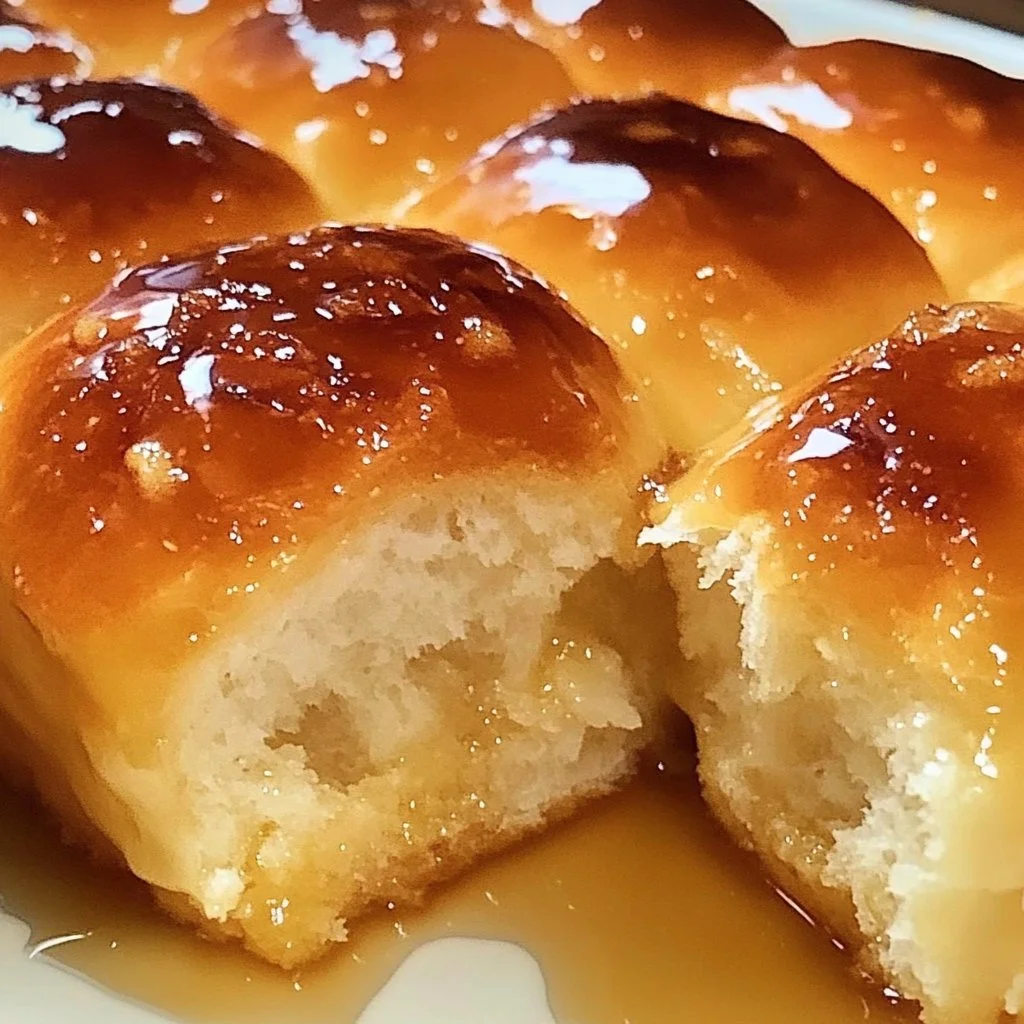
When it comes to comfort food that brings people together, nothing beats the allure of warm, soft rolls dripping with honey butter. Imagine pulling apart those soft, fluffy pieces, and you can feel the stress of the day just melt away. Honey Butter Pull-Apart Rolls: 5 Steps to Deliciousness is not just a recipe; it’s a warm invitation to family gatherings and cozy dinners. This easy dish turns a simple meal into something special, perfect for any occasion.
There’s something incredibly delightful about homemade rolls. The warmth of fresh bread fills the kitchen, and the sweet aroma of honey butter puts a smile on everyone’s face. Whether you’re having a celebratory dinner or a casual Sunday family meal, these rolls are the perfect accompaniment or even the star of the meal. The best part? You don’t need to be a professional baker to make these delicious treats.
Why is this recipe so special? It’s all in the steps. With just five easy steps, you can create a batch of Honey Butter Pull-Apart Rolls that are sure to impress. Each ingredient plays a vital role, transforming simple flour, milk, and butter into fluffy orbs of delight. You might be wondering: how can something so delicious be this easy? The secret lies in the unique combination of flavors and the method we’ll share with you.
Moreover, these rolls are incredibly versatile. Headed to a potluck? Making dinner for the family? Or just looking for that perfect side for your holiday meal? These rolls fit every scenario. With a customizable touch to suit any palate, Honey Butter Pull-Apart Rolls: 5 Steps to Deliciousness will be your go-to recipe for years to come. You’ll have everyone asking for seconds, and possibly the recipe itself!
🍴 Top Kitchen Essentials You'll Love


Key Benefits of Honey Butter Pull-Apart Rolls: 5 Steps to Deliciousness
Why You’ll Love This Recipe
- Mouthwatering Flavor: The honey mixed with butter creates a sweet and savory dish that tantalizes taste buds.
- Simplicity: Requires basic ingredients and easy-to-follow steps—perfect for novice cooks.
- Family-Friendly: Rolls are a hit with both kids and adults, making meals more enjoyable.
- Customization: Adjust the sweetness or add spices according to your taste preferences.
- Perfect for Sharing: The pull-apart style encourages sharing and togetherness, ideal for gatherings.
What Makes It Stand Out
What sets Honey Butter Pull-Apart Rolls apart is its unique combination of textures and flavors. The fluffy, soft bread coupled with the sweet, buttery honey glaze makes for a heavenly bite. Dress it up with seasonal herbs or keep it classic; the choice is yours.
This recipe is also wonderfully adaptable. You can experiment with different types of flours, alternative sweeteners, or even add-ins like garlic or cheese to make it your own. Perfectly suited for any occasion—be it a holiday feast, summer BBQ, or cozy family dinner—these rolls have a way of enhancing the atmosphere of any meal.
Ingredients for Honey Butter Pull-Apart Rolls: 5 Steps to Deliciousness
Complete Ingredient List with Measurements
- 2 cups all-purpose flour
- 1 cup warm milk
- 1/4 cup sugar
- 1 packet active dry yeast
- 1/4 cup unsalted butter, melted
- 1/2 teaspoon salt
- 1/4 cup honey
- 1/4 cup melted butter for topping
When gathering ingredients, consider pairing suggestions; homemade rolls go beautifully with soups, stews, or simply a warm bowl of butter.
Substitutes and Alternatives
If you’re dealing with dietary restrictions, don’t fret! You can swap out the all-purpose flour for gluten-free flour blends to cater to gluten sensitivities. For those avoiding dairy, opt for almond or oat milk in place of regular milk, and use vegan butter instead of unsalted butter.
Need to adjust the sweetness? You can use agave syrup instead of honey for those who are vegan. Also, if yeast is a concern, baking powder can be an alternative, but the flavor and texture will differ from the traditional method.
How to Make Honey Butter Pull-Apart Rolls: 5 Steps to Deliciousness – Step-by-Step Directions
Step 1 – Prepare Ingredients
Start by gathering all your ingredients together. Measure out the flour, warm milk, sugar, yeast, butter, salt, and honey. Ensure your milk is warm enough to activate the yeast, but not too hot to kill it.
Step 2 – Activate the Yeast
In a large mixing bowl, combine the warm milk and active dry yeast. Allow it to sit for about 5 minutes. You should see bubbles forming, indicating the yeast is active and ready to use.
Step 3 – Mix in the Dry Ingredients
Once your yeast is activated, add sugar, salt, and melted butter to the mixture. Stir gently until combined. It’s important to mix these ingredients well to ensure even flavor distribution in your dough.
Step 4 – Add the Flour
Gradually add the all-purpose flour, mixing it in little by little until a soft dough begins to form. The texture should be sticky but not too wet. If it’s too sticky, you can always add a little more flour.
Step 5 – Knead the Dough
Transfer the dough to a floured surface. Knead it vigorously for about 5 minutes, until it’s smooth and elastic. You should feel the dough come together and become less sticky as you work on it.
Step 6 – Let the Dough Rise
Place the kneaded dough in a greased bowl, covering it with a damp cloth. Let it rise in a warm area for about an hour or until it doubles in size. The warmth encourages the yeast to work its magic.
Step 7 – Prepare for Baking
Preheat your oven to 350°F (175°C) while the dough is rising. Once the dough has doubled, punch it down to release any air. Divide it into small equal pieces, rolling each piece into a ball.
Step 8 – Arrange in Baking Dish
Grease a baking dish and place the dough balls close together in the dish. They should be touching, which creates that lovely pull-apart effect when baked.
Step 9 – Make the Honey Butter
In a small bowl, mix the melted butter with honey. Brush this mixture generously over the formed rolls for that sweet topping that is the essence of Honey Butter Pull-Apart Rolls.
Step 10 – Bake and Serve
Bake for 25-30 minutes until golden brown. You can brush a little more honey butter on top right after taking them out of the oven for added flavor. Let them cool slightly before serving for the best texture and flavor.
Serving Suggestions for Honey Butter Pull-Apart Rolls: 5 Steps to Deliciousness
Best Occasions to Serve This Dish
These rolls are incredibly versatile, making them ideal for various occasions. Whether you find yourself hosting a Thanksgiving dinner or a casual Sunday brunch, Honey Butter Pull-Apart Rolls will elevate your menu. They can even grace your table during holiday gatherings, potluck dinners, or family reunions.
On a less formal scale, serve these rolls alongside a comforting bowl of chili or as a delightful addition to a picnic. With their pull-apart nature, they encourage sharing, which makes them perfect for any group setting.
What to Serve With It
- Soups: They pair beautifully with creamy soups like butternut squash or tomato basil.
- Salads: Complement your rolls with a fresh garden salad or creamy coleslaw.
- Meats: They make a great side to roasted chicken, brisket, or BBQ ribs.
- Dips: Try serving them with a honey mustard dip or marinara for a fun twist.
- Drinks: A refreshing iced tea or lemonade balances the sweetness perfectly.
How to Store Honey Butter Pull-Apart Rolls: 5 Steps to Deliciousness Properly
Best Storage Practices
To keep your Honey Butter Pull-Apart Rolls fresh, allow them to cool completely before storing. They can be kept in an airtight container at room temperature for up to 2 days. For longer storage, place them in the fridge, where they will last up to a week.
If you want to save them for later, consider freezing. Wrap each roll tightly in plastic wrap and then place them in a freezer-safe bag. They will maintain their flavor for up to three months.
Reheating and Freezing Tips
When you’re ready to enjoy your rolls again, simply pull out the number you need. If frozen, let them thaw in the fridge overnight for easy reheating. For warming, you can place them in a preheated oven at 350°F (175°C) for about 10-15 minutes. Alternatively, warm them in the microwave for about 15-20 seconds for a quick serving.
Tips & Tricks for Honey Butter Pull-Apart Rolls: 5 Steps to Deliciousness
Mistakes to Avoid
- Using Cold Milk: Always use warm milk to activate the yeast; cold milk will hinder the rising process.
- Skip the Kneading: Kneading is crucial for developing a nice texture; don’t skip it!
- Not Letting the Dough Rise Enough: Ensure your dough doubles in size; this leads to fluffier rolls.
- Baking Too Long: Keep an eye on them during baking; they should be golden brown, not dark brown.
- Skipping the Honey Butter Brush: The honey butter adds a whole new level of flavor; don’t miss this step!
Extra Tips for Better Results
- Experiment with different flours to add unique flavors and textures.
- Add herbs like rosemary or thyme to the dough for an aromatic twist.
- Brush with additional honey butter right before serving for an indulgent touch.
- Ensure you’re using fresh yeast for the best rise and flavor.
Recipe Variations of Honey Butter Pull-Apart Rolls: 5 Steps to Deliciousness
Creative Twists
- Garlic Honey Pull-Apart Rolls: Add minced garlic to the melted butter before brushing it on the rolls for a savory twist.
- Cheesy Pull-Apart Rolls: Incorporate shredded cheese in the center of each ball for a gooey surprise.
- Herb-Infused Rolls: Mix in fresh herbs or garlic powder into the dough for an added flavor punch.
- Chocolate Chip Rolls: Add semi-sweet chocolate chips to the dough for a sweet dessert version.
Dietary Adjustments
For a vegan version, substitute the butter with coconut oil and the milk with nut milk. Use maple syrup instead of honey for sweetness. To make it gluten-free, replace the all-purpose flour with a high-quality gluten-free flour mix, and consider adding xanthan gum for texture.
Conclusion about Honey Butter Pull-Apart Rolls: 5 Steps to Deliciousness
In a world full of complex recipes, Honey Butter Pull-Apart Rolls: 5 Steps to Deliciousness stands out for its simplicity and heartwarming flavors. The ease of execution combined with the comforting outcome makes this recipe a must-try. Imagine fresh, warm rolls that everyone can pull apart, spreading joy and deliciousness in every bite.
From family gatherings to Sunday dinners, these rolls have a special place at any table. They are the perfect accompaniment to nearly any meal and are sure to leave everyone asking for your secret. So why not introduce this delightful recipe into your culinary repertoire? It could quickly become your favorite go-to for all occasions!
FAQs about Honey Butter Pull-Apart Rolls: 5 Steps to Deliciousness
Can I prepare it ahead of time?
Yes! You can prepare the dough up to the rising step and refrigerate it. Just let it come to room temperature before baking.
Can I freeze it?
Absolutely! You can freeze the rolls after baking. Just wrap them well before storing them in the freezer.
How long does it last?
When stored properly, these rolls will last about 2 days at room temperature or up to a week in the fridge.
What are the best substitutions?
You can use almond or soy milk for dairy-free options and gluten-free flour for those with gluten sensitivities.
Is this recipe family-friendly?
Definitely! The soft and sweet nature of these rolls is sure to please both kids and adults.
Can I use instant yeast instead?
Yes! If using instant yeast, you can mix it directly with the flour without the need for activating it in warm milk.
Can I add nuts or fruits?
Yes! Feel free to mix in some dried fruits or nuts for a different flavor profile.
What if my dough doesn’t rise?
Check if your yeast is fresh. If the milk is too hot or cold, it could also impact the rise.
What type of honey should I use?
Any pure honey will work well, but local honey can add a unique flavor.
How can I make it sweeter?
You can brush more honey on top after baking for an extra sweet finish.

Honey Butter Pull-Apart Rolls
Ingredients
Dough Ingredients
- 2 cups all-purpose flour Can substitute with gluten-free flour.
- 1 cup warm milk Use almond or oat milk for a dairy-free version.
- ¼ cup sugar Adjust sweetness as desired.
- 1 packet active dry yeast Can substitute with instant yeast.
- ¼ cup unsalted butter, melted Use vegan butter for a dairy-free version.
- ½ teaspoon salt
Honey Butter Topping
- ¼ cup honey Can substitute with agave syrup for a vegan option.
- ¼ cup melted butter Use coconut oil for a dairy-free version.
Instructions
Preparation
- Gather all your ingredients together. Measure out the flour, warm milk, sugar, yeast, butter, salt, and honey.
- In a large mixing bowl, combine the warm milk and active dry yeast. Allow it to sit for about 5 minutes.
- Once your yeast is activated, add sugar, salt, and melted butter to the mixture. Stir gently until combined.
- Gradually add the all-purpose flour, mixing it in little by little until a soft dough begins to form.
- Transfer the dough to a floured surface. Knead it vigorously for about 5 minutes until it’s smooth and elastic.
- Place the kneaded dough in a greased bowl, covering it with a damp cloth, and let it rise for about an hour.
- Preheat your oven to 350°F (175°C) while the dough is rising.
- Once the dough has doubled, punch it down and divide it into equal pieces, rolling each into a ball.
- Grease a baking dish and place the dough balls close together in the dish.
- In a small bowl, mix the melted butter with honey. Brush this mixture generously over the formed rolls.
- Bake for 25-30 minutes until golden brown, brushing a little more honey butter on top right after baking.