
This post may contain affiliate links. As an Amazon Associate, I earn from qualifying purchases at no extra cost to you.
Table of Contents
🍴 Top Kitchen Essentials You'll Love


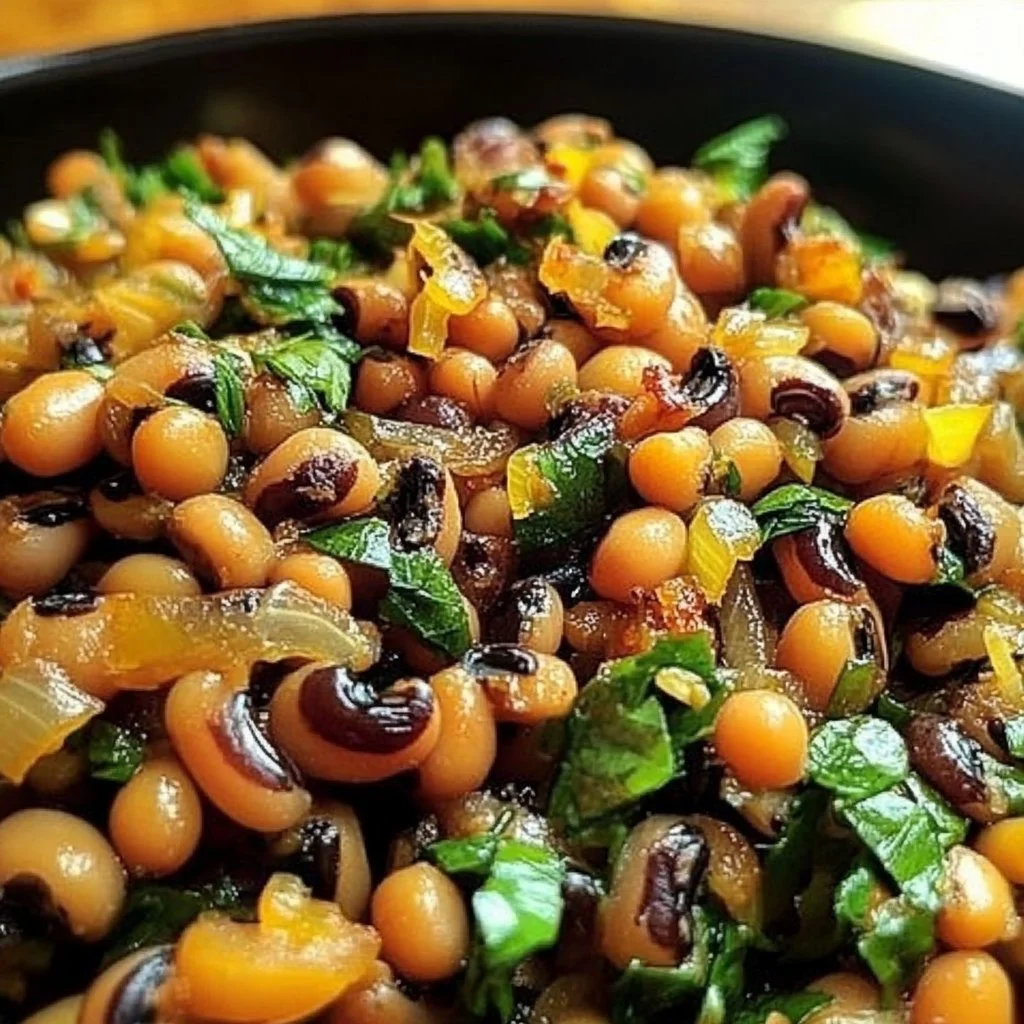
Introduction to Baked Black Eyed Peas
Are you on the hunt for a comforting, satisfying dish that’s not only easy to prepare but also brimming with flavor? Look no further than Baked Black Eyed Peas! This recipe beautifully combines the earthy richness of black-eyed peas with an array of fresh vegetables, creating a wholesome meal perfect for any occasion. The best part? It’s remarkably simple, making it a fantastic choice for both seasoned cooks and kitchen novices alike.
What makes Baked Black Eyed Peas stand out is its versatility. You can customize it with different vegetables or spices per your taste. Whether you’re looking for a hearty side dish or a flavorful main course, this recipe is a delightful choice. Have you ever wondered how a dish can evoke such warmth and nostalgia? Baked Black-Eyed Peas can whisk you away to family gatherings or cozy dinners with friends, where every spoonful is imbued with love and comfort.
Moreover, the method of slow baking not only enhances the flavors but also allows the black-eyed peas to absorb the wonderful tastes of the broth and seasonings. Imagine filling your kitchen with an inviting aroma that beckons you to the table. As you dig in, the creamy texture of the black-eyed peas and the crunch of the vegetables create an irresistible enjoyment. So gather your ingredients and let’s embark on this flavorful journey together!
Key Benefits of Baked Black Eyed Peas
Why You’ll Love This Recipe
- Rich Flavor: The combination of smoked paprika and fresh vegetables elevates the dish’s taste profile.
- Nutrient-Dense: Black-eyed peas are packed with protein and fiber, making this recipe a healthy choice.
- Customizable: You can add your favorite vegetables or spices to tailor the dish to your preferences.
- Easy Preparation: With simple ingredients and straightforward steps, it’s perfect for busy weeknights.
- Comfort Food: This dish evokes warmth and satisfaction, perfect for family dinners or gatherings.
- Great for Leftovers: Baked Black Eyed Peas taste just as good the next day, if not better.
What Makes It Stand Out
Baked Black Eyed Peas is not your typical bean dish. The unique addition of smoked paprika gives it a deep, smoky flavor that sets it apart. The dish brings together the earthy notes of legumes with seasonal vegetables, which means you can have fun experimenting based on what’s available.
It shines on special occasions like New Year’s Day, where black-eyed peas symbolize good luck in Southern traditions. This recipe can easily serve as a staple for your weekly menu or as a festive dish during holiday gatherings, ensuring that it always has a place on your table.
Ingredients for Baked Black Eyed Peas
Complete Ingredient List with Measurements
- 2 cups black-eyed peas
- 1 onion, chopped
- 2 cloves garlic, minced
- 1 bell pepper, chopped
- 1 teaspoon smoked paprika
- Salt and pepper to taste
- 2 cups vegetable broth
- Olive oil
- Optional: diced tomatoes, greens, or other favorite vegetables
Substitutes and Alternatives
If you have allergies or specific dietary needs, don’t worry! Baked Black Eyed Peas can easily accommodate various requirements. For a gluten-free option, ensure your broth is gluten-free.
If you follow a vegan diet, you’re already in luck since this dish contains no animal products. Additionally, if you prefer, swap out the black-eyed peas for other legumes like chickpeas or kidney beans—both work wonderfully and bring their unique flavor.
For a bit of zest, try adding chopped jalapeños or cayenne for some heat. Use vegetable or chicken broth instead of vegetable broth if you prefer a non-vegetarian version, but for a vegan alternative that packs flavor, stick with vegetable broth.
How to Make Baked Black Eyed Peas – Step-by-Step Directions
Step 1 – Prepare Ingredients
Start by rinsing your black-eyed peas in cold water, ensuring they are clean and ready for cooking. While you can soak them overnight for better digestibility, it’s not strictly necessary for this recipe. Drain the peas and set them aside. Chop the onion, mince the garlic, and dice the bell pepper so they’re ready to go when you start cooking.
Step 2 – Cook the Base
In a large skillet, heat a couple of tablespoons of olive oil over medium heat. Once it’s shimmering, add the chopped onion and minced garlic. Sauté them for about 5 minutes, or until the onion is translucent. This step creates a fragrant base for your Baked Black Eyed Peas.
Step 3 – Add Bell Pepper and Vegetables
After the onion and garlic have softened, add the chopped bell pepper and any optional vegetables you’ve chosen. Cook for an additional 3-4 minutes until the bell pepper begins to soften, inviting a myriad of flavors to meld together.
Step 4 – Incorporate Seasonings
Once your vegetables are tender, it’s time to introduce the star of the show: the black-eyed peas. Stir in the drained peas along with the smoked paprika, salt, and freshly ground black pepper. Mix everything thoroughly to ensure the peas are well-coated in the aromatic mixture.
Step 5 – Pour in the Broth
Take the vegetable broth and pour it into the skillet. Stir gently, bringing all the ingredients together. You’ll want to allow it to come to a gentle simmer so that all those delicious flavors start to interlace.
Step 6 – Transfer to Baking Dish
Now it’s time to move the mixture into a greased baking dish. Spread it out evenly so that it bakes uniformly. Cover the dish snugly with aluminum foil, which helps to trap moisture and allows the peas to cook perfectly without drying out.
Step 7 – Bake the Dish
Place your covered baking dish into the preheated oven at 350°F (175°C). Bake for 45-60 minutes, checking periodically to see if the peas are tender. The gentle heat will allow the flavors to deepen, making every bite unforgettable.
Step 8 – Check for Doneness
As the cooking time nears completion, use a fork to check the texture of the black-eyed peas. They should be tender yet holding their shape. If they’re still firm, return them to the oven, checking every 10 minutes until they reach the perfect consistency.
Step 9 – Serve & Enjoy
Once your Baked Black Eyed Peas are ready, remove the foil and allow them to cool for a few minutes. This dish is best served warm, so spoon it into bowls, and enjoy the delightful flavors and textures you’ve created.
Step 10 – Garnish (Optional)
If you’d like, top your Baked Black Eyed Peas with fresh herbs like parsley or cilantro for an added touch of color and freshness. This step is entirely optional but can bring an extra layer of flavor.
Serving Suggestions for Baked Black Eyed Peas
Best Occasions to Serve This Dish
Baked Black Eyed Peas are incredibly versatile and can be served on various occasions. They make an excellent dish for a cozy family dinner or contribute to festive gatherings, especially on New Year’s Day, where they symbolize good fortune.
This recipe is also superb for potlucks or BBQs, allowing you to present something unique yet approachable. It’s comforting enough to be a winter warmer while still being refreshing for spring or summer meals.
What to Serve With It
Baked Black Eyed Peas pair wonderfully with a variety of dishes. Consider serving them alongside cornbread or rice for a filling and satisfying meal. For added texture, you could offer a light salad topped with vinaigrette.
Alternatively, serving grilled meats or roasted veggies can create a fabulous contrast to the earthy flavors of the dish. For drinks, a crisp white wine or sparkling water with lemon can perfectly complement the richness of the baked peas.
How to Store Baked Black Eyed Peas Properly
Best Storage Practices
After enjoying your Baked Black Eyed Peas, be sure to store any leftovers correctly. Allow the dish to cool completely before transferring it to an airtight container. You can store it in the refrigerator for up to 3-4 days, which allows the flavors to continue melding.
For longer storage, consider freezing your Baked Black Eyed Peas. Place them in freezer-safe containers or bags, making sure to remove as much air as possible. They will last for up to 3 months in the freezer.
Reheating and Freezing Tips
When you’re ready to enjoy your leftovers, reheating is simple. For smaller portions, a microwave works well. Just make sure to stir occasionally to heat evenly. For larger amounts, you may prefer to reheat them in a skillet over low heat, adding a splash of water if they seem dry.
If frozen, let the Baked Black Eyed Peas thaw in the refrigerator overnight before reheating. This prevents a watery texture and helps them maintain their original flavor and integrity.
Tips & Tricks for Baked Black Eyed Peas
Mistakes to Avoid
1 – Not Soaking the Peas: While soaking is optional, not soaking can lead to longer cooking times and potentially less digestible beans.
2 – Skipping the Aromatics: Don’t overlook the onion and garlic; they provide a foundational flavor that enhances the entire dish.
3 – Forgetting to Taste: Always taste your mixture before baking to ensure it’s seasoned to your liking.
4 – Overcooking the Vegetables: Ensure your vegetables are tender but not mushy before adding the peas; you want a nice texture.
5 – Baking Without Covering: Cover the dish while baking—it keeps the moisture in and makes sure your peas cook through perfectly.
Extra Tips for Better Results
For an extra boost of flavor, consider adding a squeeze of fresh lemon juice just before serving. This can brighten up the dish and highlight the natural flavors of the ingredients.
If you want more depth, try infusing the vegetable broth with herbs like thyme or bay leaf while it simmers. Remember that presentation counts; serving in vibrant dishes can elevate a simple recipe like Baked Black Eyed Peas into something special.
Recipe Variations of Baked Black Eyed Peas
Creative Twists
1 – Mexican-Inspired: Add diced tomatoes, corn, and jalapeños for a southwestern flair. Top with avocado slices post-baking for freshness.
2 – Curry Style: Incorporating curry powder and coconut milk instead of broth can give a new flavor dimension to your Baked Black Eyed Peas.
3 – Italian Twist: Swap out smoked paprika for Italian seasoning and add spinach and diced tomatoes. Serve with grated Parmesan for a comforting Italian-inspired dish.
Dietary Adjustments
To adapt for dietary needs, ensure you choose gluten-free broth if needed. For a lower-carb option, replace the peas with lentils or chickpeas. Each of these substitutes will add a different flavor while keeping it nutritious and appealing to various palates.
Conclusion about Baked Black Eyed Peas
In conclusion, Baked Black Eyed Peas is a fantastic recipe to add to your culinary repertoire. Not only is it easy to prepare, but it also offers boundless possibilities for customization. This dish brings comfort, flavor, and nutrition together in one warm serving.
Try Baked Black Eyed Peas, and allow it to become a beloved staple in your home. Whether you make it for a special occasion or a cozy night in, its rich flavors and hearty ingredients will undoubtedly make an impression on your family and friends. Its embrace of community and warmth makes it an excellent choice for anyone looking to enjoy a meal that feels like home.
FAQs about Baked Black Eyed Peas
Can I make Baked Black Eyed Peas ahead of time?
Yes, you can prepare the ingredients the day before and store them separately in the fridge until you’re ready to cook.
How long can I store Baked Black Eyed Peas?
In the refrigerator, they typically last for 3-4 days. If frozen, aim to use them within 3 months for the best quality.
Can I use dry black-eyed peas instead of canned?
Absolutely! Just soak the dry peas overnight for better texture and cook them accordingly before baking.
Is it possible to add more vegetables?
Yes! Feel free to include your favorite vegetables like zucchini, carrots, or kale to enhance the dish.
How do I keep leftovers from drying out?
Store leftovers in an airtight container and make sure to consume them within a few days or freeze them for later.
Can I make Baked Black Eyed Peas in a slow cooker?
Yes! Follow the same steps in a slow cooker, cooking on low for 6-8 hours or high for about 3-4 hours.
What kind of broth should I use?
Vegetable broth works great for a plant-based dish, but chicken broth can be used for added flavor if you prefer.
Can I substitute the olive oil?
Yes, other oils like avocado or coconut oil can also be used depending on your flavor preference.
Is this recipe suitable for meal prep?
Definitely! Baked Black Eyed Peas store well and can be reheated, making them a great option for meal prep.
What are some recommended toppings?
Consider fresh herbs, a dollop of sour cream, or a sprinkle of cheese for added flavor and richness.

Baked Black-Eyed Peas
Ingredients
Main ingredients
- 2 cups black-eyed peas Rinsed and drained
- 1 medium onion, chopped Provides foundational flavor
- 2 cloves garlic, minced Adds aroma and flavor
- 1 medium bell pepper, chopped Can use any color
- 1 teaspoon smoked paprika Gives the dish a smoky flavor
- to taste Salt and pepper Adjust per preference
- 2 cups vegetable broth Use gluten-free if necessary
- 2 tablespoons olive oil For sautéing
- optional Diced tomatoes, greens, or other favorite vegetables For customization


Instructions
Preparation
- Rinse the black-eyed peas in cold water and drain.
- Chop the onion, mince the garlic, and dice the bell pepper.
Cooking Base
- Heat olive oil in a large skillet over medium heat.
- Add chopped onion and minced garlic, and sauté for about 5 minutes until the onion is translucent.
Adding Vegetables
- Add the chopped bell pepper and any optional vegetables. Cook for an additional 3-4 minutes.
Mixing Ingredients
- Stir in the drained black-eyed peas, smoked paprika, salt, and pepper, mixing everything thoroughly.
Simmering
- Pour the vegetable broth into the skillet and bring to a gentle simmer.
Baking
- Transfer the mixture to a greased baking dish and cover with aluminum foil.
- Bake in a preheated oven at 350°F (175°C) for 45-60 minutes.
Final Check
- Check the peas for tenderness and return to the oven if they are still firm.
Serving
- Remove the foil and allow to cool for a few minutes before serving.
- Garnish with fresh herbs if desired.