
This post may contain affiliate links. As an Amazon Associate, I earn from qualifying purchases at no extra cost to you.
Table of Contents
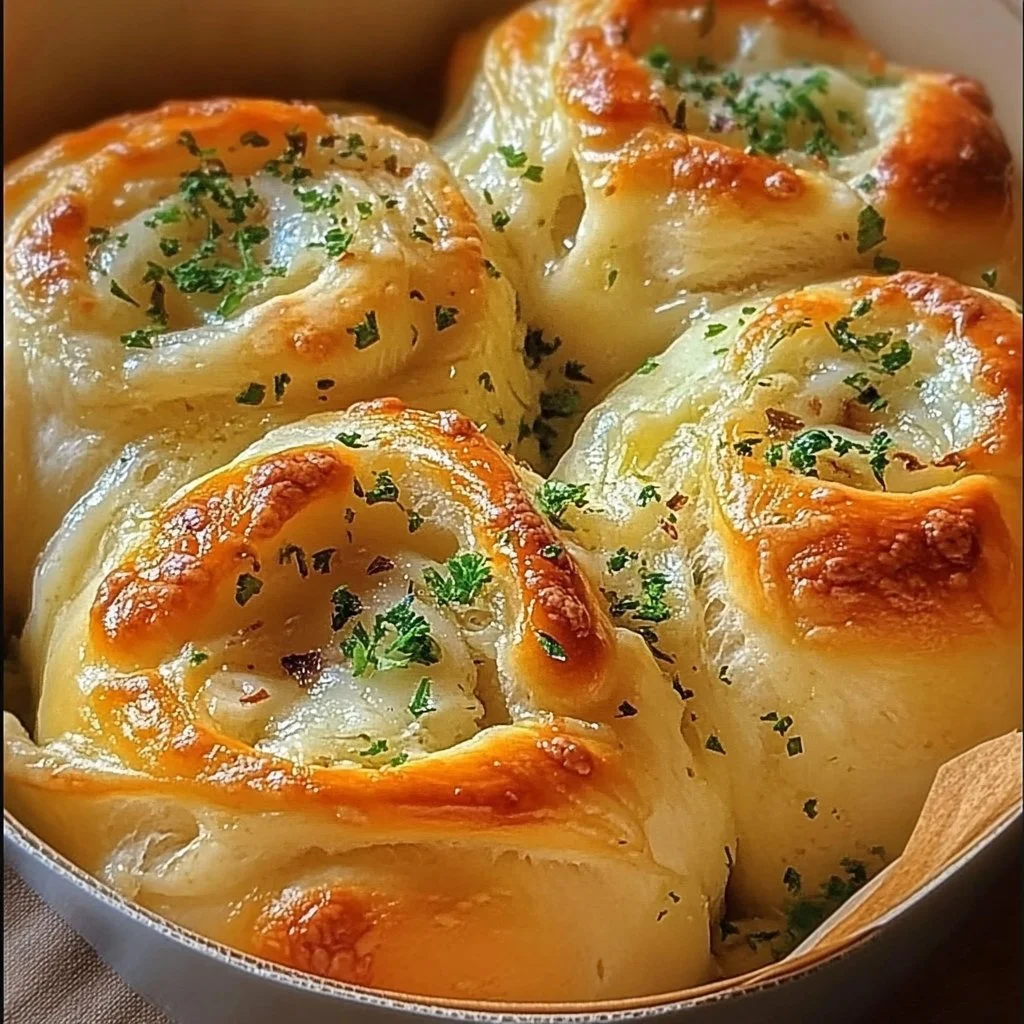
The aroma of freshly baked bread wafting through the kitchen can turn any routine day into a special occasion. Now, imagine that delightful scent combined with the heavenly flavors of cheese and garlic. That’s exactly what you get with Cheesy Garlic Pull-Apart Rolls! These rolls are a versatile treat perfect for gatherings, family dinners, or simply as a comforting snack.
Why is this recipe so special? For starters, it’s remarkably easy to make, even for novice bakers. Plus, who can resist the joy of pulling apart soft, cheesy rolls? Whether served with a hearty meal or enjoyed on their own, they are sure to be a hit at your table.
Have you ever found yourself craving warm, buttery rolls that are bursting with flavor? This recipe promises not to disappoint. Each bite is a delightful combination of cheesy goodness, aromatic garlic, and fresh parsley, making it a real crowd pleaser.
Not only are these Cheesy Garlic Pull-Apart Rolls delicious, but they are also customizable. You can tweak the cheeses, add herbs, or even throw in some spices for a twist. This adaptability makes them suitable for various occasions—be it a holiday feast, a casual get-together, or just a cozy dinner with the family.
Let’s dive deeper into the world of Cheesy Garlic Pull-Apart Rolls and explore all the fantastic aspects that make this recipe irresistible and easy to follow!
🍴 Top Kitchen Essentials You'll Love


Key Benefits of Cheesy Garlic Pull-Apart Rolls
Why You’ll Love This Recipe
- Flavor Explosion: The blend of mozzarella and Parmesan cheese with garlic creates an irresistible flavor combination.
- Easy to Make: Even novice bakers can whip these rolls up with ease, thanks to straightforward instructions.
- Customize to Your Liking: Change the cheeses or add your favorite herbs to make it your own.
- Perfect for Any Occasion: Serve them with dinner, at parties, or during family gatherings; they fit right in anywhere.
- Kid-Friendly: Children love pulling apart the rolls, making it a fun side dish that appeals to all ages.
- Comfort Food: There’s something deeply satisfying about warm, cheesy rolls straight from the oven.
What Makes It Stand Out
What truly sets Cheesy Garlic Pull-Apart Rolls apart is their originality. This dish marries the traditional concept of bread rolls with a twist of cheesy goodness and garlic flavor. It’s not just another bread recipe; it brings an exciting flair to your dinner table.
Customization is also a key element. You can experiment with different types of cheeses, such as cheddar or gouda, and incorporate herbs like oregano or basil. Whether it’s a festive dinner or a casual Friday night, these rolls can adapt to any setting.
And let’s not forget about the occasions! These rolls make a perfect addition to holiday dinners, potlucks, or intimate family meals. They’re not just side dishes; they’re conversation starters that bring everyone together.
Ingredients for Cheesy Garlic Pull-Apart Rolls
Complete Ingredient List with Measurements
- 3 cups all-purpose flour
- 1 packet (2 1/4 teaspoons) instant yeast
- 1 teaspoon salt
- 2 tablespoons sugar
- 1 cup warm milk
- 1/4 cup unsalted butter, melted
- 1 cup shredded mozzarella cheese
- 1/2 cup grated Parmesan cheese
- 4 cloves garlic, minced
- 1/4 cup fresh parsley, chopped
Each of these ingredients brings something special to the table. Flour acts as the base, while yeast provides the rise that gives these rolls their delightful texture. The warm milk and melted butter contribute moisture and richness. Cheeses add that gooey charm that everyone loves, and garlic, of course, is the star, providing that irresistible flavor.
Substitutes and Alternatives
If you have specific dietary needs or allergies, there are various substitutions you can make without sacrificing flavor. For the all-purpose flour, you can use gluten-free flour mixes, ensuring the texture remains soft and delightful.
Dairy-free individuals can swap the milk with almond or oat milk to maintain creaminess. Instead of regular butter, consider using vegan butter to make the rolls completely plant-based. For cheese, many companies now offer dairy-free mozzarella and Parmesan options that melt beautifully.
How to Make Cheesy Garlic Pull-Apart Rolls – Step-by-Step Directions
Step 1 – Prepare Ingredients
Start by gathering all your ingredients. Make sure your flour is measured accurately, and your yeast is fresh. This will ensure the best rise and texture for your rolls.
Step 2 – Combine Dry Ingredients
In a large bowl, mix together the flour, yeast, salt, and sugar. This step ensures that the yeast is evenly distributed throughout the flour, which helps in better rising.
Step 3 – Add Wet Ingredients
Now, pour in the warm milk and melted butter. Stir the mixture until a dough begins to form, making sure everything is combined thoroughly.
Step 4 – Knead the Dough
Transfer your dough to a floured surface. Knead it for about 5 minutes until it becomes smooth and elastic. This is crucial for developing gluten, which gives the rolls their lovely texture.
Step 5 – Let the Dough Rise
Place the kneaded dough in a greased bowl, cover it with a clean cloth, and let it rise. A warm, draft-free spot is ideal for about 1 hour or until it doubles in size.
Step 6 – Preheat the Oven
While the dough is rising, preheat your oven to 375°F (190°C). This allows your oven to be at the perfect temperature when the rolls are ready to bake.
Step 7 – Punch Down and Divide Dough
After the dough has risen, punch it down to release excess air. Then, divide it into small balls. Aim for uniform sizes to ensure even baking.
Step 8 – Cheese Coating
In a separate bowl, mix the shredded mozzarella and grated Parmesan cheese. Roll each dough ball in the cheese mixture, coating them generously.
Step 9 – Arrange the Dough Balls
Place the coated dough balls in a greased baking dish, ensuring they’re close to each other but not touching. This allows them to rise and create that pull-apart texture.
Step 10 – Prepare Garlic Mixture
In a small bowl, combine melted butter, minced garlic, and chopped parsley. Brush this mixture over the dough balls to infuse them with flavor.
Step 11 – Bake the Rolls
Bake the rolls in your preheated oven for about 25-30 minutes or until they turn golden brown. The rolls should be puffed up and smell heavenly.
Step 12 – Serve and Enjoy
Taking them out of the oven, let them cool slightly before serving. Pull apart these warm rolls and savor every cheesy, garlicky bite!
Serving Suggestions for Cheesy Garlic Pull-Apart Rolls
Best Occasions to Serve This Dish
These Cheesy Garlic Pull-Apart Rolls shine brightly at family gatherings where everyone is looking for comfort food. They make a fantastic addition to holiday dinners, adding that homey touch to the table.
For casual get-togethers, they can serve as finger food or a delightful appetizer to kick off the meal. The rolls also pair beautifully with soups and salads, making them versatile for many dining occasions.
What to Serve With It
- Soups: Pair with hearty soups like minestrone or tomato basil to soak up flavors.
- Salads: Serve alongside a fresh green salad for a lighter meal option.
- Dips: Provide a cheesy dip or marinara sauce for extra indulgence.
- Drinks: Enjoy with a glass of crisp white wine or a refreshing iced tea for a complete dining experience.
How to Store Cheesy Garlic Pull-Apart Rolls Properly
Best Storage Practices
To store Cheesy Garlic Pull-Apart Rolls, let them cool completely after baking. Place them in an airtight container in the refrigerator, where they can last for up to 3 days. For longer storage, consider freezing them.
Reheating and Freezing Tips
To freeze, wrap the rolls tightly in plastic wrap and then in aluminum foil. They can be stored in the freezer for up to 3 months.
When you’re ready to enjoy them again, simply thaw them in the refrigerator overnight. Reheat in the oven at 350°F (175°C) for about 10-15 minutes, or until warm and cheesy again.
Tips & Tricks for Cheesy Garlic Pull-Apart Rolls
Mistakes to Avoid
- Skipping the Kneading: Not kneading enough can lead to dense rolls. Knead until smooth and elastic.
- Wrong Yeast Temperature: Using hot milk can kill the yeast. Ensure it’s warm, not hot—around 110°F (43°C).
- Not Letting Dough Rise: Skipping the rise time will result in less fluffy rolls. Be patient; let it double in size.
- Too Much Flour: Adding excess flour can make the rolls dry. Stick to the measurements!
- Ungreased Baking Dish: Always grease the dish to prevent sticking and ensure easy removal.
Extra Tips for Better Results
For enhanced flavor, consider adding herbs like rosemary or thyme to the dough. A sprinkle of sea salt on top before baking can also elevate flavors.
For a presentation touch, brush the tops with a little extra melted butter mixed with garlic after baking for more shine and flavor.
Recipe Variations of Cheesy Garlic Pull-Apart Rolls
Creative Twists
- Herbed Cheese Rolls: Add Italian seasoning to the cheese mixture for an herby punch.
- Spicy Variant: Incorporate sliced jalapeños into the cheese for a spicy kick.
- Sweet and Savory: Mix in caramelized onions or roasted red peppers for a sweet-savory balance.
Dietary Adjustments
For those with gluten intolerance, substitute regular flour with a gluten-free blend. If vegan, use plant-based butter and cheeses to maintain the delicious flavors without dairy. You can also experiment with using chickpea or almond flour for a unique twist!
Conclusion about Cheesy Garlic Pull-Apart Rolls
In a world filled with quick snacks and fast food, Cheesy Garlic Pull-Apart Rolls bring a warm touch of home cooking that everyone can appreciate. They are not just easy to make; they encapsulate the joy of sharing food with loved ones.
Whether you’re serving them at a holiday meal or enjoying them quietly at home, these rolls are sure to become a favorite. Their cheesy, garlicky goodness is universally loved, making them a beloved recipe for any household. So why wait? Gather your ingredients and treat yourself to the warmth and comfort of homemade Cheesy Garlic Pull-Apart Rolls!
FAQs about Cheesy Garlic Pull-Apart Rolls
Can I prepare it ahead of time?
Yes, you can prepare the dough in advance. Let it rise, then shape the rolls and refrigerate them before baking.
Can I freeze it?
Absolutely! Store baked rolls in the freezer for up to 3 months. Just thaw and reheat before serving.
How long do they last?
Properly stored in an airtight container, they can last up to 3 days in the fridge or 3 months in the freezer.
What are the best substitutions?
Use gluten-free flour for a gluten-free version, or switch to plant-based butter and cheese for dairy-free options.
Is this recipe family-friendly?
Certainly! Kids will love pulling apart the rolls, and they can help with mixing and shaping.
Can I make them in advance and bake later?
Yes, you can shape them, refrigerate until ready, and bake just before serving.
What other cheeses work well?
Feel free to experiment with gouda, cheddar, or even feta for a different flavor profile.
How do I achieve a golden crust?
Brush the tops with melted butter before baking for an extra golden sheen and added flavor.
Can I add herbs?
Definitely! Fresh or dried herbs enhance the flavor beautifully; consider mixing in some rosemary or oregano.
Can I use active dry yeast instead?
Yes, though you’ll need to activate it in warm water first before using it in the recipe.
With these FAQs and the entire article, you now have a delightful guide to making your own Cheesy Garlic Pull-Apart Rolls at home. Enjoy the process and the wonderful results!

Cheesy Garlic Pull-Apart Rolls
Ingredients
Dough Ingredients
- 3 cups all-purpose flour Acts as the base for the rolls.
- 1 packet instant yeast (2 1/4 teaspoons) Ensures the rolls rise properly.
- 1 teaspoon salt Enhances flavor.
- 2 tablespoons sugar Helps activate the yeast.
- 1 cup warm milk Provides moisture and richness.
- ¼ cup unsalted butter, melted Adds flavor and moisture.
Cheese and Flavoring
- 1 cup shredded mozzarella cheese Provides gooey texture.
- ½ cup grated Parmesan cheese Adds a rich flavor.
- 4 cloves garlic, minced Brings aromatic flavor.
- ¼ cup fresh parsley, chopped For garnish and flavor.


Instructions
Preparation
- Start by gathering all your ingredients.
- In a large bowl, mix together the flour, yeast, salt, and sugar.
- Pour in the warm milk and melted butter. Stir until a dough begins to form.
- Transfer the dough to a floured surface and knead for about 5 minutes until smooth and elastic.
- Place the kneaded dough in a greased bowl, cover it, and let it rise for about 1 hour or until doubled in size.
Cooking
- Preheat your oven to 375°F (190°C).
- Punch the risen dough down and divide it into small balls.
- Mix the shredded mozzarella and grated Parmesan cheese in a separate bowl.
- Roll each dough ball in the cheese mixture, coating them generously.
- Place the coated dough balls in a greased baking dish.
- Combine melted butter, minced garlic, and chopped parsley in a small bowl and brush the mixture over the dough balls.
- Bake for 25-30 minutes until golden brown and puffed up.
- Let cool slightly before serving.