
This post may contain affiliate links. As an Amazon Associate, I earn from qualifying purchases at no extra cost to you.
Table of Contents
🍴 Top Kitchen Essentials You'll Love


Introduction to Crispy Chicken Caesar Wrap
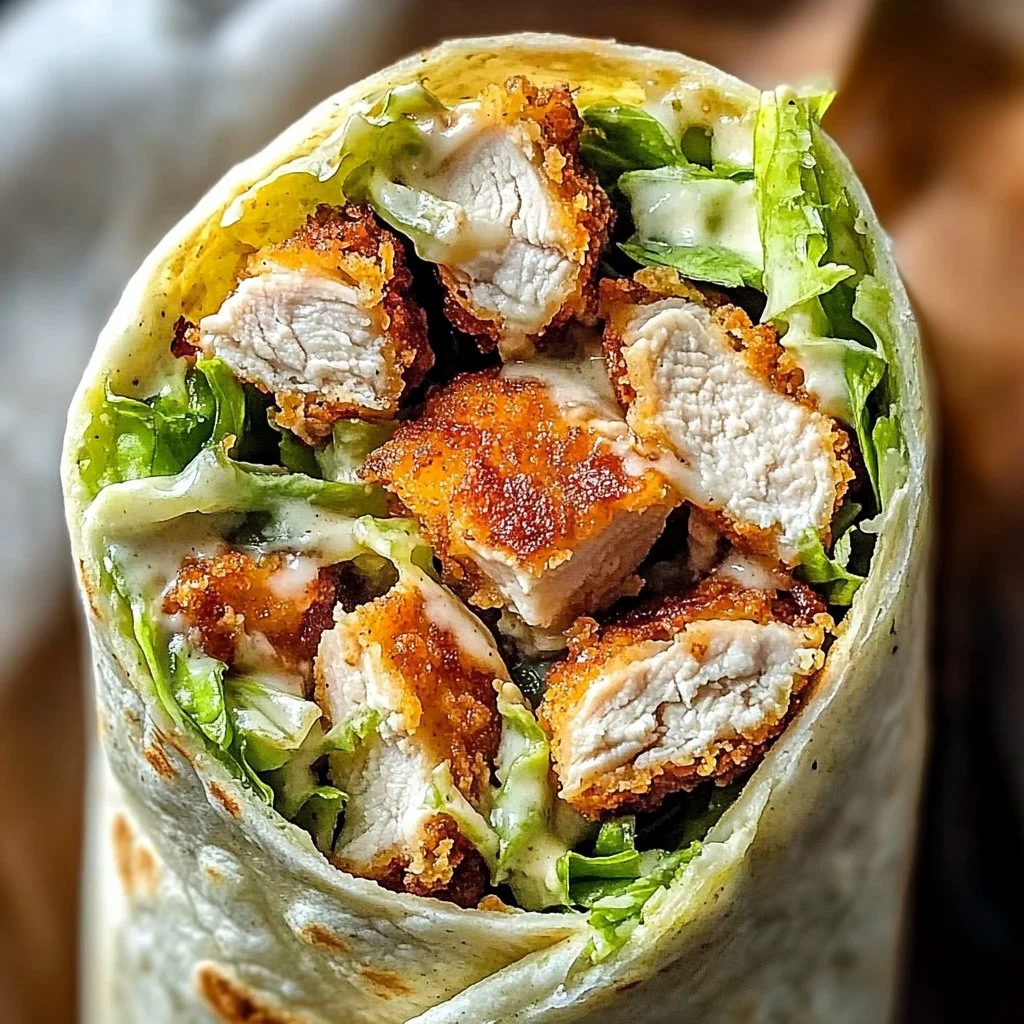
Have you ever craved a meal that’s both satisfying and quick to prepare? The Crispy Chicken Caesar Wrap is the answer to your culinary desires. This delightful recipe combines the classic flavors of Caesar salad with the convenience of a wrap, making it perfect for lunch, dinner, or even a snack. Imagine biting into a crispy tortilla filled with tender chicken, crunchy romaine lettuce, and creamy Caesar dressing. It’s a symphony of flavors and textures that you won’t be able to resist!
What makes this Crispy Chicken Caesar Wrap truly special is its versatility. Whether you’re packing lunch for work, looking for an easy meal to whip up on a busy day, or planning a casual get-together, this recipe fits the bill. It’s not just delicious; it’s also interactive! You can customize it with your favorite toppings, add more veggies, or even swap out the chicken for something else entirely. This adaptability sets it apart from other recipes, making it an essential addition to your culinary repertoire.
The beauty of a Crispy Chicken Caesar Wrap lies in its simplicity. With just a few key ingredients and minimal prep time, you can create a dish that feels gourmet without all the fuss. Let’s dive deeper into what makes this recipe so appealing, and soon you’ll be eager to wrap it up and dig in!
Key Benefits of Crispy Chicken Caesar Wrap
Why You’ll Love This Recipe
- Quick and easy to prepare, perfect for weeknight dinners.
- Packed with flavor from the creamy Caesar dressing and Parmesan cheese.
- Fully customizable, so you can alter ingredients to match your tastes.
- A great source of protein from the chicken, making it filling and satisfying.
- Can be enjoyed warm or cold, making it a versatile option for any meal.
- Perfect for meal prep; make several at once and store them for the week.
What Makes It Stand Out
The Crispy Chicken Caesar Wrap stands out due to its seamless blend of classic Caesar salad ingredients wrapped in a tortilla. This unique presentation elevates a simple meal into something visually appealing and fun to eat. Furthermore, its adaptability allows you to cater to various dietary preferences, making it a winner in any household.
Occasions for enjoying this wrap are endless. Whether it’s a family picnic, a casual dinner party, or even game day snacks, this dish is sure to impress. The ability to customize it—adding ingredients like croutons, bacon, or even additional vegetables—means that every person can have a wrap tailored to their tastes.
Ingredients for Crispy Chicken Caesar Wrap
Complete Ingredient List with Measurements
- 2 tortillas
- 1 cup cooked chicken, shredded
- 1/2 cup Caesar dressing
- 1 cup romaine lettuce, chopped
- 1/4 cup Parmesan cheese, grated
- Salt and pepper to taste
- Optional: croutons for added crunch
Substitutes and Alternatives
If you have dietary restrictions or specific preferences, you can easily modify the ingredients. For instance, if you’re gluten-free, choose gluten-free tortillas. If you prefer a different protein, consider using turkey, tofu, or even grilled shrimp as a base. Additionally, for a lighter version, you can substitute the Caesar dressing with Greek yogurt mixed with lemon juice and garlic.
For those avoiding dairy, simply skip the Parmesan cheese, or use a dairy-free cheese alternative instead. Customization not only expands the appeal but also ensures that everyone can enjoy a delicious Crispy Chicken Caesar Wrap!
How to Make Crispy Chicken Caesar Wrap — Step-by-Step Directions
Step 1 – Prepare Ingredients
Begin by gathering all your ingredients. Make sure the cooked chicken is neatly shredded and that your lettuce is thoroughly washed and chopped. Grating the Parmesan cheese ahead of time will also make the wrapping process smoother.
Step 2 – Cook the Base
In a bowl, combine the shredded chicken with the Caesar dressing. Mix thoroughly until the chicken is well-coated. This step ensures that every bite of your Crispy Chicken Caesar Wrap is flavorful.
Step 3 – Lay Out the Tortillas
Now, lay the tortillas flat on a clean, dry surface. This provides a solid base for assembling your wrap.
Step 4 – Spread the Chicken Mixture
On each tortilla, spread a generous layer of the chicken and Caesar dressing mixture. Make sure to cover the entire surface for maximum flavor in each bite.
Step 5 – Add Romaine Lettuce
Top the chicken mixture with chopped romaine lettuce. The crispness of the lettuce adds a refreshing crunch, balancing the creamy dressing.
Step 6 – Sprinkle on Parmesan Cheese
Next, generously sprinkle grated Parmesan cheese over the lettuce. This adds a salty, rich flavor that complements the wrap beautifully.
Step 7 – Season to Taste
Now, season your wrap with salt and pepper to taste. Remember, the Caesar dressing is already seasoned, so go light with the salt.
Step 8 – Optional Croutons
For an extra crunch, add some croutons on top of the cheese. This optional step elevates the texture and provides a delightful surprise as you bite into your wrap.
Step 9 – Roll the Tortillas
Carefully roll each tortilla tightly from one end to the other, enclosing all your delicious fillings. Make sure to wrap them snugly to prevent any filling from escaping.
Step 10 – Slice and Serve
Finally, slice the wraps in half diagonally for easy eating. Serve immediately for the freshest taste, or pack them in a lunch box for later. Enjoy your Crispy Chicken Caesar Wrap!
Serving Suggestions for Crispy Chicken Caesar Wrap
Best Occasions to Serve This Dish
The Crispy Chicken Caesar Wrap is perfect for casual gatherings like picnics or game day parties. It’s also a wonderful choice for busy weeknights or packed lunches. The easy preparation makes it an excellent option when entertaining guests or feeding a family. Its portable nature makes it ideal for on-the-go meals.
What to Serve With It
Pair your Crispy Chicken Caesar Wrap with a side of fresh fruit, sweet potato fries, or a small side salad for a complete meal. For drinks, refreshing lemonade or iced tea complements the flavors beautifully. Additionally, a light dessert like lemon sorbet could be the perfect sweet ending to the meal.
How to Store Crispy Chicken Caesar Wrap Properly
Best Storage Practices
If you have leftovers or prepare these wraps ahead of time, storing them correctly is essential. Wrap each Crispy Chicken Caesar Wrap in plastic wrap or place them in airtight containers to keep them fresh in the refrigerator. They can generally last for 2–3 days in the fridge.
Reheating and Freezing Tips
If you plan to freeze your wraps, make sure they are tightly wrapped to prevent freezer burn. They can last up to a month in the freezer. When ready to eat, thaw them in the fridge overnight, then reheat individually in the microwave for about 30 seconds or until warmed through.
Tips & Tricks for Crispy Chicken Caesar Wrap
Mistakes to Avoid
1 – Not letting the chicken cool: Always allow cooked chicken to cool before mixing it with the dressing to avoid wilting the lettuce.
2 – Overfilling wraps: Leaving too much filling can make rolling difficult and lead to spilling, so stick to recommended amounts.
3 – Using stale tortillas: Fresh tortillas enhance the wrap’s flavor and texture, so avoid using old or stale tortillas.
4 – Skipping seasoning: Don’t skip the salt and pepper; enhancing the flavors will elevate your wrap.
5 – Not measuring ingredients: Use the correct amounts to maintain the balance of flavors, especially with the dressing.
Extra Tips for Better Results
Experiment with different types of tortillas, such as spinach or whole grain, for added flavor. Consider adding sliced avocado or tomatoes for additional freshness. Present the wraps with a drizzle of extra Caesar dressing on the plate for an appealing touch.
Recipe Variations of Crispy Chicken Caesar Wrap
Creative Twists
1 – Spicy Chicken Caesar Wrap: Add sliced jalapeños to introduce some heat to your wrap or mix in spicy ranch dressing.
2 – Mediterranean Twist: Swap the Caesar dressing for tzatziki and add sliced cucumbers and olives for a Mediterranean flair.
3 – BBQ Chicken Caesar Wrap: Use BBQ sauce instead of Caesar dressing for a smoky and tangy version that is equally delicious.
4 – Vegan Version: Replace chicken with crispy chickpeas and use a vegan Caesar dressing for a plant-based alternative that’s just as satisfying.
Dietary Adjustments
For gluten-free diets, opt for gluten-free tortillas. If you’re looking for a low-carb version, use lettuce leaves instead of tortillas. For a dairy-free wrap, skip the Parmesan or use a nut-based cheese alternative.
Conclusion about Crispy Chicken Caesar Wrap
In conclusion, the Crispy Chicken Caesar Wrap is the ultimate combination of taste, convenience, and adaptability. Its blend of savory chicken, crunchy vegetables, and zesty Caesar dressing wrapped in a tortilla makes for an irresistible meal that anyone can enjoy. Whether you’re looking to impress guests or need a quick fix for yourself, this recipe fits the bill wonderfully.
Try it out today, and you’ll see why this dish is becoming a new favorite in so many households. Remember, with so many ways to customize it, the possibilities are endless. Enjoy every bite of your homemade Crispy Chicken Caesar Wrap!
FAQs about Crispy Chicken Caesar Wrap
Can I make the Crispy Chicken Caesar Wrap ahead of time?
Yes, you can prepare the wraps in advance. Just store them in the fridge wrapped tightly to keep them fresh for a couple of days.
What types of tortillas can I use?
You can use flour, corn, whole-wheat, or even gluten-free tortillas depending on your dietary needs.
Can I freeze the Crispy Chicken Caesar Wrap?
Absolutely! Wrap them tightly in plastic wrap and freeze for up to a month. Thaw in the fridge before reheating.
Is there a vegetarian version of this wrap?
Yes, you can substitute the chicken with chickpeas or tofu, and use a vegan Caesar dressing for a plant-based option.
How do I store leftover wraps?
Place leftover wraps in an airtight container in the refrigerator for 2–3 days for best results.
What dressing alternatives can be used?
You can substitute Caesar dressing with ranch, blue cheese, or even a homemade yogurt-based dressing for a different flavor.
Can I add other ingredients?
Certainly! You can experiment with ingredients like avocado, tomatoes, or different types of cheese for added flavor and texture.
How do I reheat the Crispy Chicken Caesar Wrap?
Reheat in the microwave for about 30 seconds or until warmed through. You can also warm them in a skillet over low heat.
What’s the best way to roll the wrap?
Start from one end and keep the filling tight as you roll, ensuring it’s snug without overstuffing to prevent spills.
How can I add crunch to my wrap?
Adding croutons is a great way to introduce crunch. You can also include sliced cucumbers or sliced bell peppers.

Crispy Chicken Caesar Wrap
Ingredients
Main Ingredients
- 2 pieces tortillas Use flour, corn, or gluten-free tortillas.
- 1 cup cooked chicken, shredded Make sure the chicken is cool before mixing.
- ½ cup Caesar dressing Store-bought or homemade.
- 1 cup romaine lettuce, chopped Wash and chop before use.
- ¼ cup Parmesan cheese, grated Can substitute with dairy-free cheese.
- to taste Salt and pepper Season according to preference.
- optional croutons For additional crunch.


Instructions
Preparation
- Gather all ingredients. Shred cooked chicken, wash and chop romaine lettuce, and grate Parmesan cheese.
Mixing
- In a bowl, combine shredded chicken with Caesar dressing and mix thoroughly.
Assembly
- Lay the tortillas flat on a clean surface.
- Spread a layer of the chicken and Caesar dressing mixture on each tortilla.
- Top with chopped romaine lettuce.
- Sprinkle grated Parmesan cheese over the lettuce.
- Season with salt and pepper to taste.
- Add croutons if desired.
- Roll each tortilla tightly from one end to the other.
- Slice the wraps in half diagonally and serve.