
This post may contain affiliate links. As an Amazon Associate, I earn from qualifying purchases at no extra cost to you.
Table of Contents
🍴 Top Kitchen Essentials You'll Love


Introduction to Fudge Christmas Trees
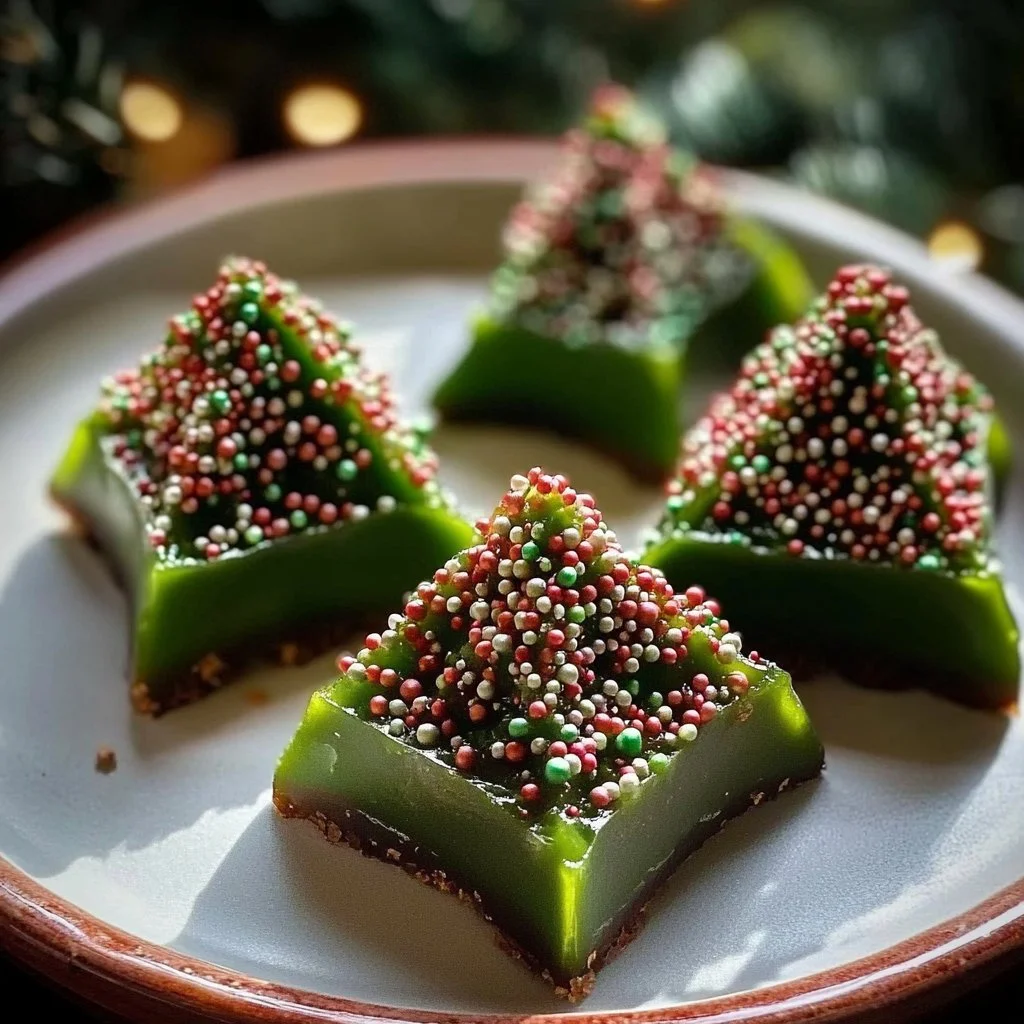
When the holiday season rolls around, the warm smell of baking fills the air, and festive treats beckon from every corner. One standout is undoubtedly the delightful Fudge Christmas Trees. Have you ever wished for a sweet that not only tastes divine but also brings a smile to your face just by looking at it? This recipe is all about that whimsical element that captures the festive spirit. The rich, creamy taste of chocolate combined with a fun tree shape makes these treats a holiday favorite.
The magic of Fudge Christmas Trees lies not only in their appearance but also in their simplicity. With just a handful of ingredients, you can create a crowd-pleaser that looks impressive without requiring advanced culinary skills. Who wouldn’t love a festive dessert that’s both easy and delightful? Whether you’re arranging an elaborate holiday feast or simply enjoying a cozy night in, these sweet treats can brighten up any occasion.
What makes Fudge Christmas Trees even more special is the opportunity for customization. Want a deeper green? A sprinkle of edible glitter? The possibilities are endless! You can make them as unique as your style or the vibe of your gathering. Indulging in Fudge Christmas Trees is not just about satisfying your sweet tooth; it’s about creating cherished moments with family and friends. So, grab your ingredients and let’s dive into this charming recipe that will surely become a staple in your holiday celebrations.
Key Benefits of Fudge Christmas Trees
Why You’ll Love This Recipe
- Irresistible chocolate flavor that appeals to all ages.
- Quick and simple to make—perfect for busy holiday schedules.
- A fun and festive way to decorate and celebrate.
- Customizable with various colors and decorations.
- Perfect for gifting, as they pack well and look beautiful.
- A delightful treat that pairs well with coffee or hot cocoa.
What Makes It Stand Out
Fudge Christmas Trees are not just another seasonal dessert; they are a fun twist on traditional fudge that captures the spirit of the holidays. The unique tree shape sets them apart from standard fudge, making them festive additions to any gathering. The joy of serving these treats comes as much from their delicious taste as from their visual appeal.
Moreover, Fudge Christmas Trees are incredibly versatile. You can easily modify the recipe to suit dietary needs or personal preferences. Want it healthier? Consider using sugar-free chocolate. Prefer white chocolate? Go for it! The creative potential of this recipe is endless, ensuring that it will remain a beloved classic in your holiday baking repertoire.
Ingredients for Fudge Christmas Trees
Complete Ingredient List with Measurements
- 2 cups chocolate chips
- 1 can sweetened condensed milk
- 1 teaspoon vanilla extract
- Green food coloring
- Edible decorations (such as sprinkles, candy stars)
Substitutes and Alternatives
If you’re looking to cater to various dietary needs, there are several substitutions you can consider. For a dairy-free option, opt for dairy-free chocolate chips and canned coconut milk as a sweetened substitute. If you’re aiming for a gluten-free dessert, ensure that your chocolate chips are certified gluten-free.
And for those looking to reduce sugar intake, you can find sugar-free or stevia-sweetened chocolate chips available in many stores, allowing you to enjoy tasty Fudge Christmas Trees without the guilt.
How to Make Fudge Christmas Trees – Step-by-Step Directions
Step 1 – Prepare Ingredients
Start by gathering all your ingredients. Ensure that your saucepan is clean and ready for use, and grease your tree-shaped mold or line your baking sheet with parchment paper.
Step 2 – Cook the Base
In a saucepan over low heat, combine the chocolate chips and sweetened condensed milk. Stir constantly until the mixture is fully melted and smooth, taking care not to burn the chocolate.
Step 3 – Add Flavor
Once the chocolate mixture is silky and smooth, remove it from the heat. Stir in the vanilla extract and add green food coloring until you achieve your desired shade of green.
Step 4 – Pour Into Mold
Pour the melted fudge mixture into your greased or lined mold, spreading it evenly. If you’re using a baking sheet, smooth it out to form a layer about one-inch thick.
Step 5 – Chill and Set
Place the mold or baking sheet in the refrigerator to cool and set completely. This may take about 1-2 hours, depending on the thickness of your fudge.
Step 6 – Shape the Trees
Once the fudge has set firmly, remove it from the mold or cut it into tree shapes using a cookie cutter if you used a baking sheet. Be gentle to maintain the shape.
Step 7 – Decorate
Now comes the fun part—decorating your Fudge Christmas Trees! Add edible decorations like colorful sprinkles or candy stars to give them a festive touch.
Step 8 – Serve or Gift
These treats are now ready to be served at your holiday gatherings or packaged as delightful gifts for friends and family.
Serving Suggestions for Fudge Christmas Trees
Best Occasions to Serve This Dish
Fudge Christmas Trees are perfect for a variety of holiday gatherings, from family Christmas parties to office celebrations and potlucks. Their festive appearance makes them an ideal centerpiece on dessert tables, drawing attention and delight from guests of all ages.
What to Serve With It
Pair these sweet treats with a warm cup of hot cocoa, coffee, or tea. They also go wonderfully with a holiday charcuterie board filled with fruits, cheeses, and nuts, enhancing the overall festive experience.
How to Store Fudge Christmas Trees Properly
Best Storage Practices
To keep your Fudge Christmas Trees fresh, store them in an airtight container placed in the refrigerator. They will typically last for about one week. If you need to store them longer, freezing them is an option.
Reheating and Freezing Tips
To freeze your Fudge Christmas Trees, place them in a single layer on a baking sheet until they’re solid, then transfer them to an airtight container or freezer bag. To enjoy them later, simply let them thaw in the refrigerator overnight before serving. Reheating isn’t necessary, but if you desire a warm treat, you can microwave them for a few seconds.
Tips & Tricks for Fudge Christmas Trees
Mistakes to Avoid
- Overheating the chocolate—Always work over low heat to prevent burning.
- Not greasing the mold—Ensure a non-stick surface to remove trees easily.
- Skipping cooling time—Patience is key for the fudge to set properly.
- Inconsistent stirring—Stir thoroughly to prevent uneven melting.
- Not measuring ingredients precisely can affect texture and flavor.
- Overloading on decorations can detract from the fudge itself.
Extra Tips for Better Results
For enhanced flavor, consider adding a pinch of sea salt or finely chopped nuts to the fudge mixture before pouring it into the mold. This will provide a wonderful contrast to the sweetness. You can also experiment with different colors of food dye and decorations to match specific party themes or personal preferences.
Recipe Variations of Fudge Christmas Trees
Creative Twists
- Chocolate Mint Christmas Trees: Add a drop of mint extract to the fudge mixture for a refreshing twist.
- Peanut Butter Fudge Trees: Mix in creamy peanut butter into the chocolate and milk for a decadent flavor combination.
- Nutty Delight: Incorporate crushed nuts or toffee bits for a delightful crunch.
- Marshmallow Surprise: Stir in mini marshmallows for added texture and sweetness.
Dietary Adjustments
If you want to make this recipe suitable for vegans, use dairy-free chocolate chips and coconut milk. For a gluten-free version, double-check that all ingredients, especially chocolate, are gluten-free. These adjustments will allow everyone to enjoy your festive creations without compromising on taste.
Conclusion about Fudge Christmas Trees
In conclusion, Fudge Christmas Trees are an exceptional addition to your holiday baking repertoire, combining flavor, fun, and versatility in one delightful treat. Whether you serve them at family get-togethers, gift them to loved ones, or enjoy them while watching holiday movies, they are sure to bring joy and sweetness into your celebrations. The best part? They’re incredibly easy to make. With just a few simple steps and ingredients, you can create these charming desserts that are not only visually appealing but also absolutely delicious. So why not gather the family and make some unforgettable memories while whipping up a batch of your own Fudge Christmas Trees this season?
FAQs about Fudge Christmas Trees
Can I make Fudge Christmas Trees ahead of time?
Yes, you can make these treats a few days in advance. Store them properly in an airtight container in the refrigerator.
How do I store leftovers?
Keep any leftover Fudge Christmas Trees in an airtight container in the fridge for up to a week.
Can I freeze Fudge Christmas Trees?
Absolutely! Freeze them in a single layer, then transfer to an airtight container.
What if I can’t find tree-shaped molds?
Use a cookie cutter for shapes or simply spread the mixture and cut out individual pieces once set.
Can I use white chocolate instead?
Yes, substituting white chocolate works well! Adjust the food coloring for a unique look.
Are there vegan options?
Yes! Substitute dairy-free chocolate and a non-dairy sweetened condensed milk alternative.
Can I add more flavors?
Definitely! Adding flavors like mint or almond extract can enhance the taste.
Do I need to use decorations?
No, the Fudge Christmas Trees are delicious even without decorations, though they definitely add a festive touch.
Fudge Christmas Trees
Ingredients
Main Ingredients
- 2 cups chocolate chips Use dairy-free chocolate chips for a dairy-free option.
- 1 can sweetened condensed milk Canned coconut milk can be used for a dairy-free version.
- 1 teaspoon vanilla extract
- green food coloring Add according to desired shade.
- edible decorations (such as sprinkles, candy stars) Customize the decorations for added festivity.


Instructions
Preparation
- Gather all your ingredients and ensure that your saucepan is clean and ready for use.
- Grease your tree-shaped mold or line your baking sheet with parchment paper.
Cooking
- In a saucepan over low heat, combine the chocolate chips and sweetened condensed milk. Stir constantly until fully melted and smooth.
- Remove from heat, stir in the vanilla extract, and add green food coloring until the desired shade is reached.
Molding
- Pour the melted fudge into the greased or lined mold, spreading it evenly. If using a baking sheet, smooth it out to form a layer about one-inch thick.
- Place in the refrigerator to cool and set completely, about 1-2 hours.
Shaping & Decorating
- Once set, remove from the mold or cut into tree shapes using a cookie cutter.
- Decorate with edible decorations such as sprinkles or candy stars.
Serving
- Serve at your holiday gatherings or package as gifts for friends and family.