
This post may contain affiliate links. As an Amazon Associate, I earn from qualifying purchases at no extra cost to you.
Table of Contents
🍴 Top Kitchen Essentials You'll Love


Introduction to Homemade Chocolate Syrup
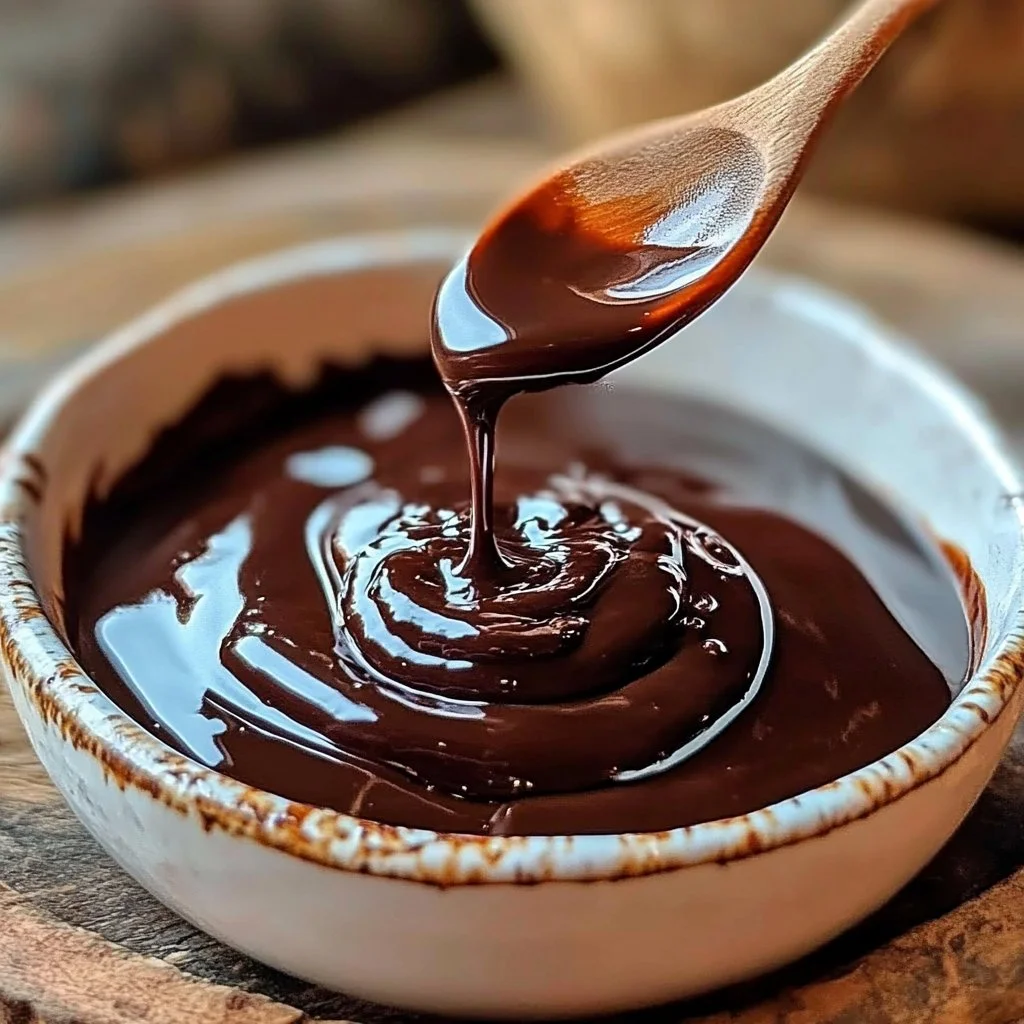
Who doesn’t love the rich and decadent flavor of chocolate? The mere thought of drizzling warm, gooey Homemade Chocolate Syrup over pancakes, ice cream, or even into your favorite milk shake warms the heart. It’s easy to see why chocolate syrup is a staple in many households, but have you ever thought about making it from scratch? This Homemade Chocolate Syrup recipe is not just simple but incredibly satisfying, allowing you to control the ingredients and customize the flavor to your liking.
Homemade Chocolate Syrup is special for a multitude of reasons. First and foremost, it’s incredibly easy to prepare, requiring only a few pantry staples that you likely have on hand. There’s something so rewarding and comforting about making your own syrup; it’s an experience that store-bought options can hardly compete with. Plus, you can infuse the syrup with additional flavors like spices or extracts to suit your personal preferences.
What makes this recipe truly unique is its versatility. You can use it in a wide range of recipes, whether it be drizzled over desserts, stirred into beverages, or even used as a topping for breakfast items. And let’s not forget about the health aspect! You can control the ingredients, ensuring that your Homemade Chocolate Syrup is free from preservatives or artificial flavors. With just a few ingredients, you’ll discover how easy it is to whip up something delicious and wholesome.
So, are you ready to elevate your dessert game? Let’s dive into the key benefits of making your very own Homemade Chocolate Syrup.
Key Benefits of Homemade Chocolate Syrup
Why You’ll Love This Recipe
- Flavorful: The taste is unmatched, as you can adjust sweetness and chocolate levels.
- Simplicity: Made in just a few steps with minimal ingredients.
- Versatile: Perfect as a topping, in drinks, or for baking.
- Customizable: Easily modify flavors or sweetness to fit your taste.
- Freshness: No preservatives means it’s fresh and organic every time.
What Makes It Stand Out
What sets Homemade Chocolate Syrup apart from store-bought varieties is the richness and depth of flavor that comes from using quality cocoa powder and pure vanilla extract. Furthermore, the syrup doesn’t contain unnecessary additives; it’s a pure creation that you can feel good about.
Another standout aspect is the ability to customize your Homemade Chocolate Syrup. Want a hint of spice? Toss in a pinch of cayenne pepper or a dash of cinnamon. Prefer a sweeter note? Use less cocoa powder and add a sprinkle of powdered sugar. The possibilities are endless, making this syrup not just a one-hit-wonder but a versatile treat that can morph into whatever your heart desires for different occasions.
Ingredients for Homemade Chocolate Syrup
Complete Ingredient List with Measurements
- 1 cup sugar
- 1 cup water
- 1 cup cocoa powder
- 1 teaspoon vanilla extract
Substitutes and Alternatives
If you have specific dietary requirements, it’s easy to swap out certain ingredients. For instance, if you’re looking to reduce sugar intake, you can substitute with an alternative sweetener like stevia or agave syrup. Cocoa powder can also be replaced with carob powder for those who may have a sensitivity to chocolate. The vanilla extract can be omitted if necessary, though it adds a lovely aroma and added flavor.
If you’re worried about gluten, rest assured that all the ingredients listed are typically gluten-free. However, always check the labels for certified gluten-free products to be safe.
How to Make Homemade Chocolate Syrup – Step-by-Step Directions
Step 1 – Prepare Ingredients
Start by gathering all your ingredients. Measure out 1 cup each of sugar, water, and cocoa powder, and have 1 teaspoon of vanilla extract ready. Having everything pre-measured will make the cooking process smoother.
Step 2 – Cook the Base
In a medium saucepan, combine the sugar and cocoa powder. Gradually add the water while stirring. Place the saucepan over medium heat and continue to stir until the mixture starts to boil. It should take about 3-4 minutes for this to happen.
Step 3 – Achieve the Right Consistency
Once it begins to boil, reduce the heat and let it simmer. This simmering process should take about 5 minutes, and you’ll want to stir occasionally. The syrup should begin to thicken slightly; it should be glossy and smooth.
Step 4 – Remove from Heat
After 5 minutes of simmering, carefully take the saucepan off the heat. The syrup will continue to thicken as it cools but should still be pourable.
Step 5 – Add Vanilla Extract
Stir in the vanilla extract immediately after removing the saucepan from the heat. This will add a delightful flavor to your Homemade Chocolate Syrup.
Step 6 – Cool the Syrup
Allow the Chocolate Syrup to cool at room temperature for about 10-15 minutes. During this time, it will thicken even more.
Step 7 – Transfer to Bottle
Once cooled, pour your Homemade Chocolate Syrup into a clean glass bottle or jar. Make sure to use a funnel to avoid spills.
Step 8 – Refrigerate
Store your Homemade Chocolate Syrup in the refrigerator. It can be kept for up to a month, but I doubt it will last that long!
Serving Suggestions for Homemade Chocolate Syrup
Best Occasions to Serve This Dish
Homemade Chocolate Syrup is perfect for breakfast, injecting a little excitement into your regular stack of pancakes or waffles. It’s also a fantastic addition to desserts like ice cream sundaes or brownies, turning ordinary treats into something gourmet.
Holidays are great occasions to whip up a batch, as everyone loves the joy that chocolate brings. Whether it’s a kids’ birthday party or a cozy winter gathering, this syrup is sure to delight.
What to Serve With It
Some popular pairings include pancakes, waffles, vanilla ice cream, milkshakes, brownies, or even stirred into a cup of coffee for an added chocolatey richness. You can even use it as an ingredient in various baking recipes, enhancing cakes and cookies.
How to Store Homemade Chocolate Syrup Properly
Best Storage Practices
For optimal freshness, store your Homemade Chocolate Syrup in a glass container with a tight-fitting lid in the refrigerator. Always ensure it is completely cool before sealing to avoid condensation and spoilage. It can typically last for up to one month when stored properly.
Reheating and Freezing Tips
If you’d like to use the syrup while it’s still chilled, give it a nice stir before serving as it may thicken in the fridge. For a warm drizzle, microwave it for a few seconds until it reaches your desired temperature.
While I recommend consuming the syrup fresh, you can freeze it if needed. Pour the syrup into ice cube trays and freeze, then transfer to an airtight container. Thaw in the fridge overnight when you’re ready to use it again.
Tips & Tricks for Homemade Chocolate Syrup
Mistakes to Avoid
- Not stirring well: Ensure you stir constantly while heating to prevent the mixture from burning or sticking.
- Using low-quality cocoa: Higher-quality cocoa powder results in a richer flavor.
- Skipping vanilla: Vanilla adds depth to your syrup; don’t skip it!
- Overcooking: Cooking too long can make it too thick, leading to a hard syrup upon cooling.
- Not letting it cool: Allowing the syrup to cool naturally helps it thicken properly.
Extra Tips for Better Results
- Add spices: Experiment with added flavors—cinnamon or cayenne can elevate your syrup.
- Choose sugar wisely: Try using brown sugar instead of white to give a subtle caramel note.
- Use fresh ingredients: Avoid older ingredients for the best flavor and texture results.
- Experiment with cooking times: You can slightly adjust simmering time based on how thick you like your syrup.
Recipe Variations of Homemade Chocolate Syrup
Creative Twists
- Mint Chocolate Syrup: Add a few drops of peppermint extract during the cooling stage for a fresh twist, perfect for holiday desserts.
- Caramel Chocolate Syrup: Incorporate a tablespoon of caramel sauce for a decadent dual-flavor syrup that works wonderfully over ice cream.
- Espresso Chocolate Syrup: Boost the flavor by adding a teaspoon of instant espresso powder before cooking; it gives a sophisticated adult touch.
Dietary Adjustments
- Vegan Option: Ensure you’re using plant-based sugar and cocoa that don’t contain dairy.
- Gluten-Free Version: All ingredients are naturally gluten-free, so you can rest assured while enjoying this treat.
- Sugar-Free Adaptation: Consider using erythritol or monk fruit sweetener for a sugar-free and low-calorie version.
Conclusion about Homemade Chocolate Syrup
There you have it—your guide to making irresistible Homemade Chocolate Syrup! This simple and delightful recipe not only satiates your chocolate cravings but also offers the satisfaction of creating something uniquely yours. With just a handful of ingredients, you can achieve a store-bought taste with the added comfort of knowing exactly what’s in your syrup. The versatility and customization options make this chocolate sauce worthy of your pantry staple list.
So go ahead, whip up a batch of Homemade Chocolate Syrup and spread the joy of chocolate in your kitchen. Whether it’s drizzled over desserts or mixed into beverages, the companions of this syrup are endless. Treat yourself and your loved ones to something delicious, and watch how it can transform any dish into a chocolatey masterpiece.
FAQs about Homemade Chocolate Syrup
How long can I store Homemade Chocolate Syrup?
You can store Homemade Chocolate Syrup in the refrigerator for up to a month in a tightly sealed container.
Can I freeze Homemade Chocolate Syrup?
Yes, you can freeze it by pouring it into ice cube trays. Once frozen, transfer the cubes to an airtight container for later use.
What can I do if my syrup is too thick?
If your syrup is too thick, you can thin it out by stirring in a little hot water until you achieve the desired consistency.
Is this recipe suitable for vegans?
Yes, the ingredients used in Homemade Chocolate Syrup are vegan-friendly, as long as you ensure the cocoa powder and sugar are plant-based.
Can I use dark cocoa instead of regular cocoa?
Absolutely! Dark cocoa powder will provide a richer and deeper chocolate flavor, which might be even more delightful.
How do I know when my syrup is done cooking?
The syrup is ready when it thickens slightly and has a glossy finish after simmering for about 5 minutes.
Can I add flavors to this syrup?
Yes! You can add flavors such as peppermint, cinnamon, or even espresso to customize your Homemade Chocolate Syrup.
What is the best way to use Homemade Chocolate Syrup?
You can drizzle it over pancakes, mix it into milkshakes, pour it over ice cream, or use it as a baking ingredient in desserts.
Do I need to use a whisk or a spoon?
A spoon is usually sufficient for stirring, but a whisk can help to fully integrate the ingredients if you find any clumps of cocoa or sugar.
How can I sweeten this syrup further if needed?
You can add additional sugar or a sweetener of your choice after the mixture has simmered for about 2 minutes. Stir well to combine.

Homemade Chocolate Syrup
Ingredients
Main Ingredients
- 1 cup sugar
- 1 cup water
- 1 cup cocoa powder
- 1 teaspoon vanilla extract


Instructions
Preparation
- Gather all your ingredients: measure out 1 cup each of sugar, water, and cocoa powder, and have 1 teaspoon of vanilla extract ready.
Cooking
- In a medium saucepan, combine the sugar and cocoa powder. Gradually add the water while stirring.
- Place the saucepan over medium heat and stir until the mixture starts to boil, which should take about 3-4 minutes.
- Once it begins to boil, reduce the heat and let it simmer for about 5 minutes, stirring occasionally until the syrup thickens slightly.
- Remove the saucepan from heat and stir in the vanilla extract.
Cooling and Storing
- Allow the Chocolate Syrup to cool at room temperature for about 10-15 minutes.
- Pour your Homemade Chocolate Syrup into a clean glass bottle or jar using a funnel.
- Store in the refrigerator for up to a month.