
This post may contain affiliate links. As an Amazon Associate, I earn from qualifying purchases at no extra cost to you.
Table of Contents
🍴 Top Kitchen Essentials You'll Love


Introduction to Mini Blooming Onions: 7 Tips for Perfectly Crispy Bites
Are you craving a crunchy, flavorful appetizer that’s sure to impress? Look no further than Mini Blooming Onions: 7 Tips for Perfectly Crispy Bites! This recipe transforms humble onions into a gourmet delight, making them a fabulous option for gatherings, game nights, or even a satisfying snack.
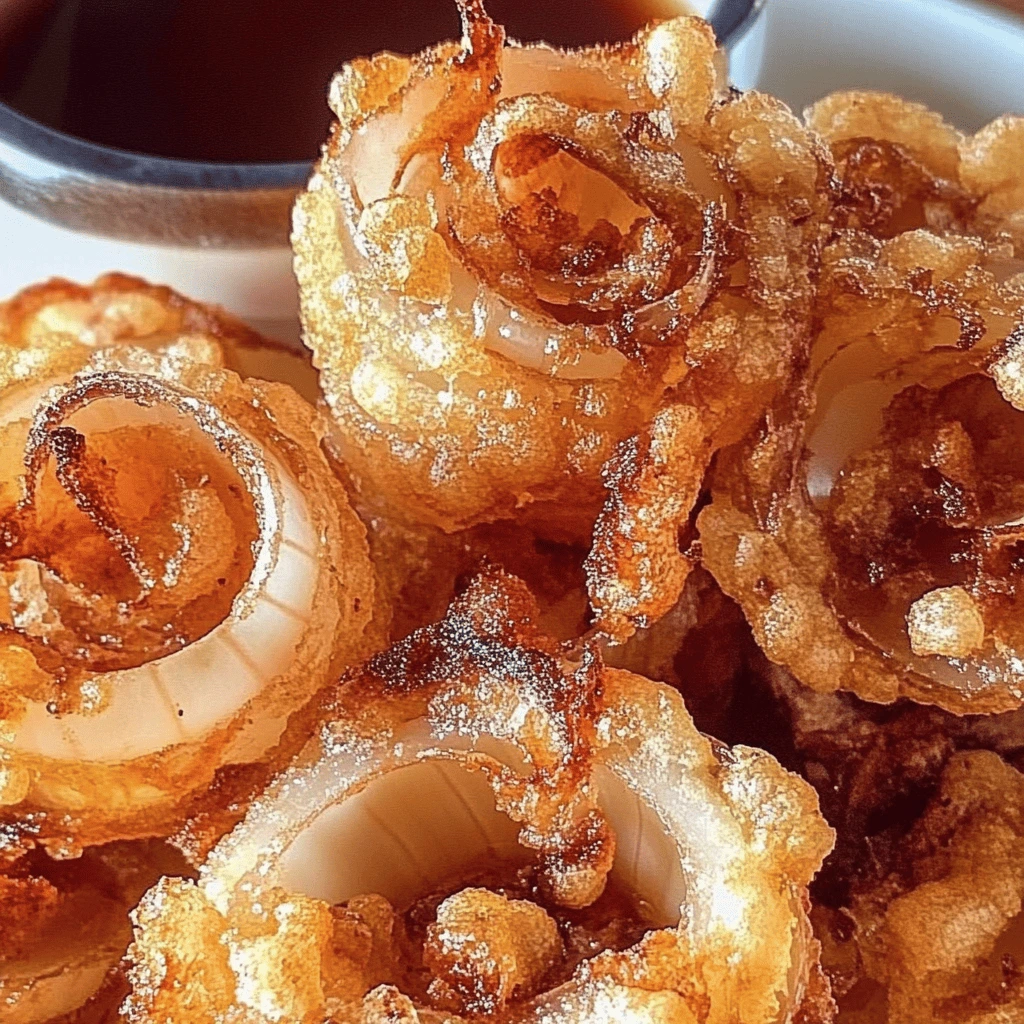
Picture this: beautifully crispy, golden-brown onions that bloom with flavor and crunch. These little bites are not only delicious but also incredibly easy to prepare. Have you ever wondered why some fried foods taste better than others? The secret often lies in the technique and ingredients, which is exactly what you’ll learn with Mini Blooming Onions: 7 Tips for Perfectly Crispy Bites.
In this article, we’ll delve into the magic of blooming onions, exploring their history and why they’ve become a beloved dish for many. Each step is meticulously crafted to help you achieve the perfect crispy texture, so don’t worry if you’re a novice in the kitchen. You may even find that this becomes your go-to recipe when you want to impress family and friends.
So, why wait? Let’s dive into the world of crispy treats with Mini Blooming Onions: 7 Tips for Perfectly Crispy Bites and discover how you can create an unforgettable dish right in your own kitchen!
Key Benefits of Mini Blooming Onions: 7 Tips for Perfectly Crispy Bites
Why You’ll Love This Recipe
- Flavor Explosion: Each bite offers a delightful crunch followed by the savory flavor of seasoned batter.
- Simplicity: With straightforward steps, even beginners can create this delicious appetizer.
- Versatile Dish: Serve them as an appetizer, snack, or side dish – the possibilities are endless.
- Customizable: Adjust the seasoning to suit your taste, whether you like it spicy, cheesy, or herb-infused.
- Crowd-Pleaser: Great for parties, they’re guaranteed to impress your guests and become a favorite.
- Fun to Make: The process of blooming onions is as exciting as eating them, making it a fun project for families.
What Makes It Stand Out
Mini Blooming Onions are not just another fried food. The way they bloom, creating a beautiful presentation, elevates them from ordinary to spectacular. This recipe allows customization; you can switch up the seasoning or even add a dipping sauce. They’re perfect for all occasions — whether it’s a family gathering, a football game, or a simple movie night.
What truly sets Mini Blooming Onions apart is the experience. It’s not just about satisfying your hunger; it’s about indulging in a dish that’s both a visual and culinary delight. People will marvel at how a simple onion can transform into such an inviting and delicious treat.
Ingredients for Mini Blooming Onions: 7 Tips for Perfectly Crispy Bites
Complete Ingredient List with Measurements
- 4 large onions
- 1 cup buttermilk
- 1 cup all-purpose flour
- 1 teaspoon garlic powder
- 1 teaspoon paprika
- 1 teaspoon salt
- 1/2 teaspoon black pepper
- Oil for frying
Substitutes and Alternatives
If you’re looking to make adaptations for dietary needs or allergies, there are plenty of substitutes available. For those avoiding dairy, you can swap buttermilk for a non-dairy alternative like almond or soy milk. Just add a tablespoon of vinegar to create a similar acidity.
For gluten-free options, you can use gluten-free flour blends which work well for frying. Additionally, if you appreciate a spicier kick, consider adding cayenne pepper to the flour mixture. Cooking can be as flexible as you want, which is part of the fun with Mini Blooming Onions: 7 Tips for Perfectly Crispy Bites.
How to Make Mini Blooming Onions: 7 Tips for Perfectly Crispy Bites – Step-by-Step Directions
Step 1 – Prepare Ingredients
Begin by gathering all your ingredients to ensure a smooth cooking process. Slice the tops off the onions and peel them carefully, making sure to leave the root intact. This will help the onions hold their shape as they bloom.
Step 2 – Soak the Onions in Buttermilk
Soaking the onions in buttermilk for about 2 hours is a crucial step in making Mini Blooming Onions: 7 Tips for Perfectly Crispy Bites. This process not only infuses flavor but also helps soften the onions, allowing them to open up beautifully during frying.
Step 3 – Mix the Flour Mixture
While the onions soak, prepare your batter. In a mixing bowl, combine the all-purpose flour, garlic powder, paprika, salt, and black pepper. Whisk together until everything is evenly distributed. This spice mixture will give your blooming onions their delicious flavor.
Step 4 – Heat the Oil
In a deep pan, heat oil to 350°F (175°C). It’s important to use enough oil to fully cover the onions while frying, ensuring even cooking and a crispy finish.
Step 5 – Dredge the Onions
Once the onions have soaked, remove them from the buttermilk. Gently dredge the onions in the flour mixture, making sure every crevice is coated. This ensures a crispy exterior that will elevate the final dish.
Step 6 – Fry the Onions
Carefully place the coated onions into the hot oil. Fry them for about 3-4 minutes, or until golden brown. Watch them closely; you want that perfect crispy texture without overcooking.
Step 7 – Drain the Onions
Once golden, use a slotted spoon to remove the onions from the oil. Place them on paper towels to drain excess oil. This step is crucial for achieving that ultimate crunchiness we all love.
Step 8 – Serve Hot
Serve your Mini Blooming Onions warm. They’re best enjoyed fresh out of the fryer, ideally with a tasty dipping sauce on the side for an extra kick of flavor.
Serving Suggestions for Mini Blooming Onions: 7 Tips for Perfectly Crispy Bites
Best Occasions to Serve This Dish
These Mini Blooming Onions shine at parties and gatherings. They’re a fabulous finger food for game day, bringing friends together over shared flavors and laughter. They also make a fun addition to family dinners or casual gatherings, where everyone can snack freely.
What to Serve With It
Pair your blooming onions with a range of dipping sauces like spicy ranch, garlic aioli, or a zesty marinara. Enjoy them alongside other finger foods, such as sliders, chicken wings, or vegetable platters, to create a diverse snack spread that caters to all tastes.
How to Store Mini Blooming Onions: 7 Tips for Perfectly Crispy Bites Properly
Best Storage Practices
To keep your Mini Blooming Onions fresh, store them in an airtight container. If you have leftovers, allow them to cool completely before placing them in the container. If stored properly, they can last in the fridge for up to 2 days.
Reheating and Freezing Tips
For reheating, place the onions back in the oven at 350°F (175°C) for about 10 minutes to restore that crispy texture. If you wish to freeze them, it’s best to freeze them raw after coating in flour. They can be fried directly from frozen when needed, allowing you to enjoy them fresh without any loss of quality.
Tips & Tricks for Mini Blooming Onions: 7 Tips for Perfectly Crispy Bites
Mistakes to Avoid
- Skipping Soaking: Not soaking the onions can result in a lack of flavor and tenderness.
- Incorrect Oil Temperature: Frying at too low a temperature can lead to soggy onions; too high can burn them.
- Overcrowding: Frying too many onions at once can lower the oil temperature, resulting in uneven cooking.
- Inadequate Coating: Failing to coat fully can affect the crispiness.
- Not Draining Properly: Skipping this step can leave them greasy.
- Serving Too Cold: Blooming onions taste best served fresh and hot from the fryer.
Extra Tips for Better Results
For added flavor, try mixing different spices into the flour mixture, like chili powder or Italian herbs. Consider garnishing with fresh herbs or chives for a beautiful presentation. Experimenting with dips can also enhance the eating experience, so don’t hesitate to get creative.
Recipe Variations of Mini Blooming Onions: 7 Tips for Perfectly Crispy Bites
Creative Twists
Instead of traditional onions, try using shallots or even garlic bulbs for a unique twist. Adding cheese to the batter can also give a delightful twist to your dish, enhancing flavor and richness. You could also experiment with creating mini versions of blooming zucchini for a seasonal touch.
Dietary Adjustments
For those needing vegan or gluten-free options, modifying the batter as previously mentioned allows everyone to enjoy this delicious dish. Using gluten-free flour and a plant-based milk alternative ensures that Mini Blooming Onions: 7 Tips for Perfectly Crispy Bites can be made to fit various diets.
Conclusion about Mini Blooming Onions: 7 Tips for Perfectly Crispy Bites
Mini Blooming Onions are not just an appetizer; they are a celebration of flavor and creativity. With the right tips and techniques, turning simple onions into a delightful treat becomes an invigorating culinary adventure. Whether for special occasions or that craving for something crispy and tasty, this recipe will surely become a staple in your kitchen. Don’t miss out on exploring the delightful world of Mini Blooming Onions: 7 Tips for Perfectly Crispy Bites and impress your friends and family with your newfound frying prowess!
FAQs about Mini Blooming Onions: 7 Tips for Perfectly Crispy Bites
1 – Can I make Mini Blooming Onions in advance?
Yes, you can prepare the onions ahead of time and store them in the fridge until you’re ready to fry.
2 – How do I reheat leftover Mini Blooming Onions?
Reheat them in a preheated oven at 350°F (175°C) for about 10 minutes to retain their crispiness.
3 – Can I freeze Mini Blooming Onions before frying?
Absolutely! Prepare and coat them, then freeze. They can be fried directly from frozen when you’re ready to enjoy.
4 – What are some good dipping sauces for Mini Blooming Onions?
Dipping sauces like ranch, garlic aioli, or spicy ketchup pair wonderfully with the onions.
5 – What type of onions works best for this recipe?
Large sweet onions like Vidalia or Walla Walla are ideal for their flavor and ease of blooming.
6 – How do I ensure my onions bloom properly?
Make sure to leave the root intact while slicing the onions, allowing them to bloom beautifully during frying.
7 – Are there any gluten-free options for this recipe?
Yes, you can substitute regular flour with a gluten-free flour blend to make this recipe gluten-free.
8 – Can I add spices to the batter?
Certainly! Feel free to experiment with different spices to customize the flavor to your liking.
9 – How do I store leftover Mini Blooming Onions?
Store them in an airtight container in the refrigerator for up to 2 days for optimal freshness.
10 – How long do Mini Blooming Onions take to fry?
They usually take about 3-4 minutes in hot oil until they reach a golden-brown color.

Mini Blooming Onions
Equipment
- Mixing Bowls
- Deep Fryer or Large Pot
- Slotted spoon
- Paper Towels
Ingredients
Main Ingredients
- 4 large onions peeled and trimmed, root left intact
- 1 cup buttermilk for soaking
- 1 cup all-purpose flour
- 1 tsp garlic powder
- 1 tsp paprika
- 1 tsp salt
- ½ tsp black pepper
- oil for frying


Instructions
- Slice off the tops of the onions and peel them, leaving the root intact so they hold their shape.
- Soak onions in buttermilk for about 2 hours to tenderize and add flavor.
- In a mixing bowl, combine flour, garlic powder, paprika, salt, and black pepper to create the batter mix.
- Heat oil in a deep fryer or pan to 350°F (175°C).
- Remove onions from the buttermilk and dredge them in the seasoned flour until fully coated.
- Fry the onions for 3–4 minutes, or until golden and crispy. Avoid overcrowding to maintain temperature.
- Remove onions with a slotted spoon and place on paper towels to drain excess oil.
- Serve hot with dipping sauces such as ranch, garlic aioli, or spicy ketchup.