
This post may contain affiliate links. As an Amazon Associate, I earn from qualifying purchases at no extra cost to you.
Table of Contents
🍴 Top Kitchen Essentials You'll Love


Introduction to Mini Pavlovas
Have you ever dreamed of a dessert that feels light, airy, and utterly delightful? Mini Pavlovas are exactly that! These charming meringue nests, crispy on the outside and soft on the inside, are simply one of the most enchanting treats you can serve. Whether it’s a special occasion or a casual gathering, Mini Pavlovas effortlessly steal the spotlight on any dessert table.
What makes this recipe even more appealing is its simplicity. With just a few ingredients, you can whip up these magical treats that everyone will love. Imagine the satisfaction of impressing your family and friends with something that looks intricate yet is easy to make! Mini Pavlovas are perfect for anyone who wants to make a stunning dessert without spending hours in the kitchen.
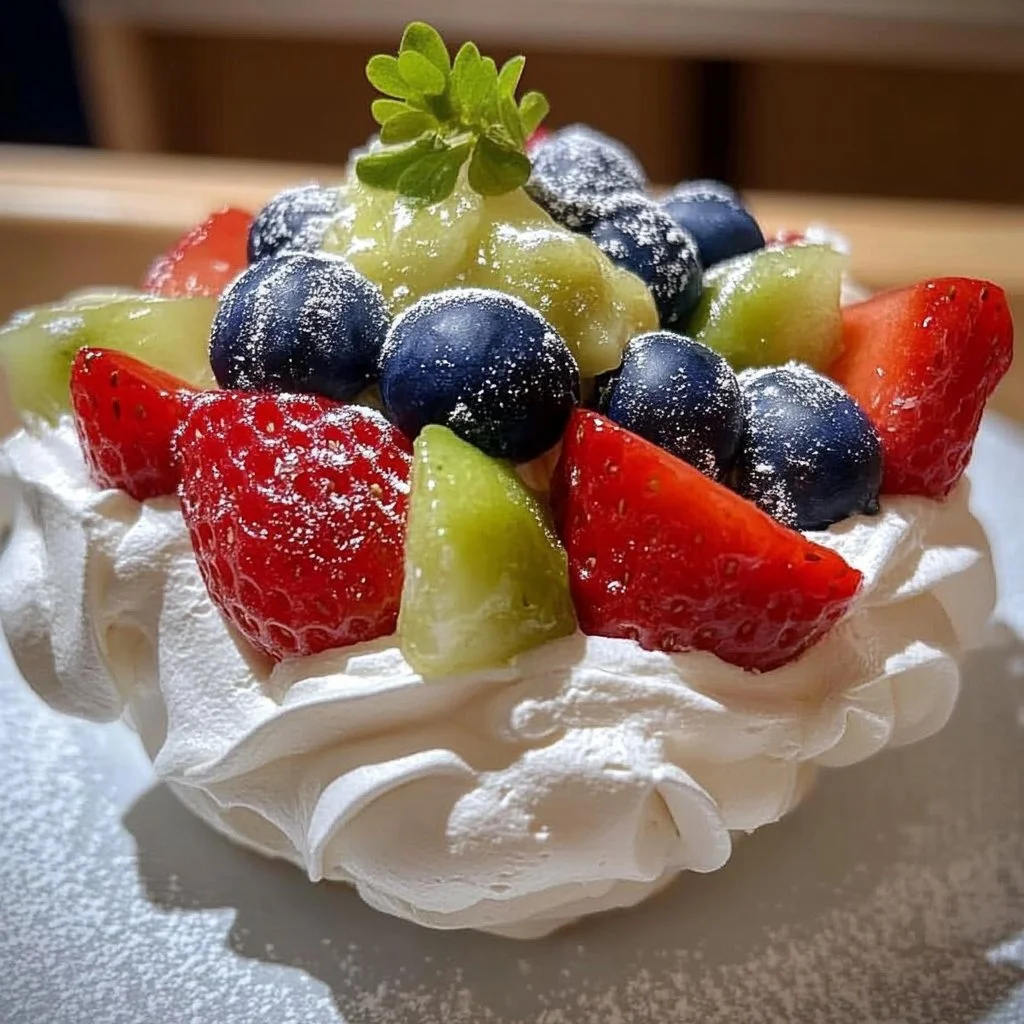
Each bite of Mini Pavlovas is a celebration of flavor—lightly sweet meringue paired with fluffy whipped cream and an array of fresh fruits brings together texture and taste in a delightful harmony. This dessert not only satisfies your sweet tooth but also adds a touch of elegance to your table. From birthdays to holidays, these bite-sized wonders are always a hit!
Key Benefits of Mini Pavlovas
- Delicious Flavor: The combination of sweet meringue, creamy filling, and fresh fruit makes for an irresistible flavor profile.
- Easy Preparation: With just a handful of ingredients and straightforward steps, these are beginner-friendly.
- Versatile Toppings: Customize each Mini Pavlova with seasonal fruits, chocolate drizzles, or flavored creams.
- Beautiful Presentation: Their delicate appearance makes them perfect for entertaining or special occasions.
- Gluten-Free Option: Made from egg whites and sugar, they naturally fit into gluten-free diets.
- Make-Ahead Friendly: Prepare the meringue in advance, and assemble just before serving for added convenience.
What Makes It Stand Out
Mini Pavlovas stand out due to their incredible versatility. You can swap out toppings based on the season or your mood, transforming the dessert with ease. Think of tropical fruits in summer or warm spiced fruits in fall—the possibilities are endless!
Additionally, these treats are not just for large gatherings. They can be scaled down for an intimate dinner or family movie night, fitting into any occasion where dessert is a must. Their stunning appearance also adds an upscale touch, making them a great choice for weddings or celebrations.
Ingredients for Mini Pavlovas
- 4 large egg whites
- 1 cup granulated sugar
- 1 teaspoon white vinegar
- 1 teaspoon cornstarch
- 1 cup heavy whipping cream
- Fresh fruits (e.g., berries, kiwi, passion fruit) for topping
Substitutes and Alternatives
If you’re allergic to eggs, consider using aquafaba (the liquid from canned chickpeas) as a substitute for the egg whites, with a similar taste and texture. For a dairy-free variation, coconut cream can replace heavy whipping cream.
For those with sugar concerns, a sugar substitute that measures 1:1 with granulated sugar can help keep the sweetness without the calories.
How to Make Mini Pavlovas – Step-by-Step Directions
Step 1 – Prepare Ingredients
Begin by gathering all your ingredients and ensuring they are at room temperature. This will help the egg whites whip up more easily. Preheat your oven to 225°F (110°C) and line a baking sheet with parchment paper.
Step 2 – Cook the Base
In a clean mixing bowl, start beating the egg whites on medium speed until soft peaks form. Be attentive; over-beating can lead to dry meringue.
Step 3 – Add Sugar Gradually
Once soft peaks are visible, gradually add the granulated sugar, one tablespoon at a time. This process helps create a glossy, stable meringue. Continue beating until stiff peaks form and the mixture appears shiny.
Step 4 – Incorporate Vinegar and Cornstarch
Gently fold in the white vinegar and cornstarch using a spatula, ensuring not to deflate the meringue. This step adds stability and a light texture to your Mini Pavlovas.
Step 5 – Spoon or Pipe Meringue
Using a spatula or piping bag, create small rounds of meringue on your prepared baking sheet. Aim for nests with edges so you can easily hold the whipped cream and fruit later.
Step 6 – Bake the Meringues
Place the baking sheet in your preheated oven and bake for about 1 to 1.5 hours. You want the meringues to become firm and dry to the touch.
Step 7 – Cool in Oven
Once baked, turn off the oven and let the Mini Pavlova cool inside. This gradual cooling helps them maintain their shape and prevents cracking.
Step 8 – Whip the Cream
While the meringues cool, whip the heavy cream in a separate bowl until soft peaks form. For added flavor, consider adding a hint of vanilla extract.
Step 9 – Assemble the Mini Pavlova
Once the meringues are completely cool, carefully remove them from the parchment paper. Top each one with a generous dollop of whipped cream and arrange your chosen fruits beautifully on top.
Serving Suggestions for Mini Pavlovas
Best Occasions to Serve This Dish
Mini Pavlova are incredibly versatile when it comes to occasions. They are perfect for spring and summer gatherings, complementing barbecues and picnics as a delightful treat. They also shine during holiday celebrations, such as Christmas or New Year’s Eve, where their festive look adds to the merriment.
What to Serve With It
Complement Mini Pavlova with a light dessert wine or sparkling water infused with lemon. Serving them alongside a fresh fruit salad or a light cheese platter can also elevate the dining experience.
How to Store Mini Pavlovas Properly
Best Storage Practices
To keep your Mini Pavlovas fresh, store the meringues in an airtight container at room temperature. Avoid refrigeration, as humidity can soften them.
Reheating and Freezing Tips
If you need to freeze your Mini Pavlova, do so before topping them. Double wrap in plastic wrap and place them in a freezer-safe container. When ready to serve, allow them to thaw in the fridge, then assemble with fresh cream and fruits.
Tips & Tricks for Mini Pavlovas
Mistakes to Avoid
1 – Underwhipping Egg Whites: Ensure you achieve stiff peaks for the best structure. Soft peaks won’t hold their shape.
2 – Humidity: Avoid making meringue on humid days as it can affect texture.
3 – Overbaking: Keep an eye on the color; they should remain white, not brown.
4 – Skipping Cooling: Let the meringues cool in the oven to achieve the perfect texture.
5 – Filling Too Early: Assemble Mini Pavlovas only right before serving to prevent sogginess.
Extra Tips for Better Results
For enhanced flavor, consider adding a splash of vanilla extract or citrus zest to the whipped cream. Experiment with your favorite fruits or even a drizzle of chocolate to create a unique twist.
Recipe Variations of Mini Pavlovas
Creative Twists
1 – Chocolate Chip Pavlovas: Fold mini chocolate chips into the whipped cream before topping.
2 – Tropical Delight: Use mango, pineapple, and coconut cream for a tropical spin.
3 – Nutty Addition: Sprinkle crushed nuts or toffee bits on top of the fruits for added crunch.
4 – Spiced Fruit Topping: Cook fruits in cinnamon and nutmeg for a warm, cozy flavor.
Dietary Adjustments
For a vegan alternative, substitute egg whites with aquafaba and use a dairy-free whip cream. For gluten-free, this recipe is naturally free from gluten ingredients, making it safe for those with gluten sensitivities.
Conclusion about Mini Pavlovas
Mini Pavlovas are not just a dessert; they are a celebration of flavors, textures, and creativity. These light-as-air treats are perfect for every season and occasion, allowing you to express yourself through an array of beautiful toppings. The combination of easy preparation and stunning presentation makes them a favorite for any home baker. If you’re looking to impress your guests or just treat yourself, trying out Mini Pavlovas is a must. They will surely win hearts and satisfy sweet cravings!
FAQs about Mini Pavlovas
How long can I store Mini Pavlovas?
Mini Pavlova can be stored in an airtight container at room temperature for up to 2 days.
Can I make Mini Pavlovas in advance?
Yes, you can prepare the meringues ahead of time and store them without the toppings. Assemble them just before serving.
What different toppings can I use?
You can use various toppings like whipped cream, yogurt, and a range of fruits, chocolates, or even flavored syrups.
What if my meringues crack?
If your meringues crack during baking, it may be due to rapid temperature changes. Cooling in the oven helps prevent this.
Are Mini Pavlovas gluten-free?
Yes, Mini Pavlovas are naturally gluten-free as they are made primarily of egg whites and sugar.
Can I freeze Mini Pavlovas?
You can freeze the meringues by storing them in an airtight container. Fill them fresh after thawing.
How do I fix too sweet meringue?
If your meringue is too sweet, you can balance it out with tart toppings such as lemon curd or yogurt.
How do I prevent Mini Pavlovas from getting soggy?
Assemble your pavlovas just before serving to keep the meringue crisp. Store meringues and toppings separately until ready to serve.
What is the best way to whip cream?
Use cold cream and a chilled bowl, whipping until soft peaks form to achieve the best texture.
Can I use flavored creams?
Absolutely! Infusing whipped cream with vanilla, chocolate, or almond gives Mini Pavlovas an exciting twist.

Mini Pavlovas
Ingredients
Meringue Base
- 4 large egg whites Ensure at room temperature
- 1 cup granulated sugar Added gradually
- 1 teaspoon white vinegar For stability
- 1 teaspoon cornstarch For light texture
Whipped Cream
- 1 cup heavy whipping cream Whipped until soft peaks form
Toppings
- to taste Fresh fruits (e.g., berries, kiwi, passion fruit) Preferred seasonal fruits


Instructions
Preparation
- Gather all ingredients and ensure they are at room temperature.
- Preheat oven to 225°F (110°C) and line a baking sheet with parchment paper.
Meringue Cooking
- Beat egg whites on medium speed until soft peaks form.
- Gradually add sugar, one tablespoon at a time, until stiff peaks form and mixture is shiny.
- Gently fold in vinegar and cornstarch.
- Spoon or pipe small rounds of meringue onto the prepared sheet, aiming for nests.
- Bake for 1 to 1.5 hours until firm and dry to the touch.
- Turn off the oven and let cool inside to maintain shape.
Assembly
- Whip cream until soft peaks form. Optionally, add vanilla extract.
- Once meringues are completely cool, carefully remove them from parchment.
- Top each meringue with whipped cream and arrange fresh fruits on top.