
This post may contain affiliate links. As an Amazon Associate, I earn from qualifying purchases at no extra cost to you.
Table of Contents
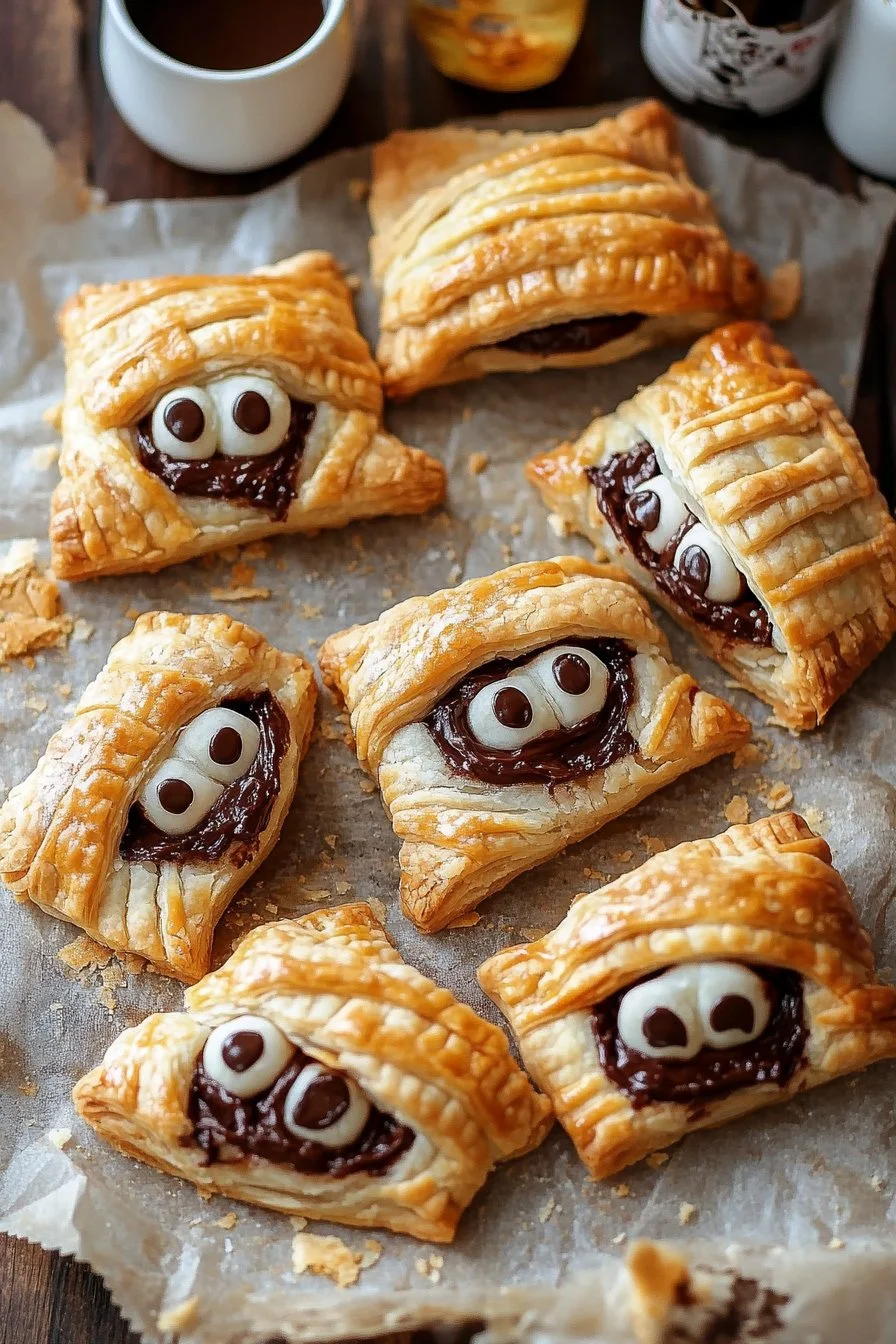
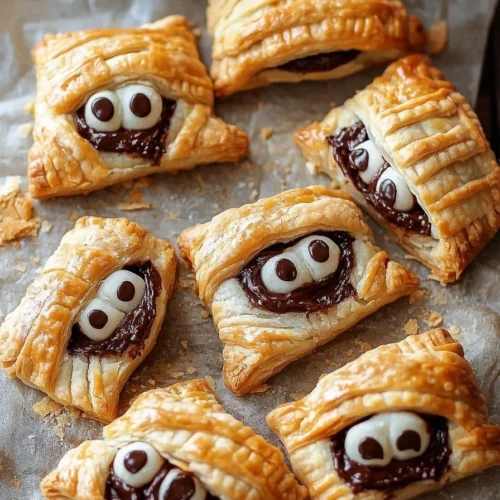
Have you ever wanted to make dessert fun and festive, especially around Halloween? Enter the Nutella Mummy Hand Pies, your new go-to recipe for a delightful treat that’s not just tasty, but also spookily cute! If you’re looking for something easy to whip up that’ll dazzle kids and adults alike, these pastry-filled goodies are where it’s at. Imagine flaky puff pastry filled with creamy vegan Nutella and layered with banana slices, all wrapped up like a mummy, and topped with adorable googly eyes. Sounds fun, doesn’t it?
The best part? This recipe is super simple! With just a few ingredients and straightforward steps, anyone can recreate these drool-worthy mummies in their own kitchen. So, let’s dive into these charming treats and explore all the ways they can add a special touch to your upcoming Halloween festivities – or any day of indulgence!
🍴 Top Kitchen Essentials You'll Love


Key Benefits of Nutella Mummy Hand Pies
Why You’ll Love This Recipe
You might be wondering what makes these Nutella Mummy Hand Pies worth your time. Here’s why:
- Delicious flavor: Vegan Nutella paired with bananas creates a sweet, creamy filling that everyone will love.
- Easy to make: Simple steps and readily available ingredients mean you won’t spend hours in the kitchen.
- Quick prep: With a little bit of prep, you can have these pies baked and ready in less than an hour!
- Family-friendly fun: Kids can help with the assembly, making it a fun, family-oriented activity.
- Versatile for any occasion: Perfect for Halloween parties, school events, or simply as a whimsical dessert at home.
- Customizable: You can mix and match fillings or shapes, making them unique to your style!
What Makes It Stand Out
What sets Nutella Mummy Hand Pies apart from regular hand pies is their playful presentation and seasonal charm. Shaped like little mummies, they add a fun twist to traditional desserts, making them perfect for Halloween. The rich chocolatey flavor combined with the natural sweetness of bananas appeals to both kids and adults.
Additionally, these pastries can easily be customized to fit various dietary needs, celebrating inclusivity in treats. Want to add a bit of spice for a Halloween twist? A pinch of cinnamon in the filling could be delightful! Or maybe add a hint of pumpkin for an autumnal flavor. The possibilities are endless and can cater to everyone’s taste.
Ingredients for Nutella Mummy Hand Pies
Complete Ingredient List with Measurements
Before we embark on our baking journey, let’s gather all the necessary goodies!
- 2 sheets of ready-roll puff pastry (Vegan & gluten-free)
- 6 tablespoons of vegan Nutella
- 2 medium-sized bananas
- 3 tablespoons of dairy-free milk (for the ‘egg wash’)
- 2 tablespoons of caster/granulated sugar
- 1 packet of dairy-free white chocolate buttons
- 2 tablespoons of icing sugar (for dusting)
- Googly eyes for decoration
Substitutes and Alternatives
No special treat should be off-limits! Here’s how to tailor these Nutella Mummy Hand Pies to various dietary needs:
- Nutella alternatives: If you’re nut-free, try sunflower seed butter or another chocolate spread that fits your dietary needs.
- Banana swap: Applesauce can be a good substitute for bananas if someone is allergic.
- Dairy-free milk options: Almond milk, oat milk, or soy milk will all work great.
- Sugar substitutes: For those avoiding refined sugar, consider coconut sugar or a sweetener like agave nectar.
How to Make Nutella Mummy Hand Pies – Step-by-Step Directions
Now that we have all our ingredients ready, let’s jump into the fun part: making the Nutella Mummy Hand Pies! Follow these steps to create your own spooky delights.
Step 1 – Prep Your Workspace and Ingredients
Start by ensuring your workspace is clean and organized. Here’s what to do:
- Clear your countertop or table.
- Gather your ingredients, rolling pin, knife, and baking sheets.
- Preheat your oven to 400°F (200°C) so it’s hot and ready when your pies are assembled.
Step 2 – Prepare the Base or Crust
Take your puff pastry and follow these simple steps:
- Gently roll out the sheets of puff pastry on a lightly floured surface to avoid sticking.
- Cut the pastry into rectangles, roughly about 4 inches by 6 inches. You can use a pizza cutter or a sharp knife for clean edges.
- Lay out half of the rectangles on a baking sheet lined with parchment paper.
Step 3 – Make the Filling
Next up, let’s create the delicious filling.
- Peel the bananas and slice them into thin rounds.
- In a bowl, mix the sliced banana rounds with the vegan Nutella. Make sure the bananas are evenly coated for maximum flavor.
- Spoon a generous amount of the Nutella-banana mixture onto the center of each pastry rectangle, leaving a border around the edges.
Step 4 – Seal the Hand Pies
We want to make sure those yummy fillings stay inside!
- Take another pastry rectangle and carefully place it over the filling.
- Using your fingers, press around the edges to seal them tightly. If you want an extra precaution, you can crimp the edges with a fork for a decorative touch.
Step 5 – Create Slits for the Mummy Wrap
Let’s give them that mummy look!
- Using a sharp knife, make a few diagonal slits on the top of each hand pie. This allows steam to escape during baking.
- Brush the top of each pie with dairy-free milk to help them turn golden brown.
Step 6 – Sprinkle with Sugar
Add a touch of sweetness!
- Sprinkle a bit of caster or granulated sugar over the top of each hand pie. This step creates a beautiful, sugary crust once they bake.
Step 7 – Bake to Perfect Golden Brown
Let’s bake these beauties!
- Place your prepared hand pies in the preheated oven and bake for 15-20 minutes, or until they’re golden brown and flaky.
- Once done, take them out and let them cool slightly on the baking sheet.
Step 8 – Decorate Your Mummies
This is the fun part!
- While the pies are cooling, melt the dairy-free white chocolate buttons in a microwave-safe bowl or over a double boiler.
- Drizzle the melted chocolate over the hand pies to resemble mummy wrappings.
- Add the googly eyes on top of the pies while the chocolate is still warm so they stick!
Step 9 – Dust with Icing Sugar
For a final touch, give your mummy hand pies a dusting of sweetness.
- Use a small sieve to lightly dust icing sugar over the tops of your mummies. It gives a nice ghostly effect!
Step 10 – Serve and Enjoy!
Now, for the best part – eat up!
- Serve your Nutella Mummy Hand Pies warm or at room temperature. They’re perfect for sharing; just don’t be surprised if they disappear quickly!
Serving Suggestions for Nutella Mummy Hand Pies
Best Occasions to Serve This Dish
These delightful pastries are perfect for various occasions:
- Halloween parties: Their spooky appearance makes them an ideal treat for the festive season.
- School events: Kids love them, and they’re easy to pack for lunches or class parties.
- Family movie nights: Make them an after-dinner treat while enjoying a spooky film.
- Birthday celebrations: Add a ghoulish twist to any birthday party with these pies.
What to Serve With It
Complement your hand pies with these delectable pairings:
- Hot chocolate
- Dairy-free vanilla ice cream
- Fresh fruit salad
- Whipped coconut cream
- Your favorite fruit dipping sauces like strawberry or raspberry
Storing Nutella Mummy Hand Pies Properly
Best Storage Practices
To keep your Nutella Mummy Hand Pies fresh:
- Store them in an airtight container to prevent drying.
- Keep them in the fridge if you have leftovers – they last up to 3–4 days!
Reheating and Freezing Tips
If you want to enjoy them later:
- To reheat, pop them in the oven at a low temperature (about 350°F or 175°C) for about 5-10 minutes until warmed through.
- These pies can be frozen before baking; just wrap them tightly in plastic wrap and store in a freezer-safe container. Bake from frozen, adding a few extra minutes to the baking time.
Tips & Tricks for Nutella Mummy Hand Pies
Mistakes to Avoid
Here are some common mishaps and how to avoid them:
- Overcrowding the filling: If you overstuff the pies, they may burst while baking. Stick to a small spoonful!
- Not sealing properly: Be sure to seal the edges well, or the filling will leak out during the baking process.
Extra Tips for Better Results
Here are a few extra gems to elevate your pie-making skills:
- For an extra crunch, consider adding finely chopped walnuts or pecans to the filling.
- Experiment with different kinds of chocolate spreads—we all have our favorites!
- Use fun cookie cutters to create shapes or messages from extra pastry before baking.
Recipe Variations of Nutella Mummy Hand Pies
Creative Twists
Looking to mix it up? Try these variations:
- Nut-filled mummies: Use a mixture of various nuts and Nutella for a crunchier filling.
- Spice it up: Add a dash of cinnamon or nutmeg to the banana mixture for some warmth.
- Fruit combos: You could add strawberries or even peanut butter for a different flavor.
Dietary Adjustments
Need to make this recipe fit your dietary preferences? Here’s how:
- To keep it gluten-free, ensure your puff pastry is labeled as such, or make a gluten-free version from scratch.
- For vegan-friendly options, confirm that all your ingredients (including chocolate buttons) are dairy-free.
Conclusion about Nutella Mummy Hand Pies
In wrapping up our journey into the world of Nutella Mummy Hand Pies, it’s clear that this recipe is not only easy to follow but also incredibly fun and versatile. These pastries provide a delicious blend of flavors that can adapt to any occasion. Their cute and spooky design makes them a hit among kids while satisfying those sweet cravings for adults.
So, whether you’re gearing up for a Halloween party or just want to create a playful dessert, these mummies are sure to be a crowd-pleaser. Don’t hesitate—give this delightful recipe a try, and I can’t wait to hear all about your experiences with these charming hand pies!
FAQs about Nutella Mummy Hand Pies
What if it doesn’t turn out right?
If your Nutella Mummy Hand Pies don’t turn out perfectly, don’t fret! Cooking is all about experimenting. If they don’t seal well, simply enjoy them as a deconstructed dessert, and learn for next time!
Can I prepare it ahead of time?
Yes, you can prepare these pies up to the baking step. Just keep them wrapped in the fridge until you’re ready to bake. They’re perfect for a last-minute bake!
What are the best ingredient substitutions?
As mentioned earlier, you can swap out Nutella for a nut-free spread, bananas for applesauce, and use any dairy-free milk for brushing. Adapt the recipe to your liking!
How long can it be stored?
If stored in an airtight container in the fridge, Nutella Mummy Hand Pies can last about 3-4 days.
Can I use store-bought dough or crust?
Absolutely! If you’re short on time, feel free to use store-bought dough. Just check that it’s vegan and gluten-free if those are your dietary needs.
Is this recipe kid-friendly or family-appropriate?
Without a doubt! Kids love the fun shapes, and they can help assemble the pies, making it a wonderful family activity.
Can I make this recipe allergen-free?
Yes! With the ingredient swaps suggested above, you can easily make these hand pies free from nuts, gluten, and dairy.
Now that you have all the information you need, it’s time to roll up your sleeves and create some delightful Nutella Mummy Hand Pies! Enjoy the process, and happy baking!
Nutella Mummy Hand Pies
Equipment
- Baking trays
- Grease-proof paper
- Sharp knife or pizza cutter
- Piping bag (optional)
- Wire rack
Ingredients
Main Ingredients
- 2 sheets vegan ready-roll puff pastry
- 6 tablespoons vegan Nutella or chocolate-hazelnut spread
- 2 medium bananas sliced
- 3 tablespoons dairy-free milk for brushing edges / wash
- 2 tablespoons caster or granulated sugar for sprinkling over pastry
Decorations (Optional)
- 1 packet dairy-free white chocolate buttons for eyes
- 2 tablespoons icing sugar for dusting


Instructions
- Preheat oven to 180 °C (fan) and line baking trays with grease-proof paper. :contentReference[oaicite:1]{index=1}
- Unroll the pastry sheets and use a knife or pizza cutter to cut rectangles (approx 4×2.5 inches), reserving scraps for strips. :contentReference[oaicite:2]{index=2}
- Transfer pastry rectangles to fridge for 5 minutes to firm up slightly. :contentReference[oaicite:3]{index=3}
- Spread vegan Nutella over each rectangle leaving space around edges. Add slices of banana on top. :contentReference[oaicite:4]{index=4}
- Brush dairy-free milk around the edges, then lay strips of pastry over the filling in a zig-zag mummy pattern. Press edges to seal. :contentReference[oaicite:5]{index=5}
- Brush tops with more dairy-free milk, sprinkle sugar over, then bake for about 12-15 minutes until golden and flaky. :contentReference[oaicite:6]{index=6}
- Remove from oven, let cool slightly. Once cooled, attach candy eyes using a small dab of Nutella. Dust with icing sugar if desired. :contentReference[oaicite:7]{index=7}