
This post may contain affiliate links. As an Amazon Associate, I earn from qualifying purchases at no extra cost to you.
Table of Contents
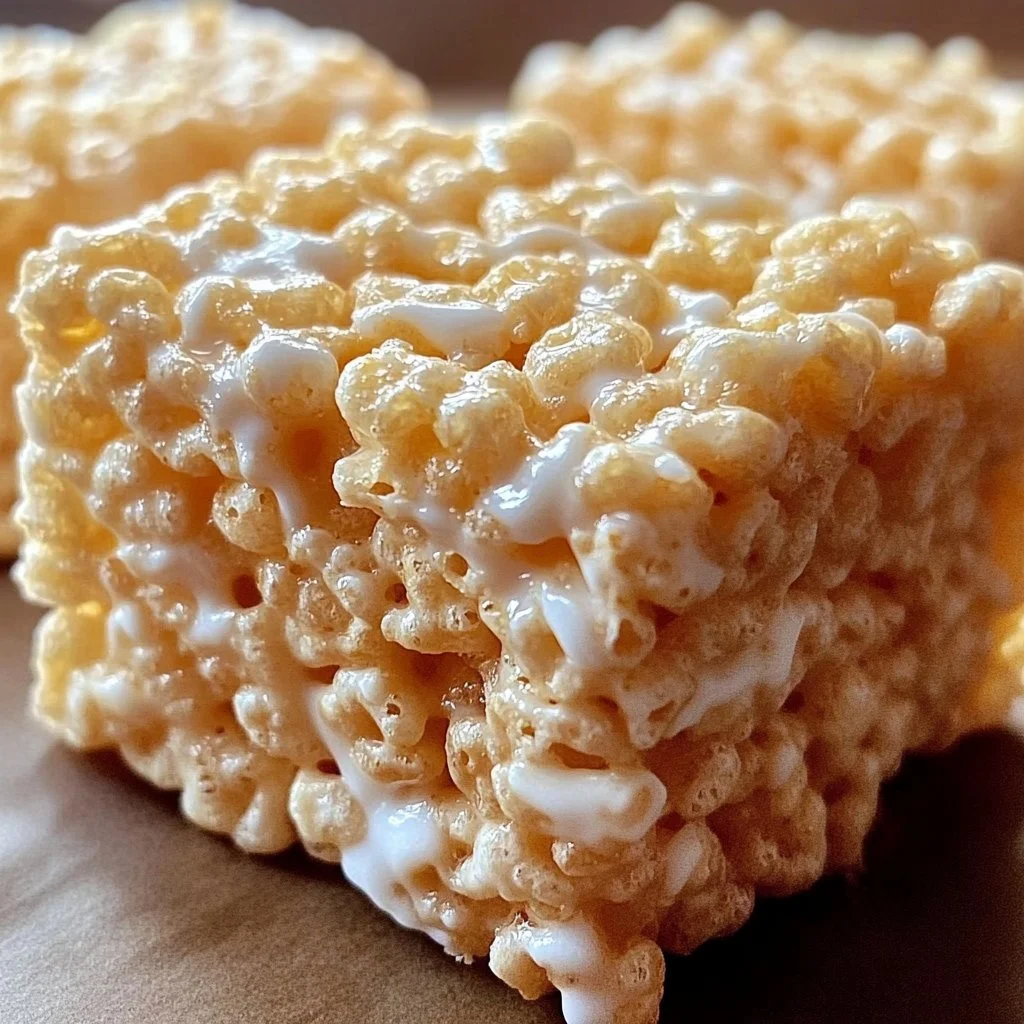
When it comes to delightful, no-bake desserts, few can rival the classic appeal of Original Rice Krispie Treats. Who doesn’t fondly remember the gooey, sweet bites packed with childhood nostalgia? This simple recipe requires only a few ingredients and can be made in less than 30 minutes, making it an ideal treat for both novice bakers and seasoned pros alike. Imagine that warm, buttery aroma wafting through your kitchen as your marshmallows melt into a sweet, sticky masterpiece. These treats spark joy and warm hearts, turning everyday moments into sweet memories.
The beauty of Original Rice Krispie Treats lies in their simplicity. A handful of ingredients culminates in a delicious dessert that’s rich yet light, chewy yet crisp. This makes it a perfect choice for any gathering—be it a birthday party, picnic, or cozy movie night at home. Have you ever considered how versatile they can be? This recipe allows for so many variations, yet the original version is always a timeless favorite. You can whip up a batch and have friends and family gather around, sharing stories and laughter over these delightful squares.
In a world filled with complex desserts that sometimes require special equipment or techniques, Original Rice Krispie Treats stand out as the ultimate uncomplicated dessert. What makes this recipe even more special is that it invites creativity. You can customize it to fit any occasion or preference, adding mix-ins or toppings to suit your taste. So, why not return to this classic? Start creating simple moments of joy with just a few key ingredients.
🍴 Top Kitchen Essentials You'll Love


Key Benefits of Original Rice Krispie Treats
There are several reasons why you’ll love making Original Rice Krispie Treats.
- Quick and Easy: The recipe comes together in no time, requiring just a handful of simple ingredients and minimal equipment.
- Family-Friendly: Kids can join in on the fun, making this a delightful family activity.
- Customizable: You can extend your creativity by adding chocolates, nuts, or sprinkles.
- Deliciously Addictive: The combination of marshmallows and butter creates a heavenly blend of flavors and textures.
- Perfect for Any Occasion: From birthday parties to holiday gatherings, these treats fit right in at every event.
- Budget-Friendly: With just a few affordable ingredients, you can make a satisfying treat without breaking the bank.
What Makes It Stand Out
Original Rice Krispie Treats hold a special place in the hearts of many. Their originality comes from the unique combination of puffed rice cereal and melted marshmallows, bringing a delightful crunch and chew. The recipe is incredibly adaptable, allowing for various add-ins like chocolate chips or your favorite candies. This versatility sets them apart, making them suitable for anyone’s taste.
This treat is perfect for any occasion. Whether you’re celebrating a child’s birthday or just looking for snacks to enjoy during a movie night, Original Rice Krispie Treats easily make themselves known as a go-to dessert. They are simple enough for casual gatherings yet can be dressed up for more formal events, making them a fantastic choice year-round.
Ingredients for Original Rice Krispie Treats
Here’s what you’ll need to whip up your very own batch of Original Rice Krispie Treats:
- 45 grams unsalted butter: This adds richness and flavor to the treats.
- 285 grams marshmallows: The star ingredient, contributing sweetness and that iconic chewy texture.
- 150 grams puffed rice cereal: Provides the signature crunch and holds everything together.
Each of these ingredients plays a vital role in ensuring your treats come out perfectly delicious. You can even experiment with flavored marshmallows for an exciting twist!
Substitutes and Alternatives
If you have dietary restrictions or allergies, you can easily swap ingredients in this recipe. For a dairy-free version, substitute unsalted butter with a non-dairy alternative such as coconut oil or vegan butter. This keeps the treat creamy without using animal products.
If you need a gluten-free option, ensure you select gluten-free puffed rice cereal. Many brands offer this now, allowing everyone to enjoy Original Rice Krispie Treats without worry.
How to Make Original Rice Krispie Treats – Step-by-Step Directions
Step 1 – Prepare Ingredients
Start by gathering all your ingredients. Having everything ready will make the process smoother and more enjoyable.
Step 2 – Coat the Pan
Take a 33 x 23 cm rectangular pan and coat it evenly with non-stick spray. This step ensures your treats don’t stick, making it easier to slice them later.
Step 3 – Melt the Butter
In a large microwave-safe bowl, gently heat the melted butter. This step should take about 30 seconds. You want it to be warm but not bubbling.
Step 4 – Combine with Marshmallows
Add the marshmallows to the bowl and stir them into the melted butter until well-combined. This helps in melting the marshmallows evenly.
Step 5 – Microwave to Melt
Microwave the mixture for 45 seconds. Afterward, remove it from the microwave and stir thoroughly. Repeat this step for another 45 seconds until everything is completely melted and smooth.
Step 6 – Stir in the Cereal
Once the marshmallows have melted, take the bowl out of the microwave. Immediately add the puffed rice cereal to the mixture. Stir gently but thoroughly until all the cereal is evenly coated.
Step 7 – Transfer to the Pan
Now, pour the mixture into your prepared pan. Use a spatula or lightly greased hands to press it firmly into an even layer. Make sure the mixture is packed well, as this helps keep the treats from crumbling.
Step 8 – Allow to Set
Let your treats cool at room temperature for about 30 minutes. This allows them to firm up a bit, making it easier to cut them into squares.
Step 9 – Slice and Serve
Once set, use a sharp knife to cut the treats into squares or rectangles. You can serve them right away or store them for later.
Step 10 – Enjoy!
Indulge in your delicious Original Rice Krispie Treats! Each bite is a perfect combination of sweetness and crunch, making it an instant hit.
Serving Suggestions for Original Rice Krispie Treats
Best Occasions to Serve This Dish
Original Rice Krispie Treats are incredibly versatile. They make a wonderful addition to birthday parties, where kids can enjoy these creative and colorful squares.
For family movie night, they add a tasty touch of nostalgia, making the experience even more enjoyable. You can also serve them during holiday festivities, as they are a crowd-pleaser for both kids and adults alike.
What to Serve With It
To enhance your serving experience, consider pairing these treats with:
- A tall glass of milk
- Hot chocolate or coffee for a cozy pairing
- Ice cream for a fun sundae
- Fruit for a fresh contrast
How to Store Original Rice Krispie Treats Properly
Best Storage Practices
To keep your Original Rice Krispie Treats fresh, store them in an airtight container. You can place parchment paper between layers to prevent them from sticking together. If kept properly, they will last about one week at room temperature.
If you prefer to keep them longer, refrigeration is your best bet. Just make sure to wrap them well to retain moisture and freshness.
Reheating and Freezing Tips
For optimal texture, it’s best to enjoy your treats as they are. However, if they get a bit hard, you can gently microwave them for a few seconds to soften.
To freeze Original Rice Krispie Treats, wrap them tightly in plastic wrap and then place them in a freezer bag. They can last up to three months. When you’re ready to enjoy them again, let them thaw at room temperature.
Tips & Tricks for Original Rice Krispie Treats
Mistakes to Avoid
Here are a few common pitfalls to watch out for:
- Not Greasing the Pan: This can lead to sticking, making it difficult to remove the treats.
- Overheating the Marshmallows: Too much heat can cause the mixture to become gritty instead of smooth.
- Packing Too Lightly: Make sure to press the mixture firmly into the pan to create solid treats.
- Skipping the Cooling Step: Cutting into them too early makes them fall apart.
- Using Stale Ingredients: Ensure that your marshmallows and cereal are fresh for the best taste and texture.
Extra Tips for Better Results
For a richer flavor, consider adding a pinch of salt to the melted marshmallow mixture. It helps enhance the sweetness beautifully.
For a little visual flair, sprinkle some colored sprinkles on top before they set. This makes them even more appealing, especially for kids’ gatherings.
Recipe Variations of Original Rice Krispie Treats
Creative Twists
If you’re feeling adventurous, why not try these fun variations of Original Rice Krispie Treats?
- Chocolate-Dipped Treats: After cutting your squares, dip them in melted chocolate. This adds extra sweetness and a delicious crunch.
- Peanut Butter Marshmallow Treats: Swap out a portion of the butter for peanut butter. This adds a lovely nutty flavor.
- S’mores Version: Incorporate graham cracker crumbs, mini chocolate chips, and marshmallows for a campfire-inspired treat.
- Rainbow Sprinkles: Mix colorful sprinkles into the cereal for an eye-catching twist that makes it fun for any occasion.
Dietary Adjustments
To create a vegan version, simply choose vegan butter and marshmallows made without gelatin. This way, everyone can enjoy them. For a gluten-free option, always check your cereal packaging to ensure that it’s certified gluten-free.
Conclusion about Original Rice Krispie Treats
In a world of elaborate desserts, Original Rice Krispie Treats offer a charming simplicity that turns everyday moments into something special. This classic recipe is not just a nostalgic trip down memory lane; it’s also a delicious treat that caters to all ages. The ease and adaptability make it a perfect choice for gatherings or a cozy night at home.
With just a few ingredients, you can create a delightful dessert that brings smiles to faces. So gather your family, create some memories, and let the deliciousness of Original Rice Krispie Treats fill your kitchen with warmth and joy.
FAQs about Original Rice Krispie Treats
Can I prepare it ahead of time?
Absolutely! You can make these treats a day in advance and store them in an airtight container.
Can I freeze it?
Yes, these treats freeze well. Just wrap them tightly to prevent freezer burn.
How long does it last?
Stored at room temperature in an airtight container, they last about a week.
What are the best substitutions?
You can use vegan butter for a dairy-free version and gluten-free cereal for a gluten-free treat.
Is this recipe family-friendly?
Definitely! Kids love helping with the mixing and pressing, making it a fun family activity.
Can I add chocolate to this recipe?
Yes, chocolate chips or melted chocolate can be added for a delicious twist.
What is the best way to cut them?
Using a sharp knife or kitchen scissors works well. Run the knife under warm water for easier slicing.
Can I double the recipe?
Yes, feel free to double the recipe if you need a larger batch. Just use a bigger pan!
What’s the easiest way to clean the pan?
Soak the pan in warm soapy water to loosen any sticky residue, making it easier to clean.
Can I add nuts or dried fruit?
Absolutely! Chopped nuts or dried fruits can add great texture and flavor.

Original Rice Krispie Treats
Ingredients
Main Ingredients
- 45 grams unsalted butter Adds richness and flavor
- 285 grams marshmallows Star ingredient for sweetness and chewiness
- 150 grams puffed rice cereal Provides crunch and holds everything together


Instructions
Preparation
- Gather all ingredients to prepare for making the treats.
- Coat a 33 x 23 cm rectangular pan with non-stick spray.
- In a large microwave-safe bowl, gently heat the unsalted butter for about 30 seconds until warm but not bubbling.
- Add marshmallows to the melted butter and stir until combined.
- Microwave the mixture for 45 seconds, then stir. Repeat for another 45 seconds until smooth.
- Remove the bowl from the microwave and add puffed rice cereal, stirring gently until coated.
- Pour the mixture into the prepared pan and press it firmly into an even layer.
- Let the mixture cool at room temperature for about 30 minutes to firm up.
- After cooling, use a sharp knife to cut into squares or rectangles.
- Enjoy the delicious Original Rice Krispie Treats!