
This post may contain affiliate links. As an Amazon Associate, I earn from qualifying purchases at no extra cost to you.
Table of Contents
🍴 Top Kitchen Essentials You'll Love


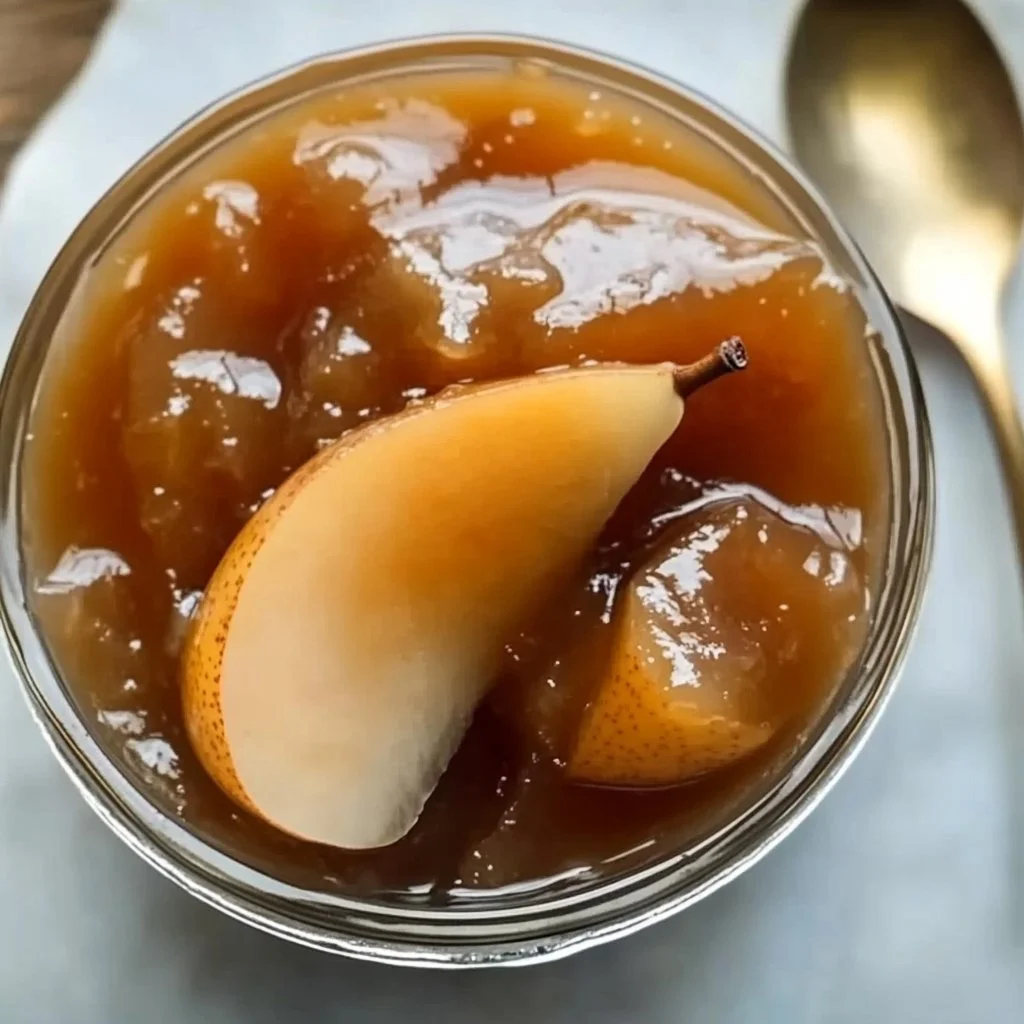
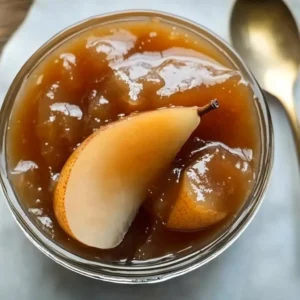
Introduction to Pear Jam
Have you ever tasted the sweet, tender goodness of homemade Pear Jam? It’s a delightful treat that brings summer’s bounty into your kitchen. Many home cooks find joy in making jams, and Pear Jam holds a special place in that category. Unlike store-bought varieties, this jam carries the essence of fresh pears, filled with natural sweetness and an inviting aroma that fills your home.
What makes Pear Jam unique? It’s not just the flavor; it’s the versatility. Imagine spreading it on warm toast, adding it to a cheese board, or stirring it into yogurt. Each spoonful captures the very essence of pears, making it a favorite among fruit lovers. It’s easy, making it perfect for both seasoned chefs and novice cooks.
The process of creating Pear Jam is rewarding. You’ll experience the satisfaction of transforming simple ingredients into a delicious preserve that can be enjoyed year-round. Whether you’re making it for yourself or to share with friends and family, there’s nothing quite like the experience of homemade jams.
Key Benefits of Pear Jam
Why You’ll Love This Recipe
- Flavorful: Pears offer a unique sweetness that is subtly fragrant.
- Easy to Make: The recipe is straightforward, even for beginners.
- Versatile: Use it on toast, in desserts, or as a topping for cheese.
- Preserves Freshness: Capture the taste of ripe pears and enjoy them long after the season.
- Customizable: Add your favorite spices or citrus for personal flair.
- Shareable: Ideal for gifts or special occasions, making every jar a heartfelt gesture.
What Makes It Stand Out
Pear Jam stands apart from other fruit jams, not only due to its smooth texture but also the delicate balance of sweetness and tang that comes from the addition of lemon juice. You can also choose to customize it with optional spices like cinnamon and nutmeg, which adds depth to the flavor.
Furthermore, this recipe allows room for creativity. You can experiment with different pears for various tastes—and even try combining them with other fruits. The possibilities are endless, making every batch of Pear Jaam a unique experience.
Ingredients for Pear Jaam
Complete Ingredient List with Measurements
- 4 cups pears, peeled and diced
- 2 cups sugar
- 1/4 cup lemon juice
- 1 teaspoon cinnamon (optional)
- 1/2 teaspoon nutmeg (optional)
- 1 package fruit pectin
Substitutes and Alternatives
If you’re looking for alternatives, consider using less sugar to make a low-sugar version. You can replace the white sugar with substitutes like honey or maple syrup, adjusting the quantity to taste. For a sugar-free version, look for pectin suitable for sugar-free jams.
For those who may have allergies, pears can be substituted with apples or peaches, although the resulting jam will have a different flavor profile. You can also use lemon zest instead of lemon juice for a more intense citrus flavor.
How to Make Pear Jam – Step-by-Step Directions
Step 1 – Prepare Ingredients
Begin by washing the pears and peeling them. Dice them into small pieces to ensure they cook down evenly. This step sets the foundation for your Pear Jam, so take your time.
Step 2 – Cook the Base
In a large pot, combine the diced pears, sugar, and lemon juice. If you’re opting for spices, now’s the time to add them. Cook this mixture over medium heat, stirring frequently until it comes to a gentle boil.
Step 3 – Bring to a Boil
Once the mixture reaches a boil, allow it to bubble for about 10 minutes, stirring often. You’ll notice it thickening and might see the natural juices released from the pears blending with the sugar.
Step 4 – Add the Pectin
Stir in the packet of fruit pectin. Keep the mixture boiling for another 1-2 minutes, stirring constantly. You want to ensure that the pectin dissolves fully, which is crucial for a successful set.
Step 5 – Skim Off Foam
After boiling, remove the pot from the heat. You may see some foam on the surface. Skim it off with a spoon for a cleaner presentation in your jars. While it is edible, too much foam can make your jam look unappealing.
Step 6 – Jar the Jam
Pour your hot Pear Jam into sterilized jars. Ensure you leave about 1/4 inch of headspace at the top. This space is necessary for any expansion during the canning process.
Step 7 – Seal the Jars
After filling the jars, wipe the rims with a clean cloth to remove any sticky residue. Seal them with sterilized lids. This step prevents spoilage and ensures a strong seal.
Step 8 – Process the Jars
To preserve your Pear Jam, process the jars in a water bath canner. Allow them to boil for 10-15 minutes. This step is crucial for the longevity of the jam, killing any potential bacteria.
Step 9 – Cool Down
Once processed, carefully remove the jars from the water bath and place them on a clean towel. Let them cool completely at room temperature. You’ll hear the satisfying pop of the jars sealing as they cool.
Serving Suggestions for Pear Jam
Best Occasions to Serve This Dish
Pear Jam is perfect for breakfast spreads, giving your morning toast the sweetness it deserves. It can also be served during afternoon tea or as an elegant addition to a cheese platter at gatherings. Whip it out during holiday celebrations or cozy family dinners, where it can take center stage on the dessert table.
What to Serve With It
Enjoy Pear Jam with buttery scones, pancakes, or waffles. Pair it with goat cheese or brie for an impressive appetizer. Its sweetness also complements savory dishes such as roasted meats and salads, making it wonderfully versatile.
How to Store Pear Jam Properly
Best Storage Practices
Store your sealed jars of Pear Jam in a cool, dark place like a pantry or cupboard. If opened, keep the jar in the refrigerator, where it will last for 2-3 weeks. Make sure to use clean utensils each time to prevent contamination.
Reheating and Freezing Tips
If you want to enjoy your jam warm, gently reheat it on the stove over low heat until it reaches your desired temperature. Pear Jam can also be frozen if you’ve made a large batch. Transfer it to freezer-safe containers and enjoy it for up to 1 year.
Tips & Tricks for Pear Jam
Mistakes to Avoid
1 – Wrong Pears: Opt for ripe but firm pears. Overripe ones may lead to a poor texture.
2 – Skipping Lemon Juice: Skipping lemon juice can result in an overly sweet jam. It helps balance flavors.
3 – Not Skimming Foam: Leaving foam can affect the appearance and flavor, so take the time to skim.
4 – Overcooking the Jam: Monitor cooking time carefully to avoid a thick, leathery consistency.
5 – Insufficient Sterilization: Always sterilize jars. Pouring hot jam into unsterilized containers can lead to spoilage.
Extra Tips for Better Results
For added flavor, consider infusing the jam with fresh herbs like thyme or rosemary during cooking. You can also adjust the sweetness for your taste preferences, adding more sugar or reducing it as desired. Finally, adding a splash of vanilla extract before canning can introduce a lovely complexity to your Pear Jam.
Recipe Variations of Pear Jam
Creative Twists
1 – Spicy Pear Jam: Add chopped jalapeños for a spicy kick that complements meats beautifully.
2 – Pear and Ginger Jam: Incorporate fresh ginger for a zesty touch that brightens the sweetness of the pears.
3 – Cinnamon Pear Jam: Increase the cinnamon for a warm, comforting flavor—ideal for autumn.
4 – Mixed Fruit Jam: Combine with other fruits like apples or cranberries for a fruity medley that balances flavors.
Dietary Adjustments
For a vegan version, simply ensure the pectin you use is plant-based. If you prefer gluten-free, this Pear Jam is naturally gluten-free, and you won’t need any adjustments. Adjusting sugar content can help make it fit various dietary needs.
Conclusion about Pear Jam
Making Pear Jaam is a rewarding culinary adventure, bringing the joy of homemade preserves into your kitchen. This delightful spread not only brightens your breakfast but also enhances various dishes and occasions. With just a few simple ingredients and steps, you can create something truly special that captures the essence of fresh pears. No matter how you choose to enjoy it, Pear Jaam will always dazzle your taste buds and warm your heart with its deliciousness.
FAQs about Pear Jam
How long can homemade Pear Jaam last?
Homemade Pear Jaam can be stored in a sealed jar in a cool, dark place for up to one year. Once opened, it should be kept in the refrigerator.
Can I use frozen pears for Pear Jam?
Yes, you can use frozen pears, but make sure to thaw and drain excess moisture before using them in your jam recipe.
What should I do if my Pear Jam didn’t set?
If your jam hasn’t set, you can re-cook it with a little more pectin and bring it to a boil for a few minutes to help it firm up.
Can I make Pear Jam without pectin?
Yes, you can make Pear Jam without pectin, but it may require longer cooking time to achieve the desired thickness.
Can I use other fruits with pears in this jam?
Absolutely! Pears blend well with apples, peaches, and berries, adding different flavors and textures to your jam.
How do I know when my Pear Jaam is done?
The jam is done when it has thickened and holds its shape on a spoon. A simple test is to place a spoonful on a cold plate; it should not run.
Is Pear Jaam gluten-free?
Yes, Pear Jaam is naturally gluten-free, so there are no modifications necessary for gluten sensitivities.
Can I use granulated sugar substitutes in Pear Jaam?
You can use granulated sugar substitutes, but make sure to follow the manufacturer’s guidelines for amounts and cooking instructions for proper setting.
What’s the best way to enjoy Pear Jam?
Pear Jam is delicious on toast, pancakes, or yogurt. It pairs wonderfully with cheese for a savory-sweet combo.
Can I adjust the spices in my Pear Jam?
Yes, feel free to adjust spices like cinnamon and nutmeg according to your taste preferences. Experimenting will create a unique flavor profile!
Pear Jam
Ingredients
Main Ingredients
- 4 cups pears, peeled and diced Use ripe but firm pears.
- 2 cups sugar Sugar substitutes can be used for low-sugar versions.
- ¼ cup lemon juice Freshly squeezed recommended.
- 1 teaspoon cinnamon Optional for additional flavor.
- ½ teaspoon nutmeg Optional for spicing.
- 1 package fruit pectin Ensure it is suitable for your recipe.


Instructions
Preparation
- Wash the pears, peel them, and dice them into small pieces.
- In a large pot, combine the diced pears, sugar, and lemon juice. If using spices, add them now.
Cooking
- Cook the mixture over medium heat, stirring frequently until it comes to a gentle boil.
- Allow it to bubble for about 10 minutes, stirring often until thickened.
- Stir in the packet of fruit pectin and keep boiling for another 1-2 minutes, stirring constantly.
- Remove from heat and skim off the foam from the surface.
Jarring
- Pour the hot Pear Jam into sterilized jars, leaving about 1/4 inch of headspace.
- Wipe the rims with a clean cloth and seal them with sterilized lids.
Processing
- Process the jars in a water bath canner for 10-15 minutes.
- Remove the jars and let them cool completely at room temperature.