

This post may contain affiliate links. As an Amazon Associate, I earn from qualifying purchases at no extra cost to you.
Table of Contents
🍴 Top Kitchen Essentials You'll Love


Introduction to Pita Pizzas: 7 Delicious Ways to Savor Every Bite
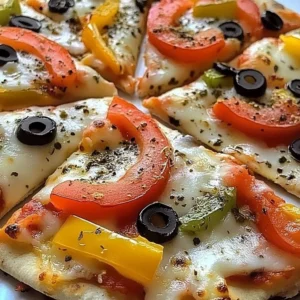
If you’re searching for a quick, delightful meal that’s sure to please everyone at the table, look no further than Pita Pizzas: 7 Delicious Ways to Savor Every Bite. This innovative dish pairs the convenience of pita bread with all the cheesy goodness of pizza. But what makes these pita pizzas truly special? Each mini pizza offers a perfect crunch, customizable toppings, and a deliciously gooey cheese experience that will make you wonder why you haven’t tried them sooner.
Imagine this: it’s a busy weeknight, and the last thing you want is to spend hours in the kitchen. With Pita Pizzas, you can create a delightful family dinner in under 30 minutes. Have picky eaters? No problem! Each family member can top their pita with their favorite ingredients, turning mealtime into a fun, creative activity.
You can swap out ingredients based on what you have available or make these pizzas fit almost any dietary need. From vegan cheese to gluten-free pitas, the possibilities for Pita Pizzas: 7 Delicious Ways to Savor Every Bite are nearly limitless. Whether enjoyed as a quick lunch, a hearty snack, or a fun appetizer for gatherings, these pita pizzas are set to be a new favorite. Light, healthy, and absolutely delicious, what’s not to love?
Key Benefits of Pita Pizzas: 7 Delicious Ways to Savor Every Bite
Why You’ll Love This Recipe
- Quick and easy preparation—ready in under 30 minutes.
- Kid-friendly and customizable for picky eaters.
- Healthy option compared to traditional pizza.
- Perfect for using up leftover vegetables or meats.
- Versatile enough for any meal—lunch, dinner, or snacks.
- Great for meal prep and can be stored for later.
What Makes It Stand Out
Pita Pizzas bring together simplicity and flavor in a way that few recipes can match. The personal touch allows everyone to create their ideal flavor combination by choosing their own toppings. Plus, they are a visually appealing dish, perfect for serving at parties or family gatherings where everyone wants something a little different.
Pita breads serve as an excellent canvas, providing a satisfying crunch that traditional pizza crusts often lack. Whether you’re hosting a movie night, preparing for a game day, or just craving a snack, Pita Pizzas: 7 Delicious Ways to Savor Every Bite deliver on multiple occasions and expectations.
Ingredients for Pita Pizzas: 7 Delicious Ways to Savor Every Bite
Complete Ingredient List with Measurements
- 4 pita breads
- 1 cup pizza sauce
- 2 cups shredded mozzarella cheese
- 1 cup sliced bell peppers
- 1 cup sliced mushrooms
- 1/2 cup sliced olives
- 1 tsp dried oregano
Substitutes and Alternatives
If you have dietary restrictions or preferences, don’t worry. There are plenty of viable alternatives for Pita Pizzas. For gluten-free options, try using gluten-free pita or naan bread. If you’re vegan, substitute the mozzarella cheese with nutritional yeast, cashew cheese, or specially formulated vegan cheese products. You can also add protein alternatives such as grilled chicken, turkey, or even chickpeas to add extra flavor and nutrition.
For those avoiding dairy, consider dairy-free cheeses or a simple blend of olive oil, garlic, and herbs for flavor without the cheese. With these swaps, Pita Pizzas: 7 Delicious Ways to Savor Every Bite can cater to everyone!
How to Make Pita Pizzas: 7 Delicious Ways to Savor Every Bite – Step-by-Step Directions
Step 1 – Prepare Ingredients
Start by washing and slicing your vegetables—bell peppers, mushrooms, and olives. Prepping these beforehand ensures a smooth assembly and plenty of flavor.
Step 2 – Preheat the Oven
Preheat your oven to 400°F (200°C). A well-heated oven helps to achieve that perfect crispy texture on your pita bases.
Step 3 – Place Pita Breads on a Baking Sheet
Arrange the pita breads on a baking sheet. Make sure to leave some space between them for even cooking and easy handling.
Step 4 – Spread the Pizza Sauce
Use a spoon or spatula to evenly spread pizza sauce over each pita bread. Don’t skimp on the sauce; it’s the flavor foundation for your pizzas!
Step 5 – Add Cheese
Sprinkle shredded mozzarella cheese generously on top of the sauced pitas. Melted cheese creates that delightful gooey texture we all love.
Step 6 – Layer the Toppings
Distribute your sliced bell peppers, mushrooms, and olives over the cheesy layer. Be creative! Mix and match your toppings based on what you like.
Step 7 – Season with Oregano
Sprinkle dried oregano over the top for an aromatic touch that brings everything together. Oregano is a classic pizza herb that enhances the taste wonderfully.
Step 8 – Bake
Place the baking sheet in your preheated oven and bake for 10-12 minutes. You’ll know they’re done when the cheese is melted and bubbly, and the edges of the pita are lightly golden.
Step 9 – Slice and Serve
Once baked, remove the pita pizzas from the oven and let them cool slightly. Slice into wedges for easy serving, and watch them disappear!
Step 10 – Enjoy
Gather your family or friends, and enjoy your delightful Pita Pizzas: 7 Delicious Ways to Savor Every Bite together!
Serving Suggestions for Pita Pizzas: 7 Delicious Ways to Savor Every Bite
Best Occasions to Serve This Dish
Pita pizzas are incredibly versatile and can suit a wide range of occasions. Hosting a casual game night? Pita pizzas will keep everyone happy without taking too much time to prepare. They also make excellent snacks or appetizers for parties where guests can help themselves.
For a family dinner, pair them with a fresh salad or soup for a balanced meal. Need a quick lunch? Leftover pita pizzas are just as tasty the next day and make excellent packed lunches.
What to Serve With It
Consider serving a light side salad for some added freshness. You could include a classic Caesar salad, a simple green salad with vinaigrette, or even a Mediterranean-inspired salad with cucumbers and feta. Other great pairings include garlic breadsticks, roasted veggies, or fruit salad.
Drinks like iced tea, lemonade, or even a light beer can complement the flavors nicely. Your choice of sides will enhance the whole dining experience of Pita Pizzas: 7 Delicious Ways to Savor Every Bite.
How to Store Pita Pizzas: 7 Delicious Ways to Savor Every Bite Properly
Best Storage Practices
To keep your leftover Pita Pizzas fresh, store them in an airtight container in the refrigerator. They will last for about 3-4 days. Make sure they are completely cooled before placing them in the container to avoid steam, which can make the bread soggy.
If you want to keep them longer, consider freezing your prepared pizzas. Wrap each one tightly in plastic wrap or aluminum foil, and then place them in a freezer-safe bag. They can last in the freezer for up to three months.
Reheating and Freezing Tips
For reheating, simply take the desired number of pita pizzas and place them in the oven at 350°F (175°C) for about 10-15 minutes. This method keeps the bread crispy, and the cheese melts beautifully.
If you’ve got frozen Pita Pizzas, remove them from the freezer and let them thaw in the fridge overnight. Once thawed, you can reheat them using the same oven method or pop them in the microwave for a quick fix, though this will sacrifice some crispiness.
Tips & Tricks for Pita Pizzas: 7 Delicious Ways to Savor Every Bite
Mistakes to Avoid
1 – Overloading toppings can lead to soggy pizza. Stick to a balanced amount for the best texture.
2 – Not preheating the oven can prevent your pita breads from getting that desirable crispiness.
3 – Using too much sauce can make them overly wet, so spread it evenly and keep it moderate.
4 – Forgetting to slice before serving can make them harder to share.
5 – Not allowing them to cool slightly before slicing can lead to cheese tearing instead of slicing cleanly.
Extra Tips for Better Results
For an added punch of flavor, consider brushing a little olive oil and garlic onto the pita before adding the sauce. You can experiment with different cheeses or spices to create unique flavor profiles. If you’re hosting a family gathering, set up a DIY station with various toppings.
Letting guests create their own Pita Pizzas: 7 Delicious Ways to Savor Every Bite can be a fun experience and encourages creativity.
Recipe Variations of Pita Pizzas: 7 Delicious Ways to Savor Every Bite
Creative Twists
1 – BBQ Chicken Pita Pizza: Use barbecue sauce as the base, top with grilled chicken, red onions, and cilantro for a tasty twist.
2 – Mediterranean Pita Pizza: Spread hummus instead of pizza sauce and add feta, olives, and roasted peppers for a Mediterranean flair.
3 – Breakfast Pita Pizza: Top with scrambled eggs, cheese, and avocado slices for a delightful breakfast option.
4 – Dessert Pita Pizza: Spread a thin layer of Nutella, top with sliced bananas and strawberries, then bake for a unique dessert.
Dietary Adjustments
For vegan Pita Pizzas, stick to plant-based cheese and include plenty of fresh veggies. Use gluten-free pita or make your own using gluten-free flour. You can also create a low-carb variation using a cauliflower crust or as a pizza base, making adjustments based on dietary preferences without sacrificing flavor.
Conclusion about Pita Pizzas: 7 Delicious Ways to Savor Every Bite
In closing, Pita Pizzas: 7 Delicious Ways to Savor Every Bite are an excellent addition to any meal rotation. They deliver on flavor, convenience, and versatility that few other dishes can offer. Whether you’re hosting a party, looking for a quick family meal, or just want to indulge in a fun food experience, these pizzas can cater to every need.
With an endless array of toppings and the ease of preparation, it’s no wonder why these pita pizzas are becoming a household favorite. Bring your family together and enjoy a delicious and interactive mealtime with homemade Pita Pizzas today!
FAQs about Pita Pizzas: 7 Delicious Ways to Savor Every Bite
How should I store leftover pita pizzas?
Store leftover pita pizzas in an airtight container in the fridge for 3-4 days. For longer storage, wrap them securely and freeze.
Can I prepare pita pizzas ahead of time?
Yes, you can prepare the toppings and assemble the pizzas, then keep them in the fridge until you’re ready to bake.
What are some good topping suggestions?
Great toppings include pepperoni, sausage, spinach, and various cheeses. Feel free to mix and match based on your taste.
Are these pizzas freezer-friendly?
Yes, you can freeze assembled pita pizzas. Just wrap them well and store up to three months.
Can I use gluten-free pita bread?
Absolutely! Gluten-free pita bread works wonderfully as a base for your pizzas.
How can I make these pizzas healthier?
Use whole grain pita, opt for lower-fat cheese, and load up on fresh vegetables for a nutritious boost.
What sauce can I use for a different flavor?
Try pesto, alfredo sauce, or even hummus for a unique twist instead of traditional pizza sauce.
How do I ensure my pizzas remain crispy?
Avoid excess sauce and toppings; use a preheated oven to get a crispy texture.
Can I make a breakfast version of pita pizza?
Definitely! Use eggs, cheese, vegetables, and any breakfast meats for a delightful twist.
Is this recipe kid-friendly?
Yes! Kids can customize their toppings, making it fun and interactive for mealtime.
Pita Pizzas
Ingredients
Main Ingredients
- 4 pieces pita breads Can use gluten-free pita if needed.
- 1 cup pizza sauce Spread evenly for the best flavor.
- 2 cups shredded mozzarella cheese Use vegan cheese if desired.
- 1 cup sliced bell peppers Choose your favorite colors.
- 1 cup sliced mushrooms Any variety works well.
- ½ cup sliced olives Black or green olives can be used.
- 1 teaspoon dried oregano Sprinkle on top for flavor.


Instructions
Preparation
- Start by washing and slicing your vegetables—bell peppers, mushrooms, and olives.
- Preheat your oven to 400°F (200°C).
- Arrange the pita breads on a baking sheet, leaving space between them.
- Evenly spread pizza sauce over each pita bread.
- Sprinkle shredded mozzarella cheese generously on top.
- Layer the sliced bell peppers, mushrooms, and olives over the cheesy layer.
- Sprinkle dried oregano over the top.
Cooking
- Bake in the preheated oven for 10-12 minutes until the cheese is melted and bubbly.
Serving
- Remove from the oven and let cool slightly.
- Slice into wedges for easy serving.
- Enjoy your delightful Pita Pizzas together!