

This post may contain affiliate links. As an Amazon Associate, I earn from qualifying purchases at no extra cost to you.
Table of Contents
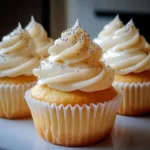
Imagine a warm kitchen filled with the sweet, inviting aroma of freshly baked cupcakes. Isn’t that a delightful thought? Silver Snow Vanilla Cupcakes embody this cozy feeling with every bite. These cupcakes are not just any ordinary treat; they bring a sense of joy and comfort that can brighten anyone’s day. Whether you’re celebrating a special occasion or simply satisfying a sweet tooth, this recipe stands out.
The beauty of Silver Snow Vanilla Cupcakes lies in their simplicity and versatility. Crafted with basic ingredients, they transform into delightful bites of fluffy goodness. What makes this recipe special is its balance between flavors. The lightness of vanilla paired with just the right amount of sweetness creates a cupcake that’s both comforting and indulgent. Have you ever craved something special but didn’t want to spend all day in the kitchen? This recipe delivers just that.
In a world filled with extravagant desserts, Silver Snow Vanilla Cupcakes remind us that sometimes the classic recipes are the best. With their elegant silver sprinkles, they not only taste amazing but also look breathtaking, making them perfect for any occasion. You can serve them at birthday parties, holiday gatherings, or as a sweet surprise for loved ones. Doesn’t that make you want to grab the mixing bowl and start baking?
🍴 Top Kitchen Essentials You'll Love


Key Benefits of Silver Snow Vanilla Cupcakes
Why You’ll Love This Recipe
- Fluffy Texture: The light and airy texture makes these cupcakes a divine treat.
- Easy to Make: With straightforward steps, even beginners can create these delicious cupcakes.
- Versatile Flavors: The simple flavor of vanilla pairs well with various toppings and fillings.
- Family-Friendly: These cupcakes are a hit among both kids and adults.
- Perfect for Occasions: Great for parties, celebrations, and cozy family gatherings.
What Makes It Stand Out
Silver Snow Vanilla Cupcakes are not just about taste; they offer a chance for creativity. Their basic vanilla flavor acts as a canvas for a variety of customization options. You can add different flavors or fillings to suit preferences or themes. They are also enchanting enough to steal the spotlight at any event.
This recipe shines through its classic elegance and ease. With simple ingredients that many already have in their pantry, this creation doesn’t require specialized tools or complicated techniques. Perfect for beginners and seasoned bakers alike, it encourages everyone to enjoy the art of baking.
Ingredients for Silver Snow Vanilla Cupcakes
Here’s what you’ll need to create these delectable cupcakes:
- 1 1/2 cups all-purpose flour
- 1 1/2 teaspoons baking powder
- 1/2 teaspoon salt
- 1/2 cup unsalted butter, softened
- 1 cup granulated sugar
- 2 large eggs
- 2 teaspoons vanilla extract
- 1/2 cup milk
- Silver sprinkles for topping
These ingredients blend perfectly to create a satisfying treat. All-purpose flour keeps the cupcakes light, while butter adds richness. Consider this your foundation for a delicious dessert!
Substitutes and Alternatives
If you have dietary restrictions or allergies, you can make adjustments easily. For instance, you can use gluten-free all-purpose flour to make a gluten-free recipe. Coconut milk or almond milk can be swapped in for the regular milk, making the cupcakes dairy-free. For a healthier option, consider using applesauce instead of butter, which can reduce the fat content.
If you prefer a different flavor profile, replace vanilla extract with almond extract or add citrus zest for a refreshing twist. These substitutions increase the versatility of the recipe without sacrificing taste.
How to Make Silver Snow Vanilla Cupcakes – Step-by-Step Directions
Step 1 – Prepare Ingredients
Start by gathering all your ingredients. This ensures that everything is ready for use. Preheat your oven to 350°F (175°C) and line your cupcake trays with liners.
Step 2 – Mix Dry Ingredients
In a bowl, combine the all-purpose flour, baking powder, and salt. Whisk together until well blended. This step is crucial because it ensures that the leavening agent is evenly distributed throughout the flour.
Step 3 – Cream Butter and Sugar
In a separate large bowl, cream together the softened unsalted butter and granulated sugar. Mix until it achieves a light and fluffy texture. This usually takes about 3-5 minutes, and it’s a key step for achieving the perfect cupcake crumb.
Step 4 – Add Eggs and Vanilla
Once your butter and sugar are well combined, add the eggs one at a time. Mix well after each addition to fully incorporate them into the mixture. Stir in the vanilla extract, ensuring your batter is rich with flavor.
Step 5 – Combine Dry and Wet Ingredients
Gradually mix in the dry ingredients into the wet mixture. Alternate with adding the milk. Start and end with the dry ingredients, mixing gently until the batter is just combined. Don’t overmix, as it can lead to dense cupcakes.
Step 6 – Fill Cupcake Liners
Use a spoon or an ice cream scoop to fill cupcake liners about 2/3 full. This allows room for the cupcakes to rise beautifully during baking.
Step 7 – Bake the Cupcakes
Place the filled cupcake pans in the preheated oven. Bake for 18-20 minutes, or until a toothpick inserted comes out clean. Keep an eye on them towards the end of the baking time to avoid overbaking.
Step 8 – Cool Completely
Allow the cupcakes to cool in the pan for about 5 minutes before transferring them to a wire rack. Let them cool completely before frosting. Sometimes patience is key; adequate cooling helps prevent your frosting from melting.
Step 9 – Top with Sprinkles
Once the cupcakes are cool, top them with your favorite frosting. You can use a simple buttercream or a whipped cream frosting. Finally, sprinkle the silver sprinkles over the top for a festive finish!
Serving Suggestions for Silver Snow Vanilla Cupcakes
Best Occasions to Serve This Dish
Silver Snow Vanilla Cupcakes are perfect for birthdays, holiday parties, bridal showers, or even a casual family gathering. Their simple yet elegant appearance makes them suitable for both formal and informal events.
You can also bake them as a sweet surprise for a friend or loved one. They work perfectly as classroom treats or office snacks, allowing everyone to enjoy a moment of sweetness during their day.
What to Serve With It
- Coffee or Tea: A warm beverage pairs perfectly with these delightful cupcakes.
- Ice Cream: A scoop of vanilla or chocolate ice cream complements the vanilla flavor.
- Fresh Fruits: Berries or sliced fruits add a refreshing contrast.
These accompaniments elevate the experience, making each bite even more enjoyable.
How to Store Silver Snow Vanilla Cupcakes Properly
Best Storage Practices
Store any leftover cupcakes in an airtight container at room temperature for up to 3 days. Adding a slice of bread to the container can help keep the cupcakes moist. If you wish to keep them longer, consider refrigeration.
Reheating and Freezing Tips
To reheat, place cupcakes in the microwave for about 10-15 seconds to soften them up. If freezing, wrap each cooled cupcake in plastic wrap and then in aluminum foil to prevent freezer burn. They can last in the freezer for up to three months.
When you’re ready to enjoy them, simply thaw them in the refrigerator overnight or at room temperature for a few hours.
Tips & Tricks for Silver Snow Vanilla Cupcakes
Mistakes to Avoid
- Overmixing: Mixing the batter too much can make your cupcakes dense. Mix until just combined.
- Skipping the Preheat: Baking in an unheated oven can lead to uneven baking. Always preheat!
- Filling Liners Too Full: Overfilling can cause the batter to overflow. Stick to 2/3 full.
- Not Cooling Properly: Frosting warm cupcakes can lead to melting frosting. Ensure they’re cool first.
- Ignoring Ingredient Temperature: Using cold eggs and butter can affect the batter’s texture. Bring them to room temperature before mixing.
Extra Tips for Better Results
- Experiment with flavored extracts for unique twists.
- Consider adding chocolate chips or fruit pieces to the batter for added sweetness.
- For a fun presentation, use a piping bag for frosting and create swirls or rosettes.
- You can also create a cupcake tower for special occasions, topping each tier with festive decorations.
Recipe Variations of Silver Snow Vanilla Cupcakes
Creative Twists
- Chocolate Chip Vanilla Cupcakes: Add chocolate chips for bursts of chocolate in each bite. It makes for an indulgent treat!
- Lemon Vanilla Cupcakes: Incorporate lemon zest into the batter for a citrusy brightness that’s refreshing.
- Stuffed Cupcakes: Inject your cupcakes with a filling like raspberry jam or caramel for a delicious surprise inside.
- Frosting Variations: Try cream cheese frosting or a light whipped frosting to change up the flavors.
Dietary Adjustments
For a vegan version, use flax eggs instead of regular eggs and substitute dairy products with plant-based alternatives. Gluten-free flour blends can be utilized to modify the recipe to gluten-free standards. Adjusting the recipe for dietary restrictions allows everyone to enjoy this delightful treat.
Conclusion about Silver Snow Vanilla Cupcakes
In summary, Silver Snow Vanilla Cupcakes are a delightful treat that brings joy and warmth to any occasion. Easy to prepare yet utterly delicious, they can be customized and enjoyed by everyone in the family. The simple ingredients transform into a wonderfully fluffy texture that will make anyone smile. Don’t you want to step into your kitchen and bake a batch?
This recipe is not just about satisfying a sweet craving; it’s about creating memories with loved ones. With a sprinkle of silver on top, they add a touch of elegance to any gathering. So go ahead, indulge yourself, and discover the magic behind these perfect cupcakes!
FAQs about Silver Snow Vanilla Cupcakes
Can I prepare them ahead of time? Absolutely! You can bake the cupcakes a day ahead and frost them the day of serving to keep them fresh.
Can I freeze it? Yes, these cupcakes freeze wonderfully. Just make sure they’re well-wrapped.
How long do they last? When stored properly at room temperature, they can last up to 3 days and about 3 months in the freezer.
What are the best substitutions? Gluten-free flour and non-dairy milk work well. You can also replace butter with coconut oil if desired.
Is this recipe family-friendly? Yes! Kids love the taste, and it’s simple enough for them to help make.
Can I add fillings? Yes, you can add fillings like jam or whipped cream after baking for a delightful twist.
How do I store leftover cupcakes? Keep them in an airtight container at room temperature or fridge for longer shelf life.
What’s the best way to frost them? Use a piping bag for even, decorative frosting. You can also use a spatula for a more rustic look.
Can I use a different flavor besides vanilla? Absolutely! Feel free to experiment with almond or lemon flavors.
Do I have to use silver sprinkles? Not at all! You can use any color of sprinkles or even omit them entirely.
Silver Snow Vanilla Cupcakes
Ingredients
Cupcake Batter
- 1.5 cups all-purpose flour Keeps the cupcakes light
- 1.5 teaspoons baking powder Leavening agent for fluffiness
- 0.5 teaspoon salt Balances sweetness
- 0.5 cups unsalted butter, softened Adds richness
- 1 cup granulated sugar Provides sweetness
- 2 large eggs Adds moisture and structure
- 2 teaspoons vanilla extract For flavor
- 0.5 cups milk Keeps batter moist
- to taste silver sprinkles for topping For decoration


Instructions
Preparation
- Gather all your ingredients and preheat your oven to 350°F (175°C). Line your cupcake trays with liners.
Mixing Ingredients
- In a bowl, whisk together the all-purpose flour, baking powder, and salt until well blended.
- In a separate bowl, cream together the softened butter and sugar until light and fluffy, about 3-5 minutes.
- Add the eggs one at a time, mixing well after each addition. Stir in the vanilla extract.
- Gradually mix in the dry ingredients with the wet mixture, alternating with the milk. Start and end with dry ingredients. Mix gently until just combined.
Baking
- Fill cupcake liners about 2/3 full. Bake for 18-20 minutes or until a toothpick comes out clean.
- Allow the cupcakes to cool in the pan for 5 minutes before transferring to a wire rack to cool completely.
Finishing Touches
- Once cooled, frost the cupcakes with your favorite frosting and sprinkle with silver sprinkles.